
Introduction
This manual provides essential information for the safe and correct installation, verification, and maintenance of your Samsung DC92-00322J Dryer Main PCB. This component is a genuine Original Equipment Manufacturer (OEM) part designed to ensure compatibility and optimal performance with your Samsung dryer. Please read all instructions carefully before proceeding with installation.
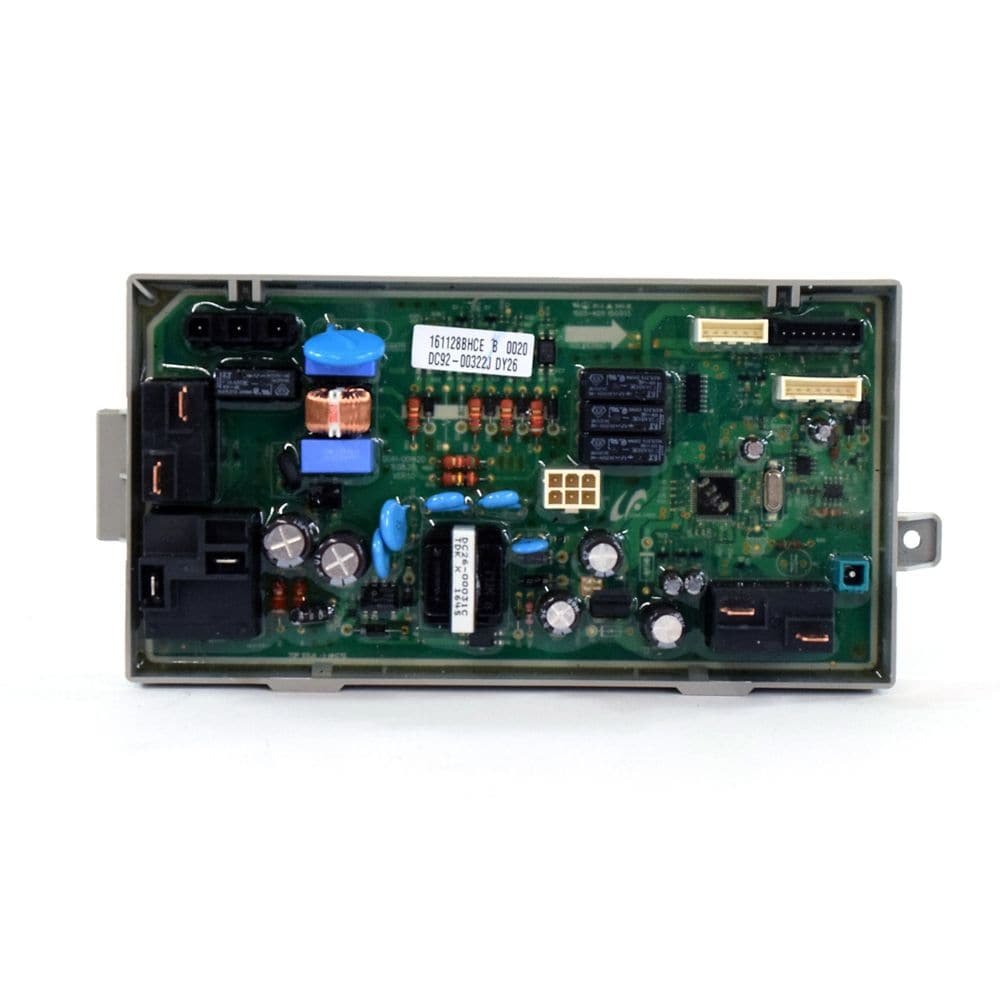
An image of the Samsung DC92-00322J Dryer Main PCB, a genuine original equipment manufacturer replacement part.
Safety Information
WARNING: To reduce the risk of electric shock, fire, or injury to persons, read all instructions before installing this part.
- Always disconnect the dryer from its power supply (unplug it or turn off the circuit breaker) before attempting any installation, repair, or maintenance. Failure to do so can result in serious injury or death from electric shock.
- Installation should only be performed by a qualified technician. Improper installation can lead to damage to the appliance, property, or personal injury.
- Wear appropriate personal protective equipment, such as gloves, to prevent cuts or scrapes from sharp edges.
- Handle the PCB with care. Avoid touching the electronic components directly to prevent damage from static electricity.
- Ensure all connections are secure and correctly seated before restoring power.
Setup & Installation
This section outlines the general steps for replacing a dryer's main PCB. Specific dryer models may vary, so always refer to your dryer's service manual for detailed instructions.
Tools Required:
- Screwdriver (Phillips and/or flathead)
- Pliers (optional, for stubborn connectors)
- Nut driver (if applicable)
- Anti-static wrist strap (recommended for handling electronic components)
Installation Steps:
- Disconnect Power: Unplug the dryer from the wall outlet or turn off the circuit breaker supplying power to the dryer. Verify power is off using a voltage tester.
- Access the PCB: Depending on your dryer model, you may need to remove the top panel, control panel, or rear access panel to reach the main PCB. Carefully remove any screws or clips securing these panels.
- Document Connections: Before disconnecting any wires, take clear photos or make a diagram of all wire connections to the old PCB. This will be crucial for correct reassembly.
- Disconnect Wires: Carefully disconnect all wire harnesses and connectors from the old PCB. Note that some connectors may have locking tabs that need to be pressed or squeezed.
- Remove Old PCB: Unscrew or unclip the old PCB from its mounting bracket or housing.
- Install New PCB: Position the new Samsung DC92-00322J PCB in the same location as the old one. Secure it with the original screws or clips.
- Reconnect Wires: Using your photos or diagram, carefully reconnect all wire harnesses and connectors to the new PCB. Ensure each connection is firm and correctly seated. Double-check all connections.
- Reassemble Dryer: Reattach any panels or covers that were removed, ensuring all screws and clips are securely fastened.
- Restore Power: Plug the dryer back into the wall outlet or turn on the circuit breaker.
Operating Verification
After successful installation, perform the following steps to verify the proper function of the new main PCB:
- Power On: Turn on the dryer. The display should illuminate, and the control panel should respond to inputs.
- Select a Cycle: Choose a short drying cycle, such as 'Air Fluff' or a timed dry setting.
- Start Dryer: Press the 'Start' button. The dryer drum should begin to tumble.
- Check Heating (if applicable): For cycles that involve heat, allow the dryer to run for a few minutes and check if the air inside the drum is warming up.
- Monitor for Errors: Observe the display for any error codes or unusual behavior.
- Complete Cycle: Allow the dryer to complete the selected cycle.
If the dryer operates normally through these checks, the PCB has likely been installed correctly.
Maintenance
The Samsung DC92-00322J Main PCB is a sealed electronic component and does not require routine maintenance itself. However, proper care of your dryer can help prolong the life of all its components, including the PCB.
- Keep Dryer Area Clean: Regularly clean the area around and behind your dryer to prevent lint buildup, which can be a fire hazard and obstruct airflow, leading to overheating of components.
- Ensure Proper Ventilation: Make sure the dryer vent hose is clear of obstructions and properly connected to allow for efficient exhaust of hot, moist air.
- Avoid Moisture: Keep the dryer and its surrounding environment dry. Excessive moisture can damage electronic components.
- Do Not Attempt Internal Repairs: The PCB is not user-serviceable. Do not attempt to open or repair the PCB itself. If issues persist, consult a qualified technician.
Troubleshooting
If your dryer is not functioning correctly after replacing the main PCB, consider the following troubleshooting steps:
- Dryer Not Powering On:
- Check if the dryer is properly plugged into a working electrical outlet.
- Verify the circuit breaker for the dryer has not tripped.
- Ensure all wire harnesses are securely connected to the new PCB. Refer to your installation photos/diagram.
- Dryer Not Starting Cycle:
- Confirm the dryer door is fully closed and latched. The door switch must be engaged for the dryer to start.
- Check if the 'Start' button is functioning correctly.
- Ensure no error codes are displayed that prevent operation.
- Dryer Not Heating:
- While the PCB controls heating functions, other components like the heating element, thermal fuse, or thermistor could be faulty. These should be checked by a qualified technician.
- Verify all heating-related wire connections to the PCB are secure.
- Error Codes Displayed:
- If an error code appears on the dryer's display, consult your specific dryer model's user manual or service manual for the meaning of the code and recommended troubleshooting steps.
If these steps do not resolve the issue, it is recommended to contact a qualified appliance repair technician or Samsung customer support for further assistance.
Specifications
| Manufacturer | Samsung |
| Part Number | DC92-00322J |
| Item Weight | 1.22 pounds |
| Product Dimensions | 10 x 7 x 4 inches |
| Item Model Number | DC92-00322J |
Warranty & Support
Warranty Information:
As a genuine Original Equipment Manufacturer (OEM) part, the Samsung DC92-00322J PCB typically carries a limited warranty from Samsung. The specific terms and duration of the warranty may vary based on your region and the retailer from whom the part was purchased. Please retain your proof of purchase. For detailed warranty information, refer to the documentation provided with your original dryer or contact Samsung customer service directly.
Customer Support:
For technical assistance, troubleshooting beyond the scope of this manual, or to inquire about warranty claims, please contact Samsung customer support. You can find contact information on the official Samsung website for your region or through your dryer's original user manual.
Samsung Official Website: https://www.samsung.com/us/support/ (or your regional equivalent)


