1. Important Safeguards
When using electrical appliances, basic safety precautions should always be followed to reduce the risk of fire, electric shock, and/or injury to persons, including the following:
- Read all instructions carefully before using the appliance.
- Do not touch hot surfaces. Use handles or knobs.
- To protect against fire, electric shock, and personal injury, do not immerse cord, plugs, or the appliance in water or other liquid.
- Close supervision is necessary when any appliance is used by or near children.
- Unplug from outlet when not in use and before cleaning. Allow to cool before putting on or taking off parts, and before cleaning the appliance.
- Do not operate any appliance with a damaged cord or plug, or after the appliance malfunctions or has been damaged in any manner. Return appliance to the nearest authorized service facility for examination, repair, or adjustment.
- The use of accessory attachments not recommended by the appliance manufacturer may result in fire, electric shock, or personal injury.
- Do not use outdoors.
- Do not let cord hang over edge of table or counter, or touch hot surfaces.
- Do not place on or near a hot gas or electric burner, or in a heated oven.
- Always attach plug to appliance first, then plug cord into the wall outlet. To disconnect, turn any control to "off", then remove plug from wall outlet.
- Do not use appliance for other than intended use.
- Avoid contact with moving parts.
- This appliance has a polarized plug (one blade is wider than the other). To reduce the risk of electric shock, this plug is intended to fit into a polarized outlet only one way. If the plug does not fit fully into the outlet, reverse the plug. If it still does not fit, contact a qualified electrician. Do not attempt to modify the plug in any way.
2. Product Overview and Components
Familiarize yourself with the parts of your De'Longhi Alicia PLUS EMKP 21.B Electric Moka Coffee Maker.

Figure 1: Front view of the De'Longhi Alicia PLUS EMKP 21.B Electric Moka Coffee Maker. Shows the transparent upper container, metal base, and digital control panel.

Figure 2: Side view of the coffee maker, highlighting the handle and the detachable base.
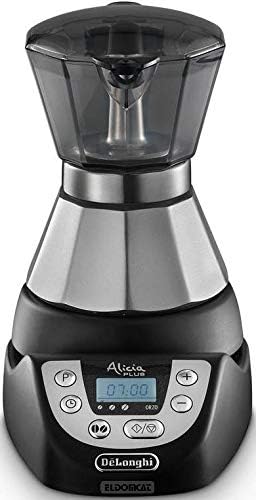
Figure 3: Angled front view, showing the digital display and control buttons more clearly.
Components:
- Transparent Upper Container with Lid
- Coffee Collector
- Filter Funnel
- Boiler (Lower Water Chamber)
- Safety Valve
- Detachable Power Base with 360° Swivel
- Digital Control Panel (Display, Power Button, Timer Button, Aroma Function Button, 1/2 Cup Adapter Button, +/- Buttons)
- 1-2 Cup Adapter (for reducing capacity)
3. Setup
Initial Cleaning:
Before first use, wash all removable parts (upper container, filter funnel, coffee collector) with warm water and mild detergent. Rinse thoroughly and dry. Wipe the exterior of the power base with a damp cloth.
First Use (Priming):
To prime the unit and remove any manufacturing residues, perform a brewing cycle using only water, without coffee. Discard the water after this cycle.
- Fill the boiler with cold water up to the level of the safety valve.
- Insert the filter funnel (without coffee).
- Screw the upper container onto the boiler securely.
- Place the coffee maker on its power base and plug it in.
- Press the power button to start a brewing cycle.
- Once the cycle is complete, discard the water and rinse the components.
4. Operating Instructions
Brewing Coffee:
- Unscrew the upper container from the boiler.
- Fill the boiler with cold water up to the level of the safety valve. Do not overfill.
- Insert the filter funnel into the boiler.
- Fill the filter funnel with ground coffee. Do not press the coffee down. For 1 cup, use the provided 1-2 cup adapter.
- Screw the upper container onto the boiler securely, ensuring a tight seal.
- Place the coffee maker on its power base and plug it into a suitable electrical outlet.
- Press the power button (P) to begin brewing. The digital display will show the brewing progress.
- The coffee maker will automatically shut off when the coffee is ready. The transparent container allows you to monitor the brewing process.
Using the 1-2 Cup Adapter:
To prepare a single cup of coffee or barley coffee, use the special 1-2 cup adapter. Place the adapter inside the filter funnel before adding the appropriate amount of ground coffee for one serving.
Aroma Function:
The Alicia PLUS EMKP 21.B offers an Aroma function to customize your coffee strength. Press the Aroma button (A) to cycle through options: Light, Medium, or Strong. Select your preferred strength before starting the brewing cycle.
Programmable Timer (24-hour):
You can program the coffee maker to start brewing at a specific time within a 24-hour period.
- Prepare the coffee maker with water and ground coffee as described in "Brewing Coffee".
- Press the Timer button (T). The display will show the current time or the last programmed time.
- Use the + and - buttons to set the desired brewing start time.
- Confirm the setting by pressing the Timer button again or waiting a few seconds. The timer indicator will illuminate.
- The coffee maker will automatically start brewing at the programmed time.
Keep Warm Function:
After brewing, the coffee maker automatically activates a keep warm function, maintaining the coffee's temperature for up to 30 minutes. This function will automatically deactivate after 30 minutes.
5. Maintenance and Cleaning
Regular cleaning ensures optimal performance and extends the life of your coffee maker.
Daily Cleaning:
- Always unplug the appliance and allow it to cool completely before cleaning.
- Unscrew the upper container and remove the filter funnel and coffee grounds.
- Wash the upper container, filter funnel, and boiler (lower water chamber) with warm water and a mild detergent. Rinse thoroughly to remove all soap residue.
- Dry all parts completely before reassembling or storing.
- Wipe the exterior of the power base with a soft, damp cloth. Do not immerse the power base in water or any other liquid.
Descaling:
Over time, mineral deposits (limescale) can build up in the boiler, affecting performance. Descale your coffee maker regularly, depending on water hardness and frequency of use. Use a commercial descaling solution suitable for coffee makers, following the product's instructions. Alternatively, a solution of white vinegar and water (1:1 ratio) can be used. Perform a few rinse cycles with plain water after descaling to remove any residual descaling agent.
6. Troubleshooting
| Problem | Possible Cause | Solution |
|---|---|---|
| Coffee does not brew or brews slowly. |
|
|
| Coffee tastes weak. |
|
|
| Coffee overflows from the upper container. |
|
|
| Appliance does not turn on. |
|
|
7. Specifications
| Feature | Detail |
|---|---|
| Brand | De'Longhi |
| Model Number | EMKP21.B |
| Color | Black/Steel |
| Dimensions (L x W x H) | 18.5 x 12 x 17 cm |
| Capacity | 2 Cups |
| Power | 550 Watts |
| Material | Stainless Steel |
| Automatic Shut-off | Yes |
| Special Features | Keep Warm Function, 24-hour Programmable Timer, Integrated Digital Display, Aroma Function (Light, Medium, Strong), 1-2 Cup Adapter |
| Weight | 800 Grams |
8. Warranty and Support
For warranty information, technical support, or to purchase spare parts, please refer to the official De'Longhi website or contact their customer service department. Keep your proof of purchase for warranty claims.
You can find more information and contact details on the official De'Longhi website: www.delonghi.com


