
1. Introduction
This manual provides essential instructions for the safe installation, operation, and maintenance of your Sunlite 40170-SU SB254HOMV 2-Lamp F54 T5 High Output Linear Fluorescent Ballast. Please read this manual thoroughly before installation and retain it for future reference.
2. Important Safety Information
WARNING: Risk of Electric Shock. Installation should only be performed by a qualified electrician in accordance with all national and local electrical codes.
- Always disconnect power at the circuit breaker before installing or servicing the ballast.
- Ensure the supply voltage is compatible with the ballast's multi-volt rating (120-277V).
- Do not attempt to modify the ballast or its wiring.
- This ballast is designed for use with specific fluorescent lamp types (F54 T5 HO, FC40T5, F55W/2G11, F50/2G11). Using incompatible lamps may cause damage or fire.
- The ballast is a heavy-duty Class P electronic ballast, providing reliable overheating protection. However, ensure proper ventilation.

Figure 2.1: The Sunlite ballast is UL Listed, ensuring compliance with safety standards.
3. Product Overview
The Sunlite 40170-SU SB254HOMV is a high-performance electronic ballast designed to operate one or two F54 T5 High Output linear fluorescent lamps, or one or two FC40T5, F55W/2G11, or F50/2G11 plug-in lamps. Its multi-volt technology allows for operation on line voltages between 120V and 277V (50/60Hz), simplifying installation in various commercial and industrial settings.
Key Features:
- Multi-Volt Technology: Operates on 120-277V, 50/60Hz.
- Dual Lamp Compatibility: Supports one or two F54 T5 HO, FC40T5, F55W/2G11, or F50/2G11 lamps.
- Instant Start: Provides immediate illumination without flickering or warm-up delays.
- Silent Operation: Features a professional-grade Sound Rating A for quiet performance.
- UL Listed: Meets standard safety and quality guidelines.
- Overheating Protection: Heavy-duty Class P electronic ballast design.
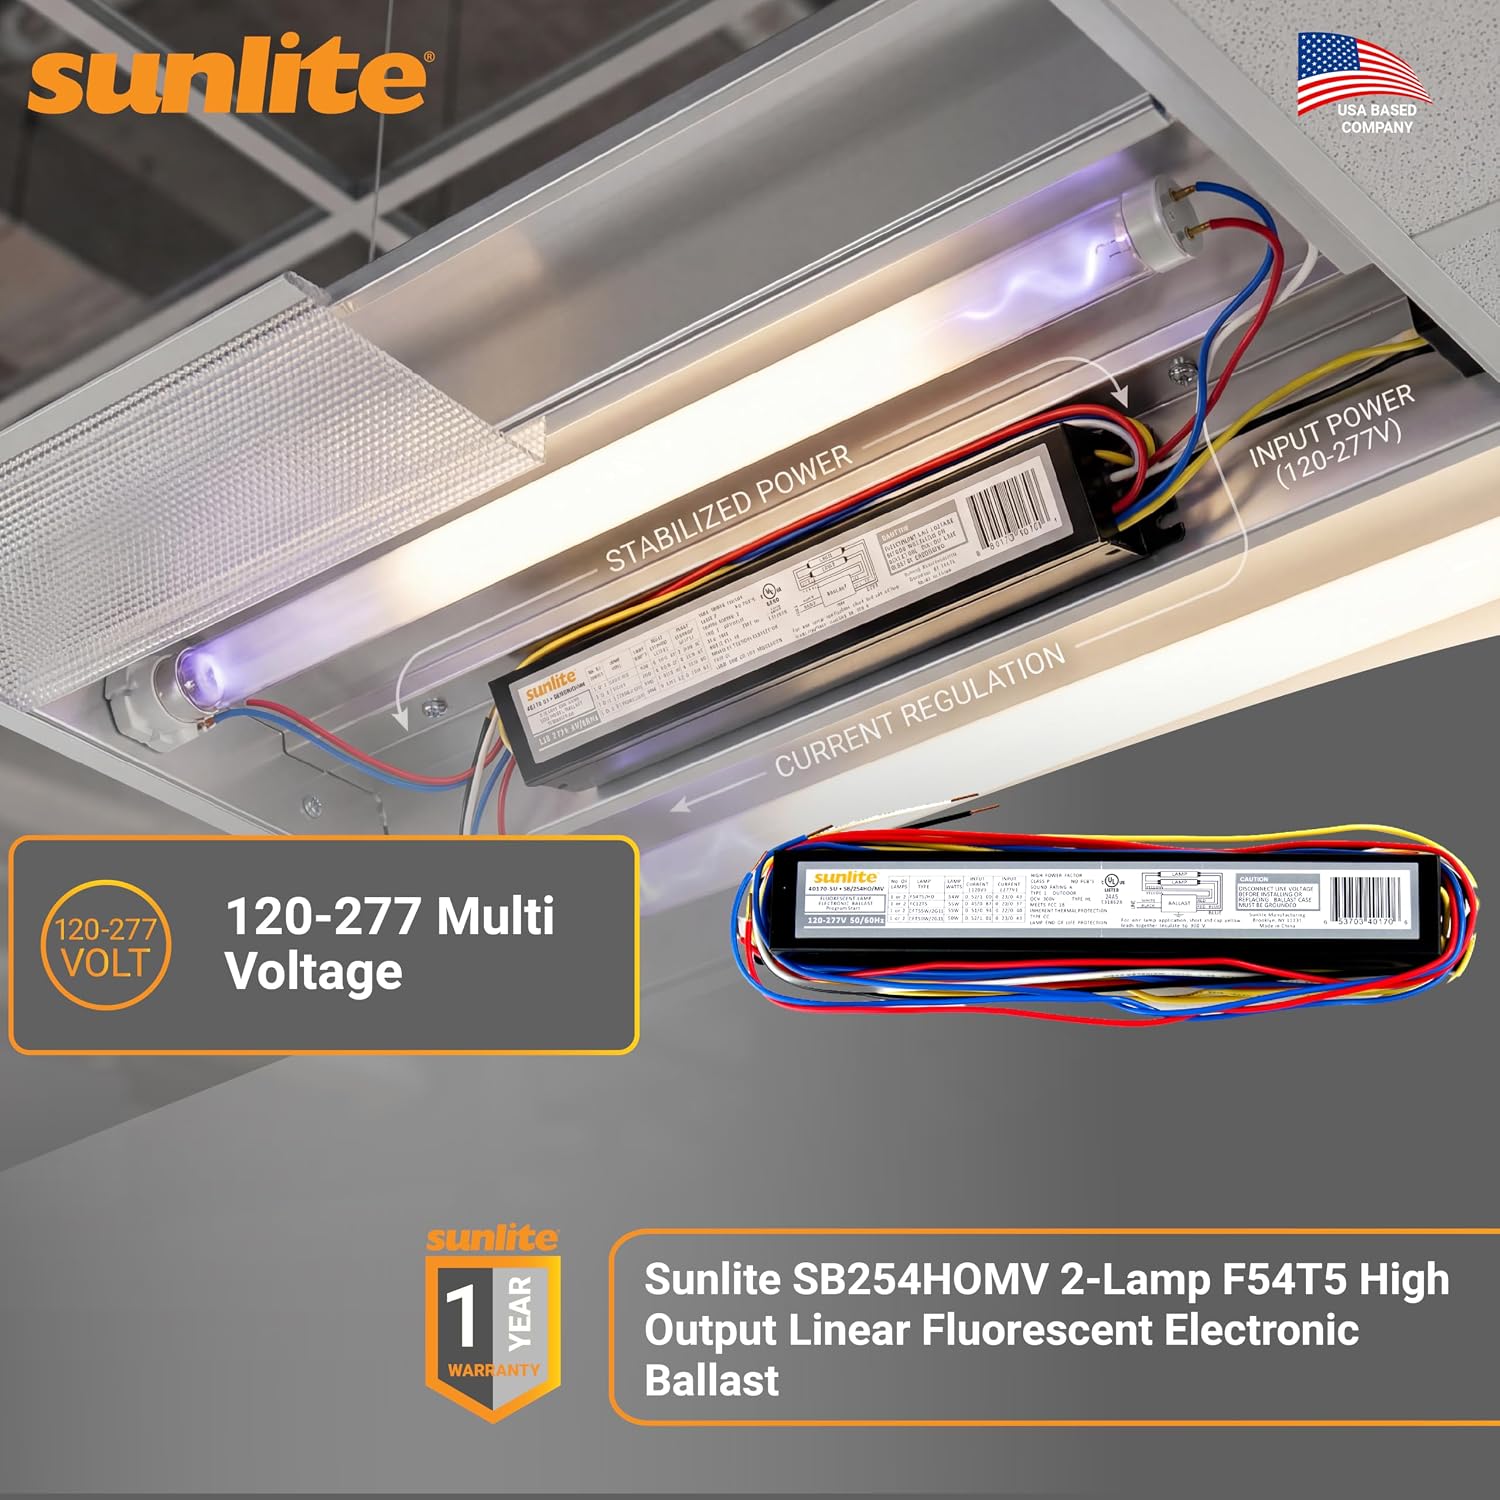
Figure 3.1: The Sunlite ballast installed in a fixture, demonstrating its multi-voltage capability and connection points.

Figure 3.2: The ballast is engineered for dual lamp compatibility, supporting various fluorescent lamp types.
4. Installation Instructions
Before beginning installation, ensure you have read and understood the safety information in Section 2. This ballast is designed for new installations or as a replacement in existing fixtures.
4.1 Tools and Materials Required:
- Screwdriver set
- Wire strippers/cutters
- Electrical tape
- Wire nuts or appropriate connectors
- Voltage tester/multimeter
- Compatible fluorescent lamps

Figure 4.1: Essential tools for ballast installation, highlighting the multi-volt technology for simplified wiring.
4.2 Wiring Diagram (General Guidance):
The Sunlite 40170-SU SB254HOMV ballast features color-coded wires for easy identification. Refer to the specific wiring diagram printed on the ballast label for precise connections. The following is a general guide for a typical 2-lamp setup:
- Power Disconnection: Turn off power to the fixture at the circuit breaker. Verify power is off using a voltage tester.
- Mounting: Securely mount the new ballast inside the fixture using appropriate fasteners.
- Input Power (Line Voltage):
- Connect the Black wire from the ballast to the incoming Line (Hot) wire from the power supply.
- Connect the White wire from the ballast to the incoming Neutral wire from the power supply.
- Connect the Green wire from the ballast to the fixture's Ground.
- Lamp Connections (Output Wires):
- For Lamp 1: Connect the Blue wire(s) from the ballast to one end of the first lamp's tombstone (socket). Connect the Red wire(s) from the ballast to the other end of the first lamp's tombstone.
- For Lamp 2: Connect the Yellow wire(s) from the ballast to one end of the second lamp's tombstone. Connect the Orange wire(s) from the ballast to the other end of the second lamp's tombstone.
- Note: Some ballasts may have multiple wires of the same color for each lamp connection. Ensure all wires for a specific connection point are properly grouped and secured. Refer to the ballast's specific wiring diagram.
- Secure Connections: Use wire nuts or approved connectors for all wire splices. Ensure all connections are tight and insulated.
- Lamp Installation: Install the compatible fluorescent lamps into the fixture sockets.
- Power Restoration: Restore power at the circuit breaker and test the fixture.
If replacing an existing ballast, note the original wiring configuration before disconnecting. Wiring can vary between ballast models. Always consult the diagram on your specific Sunlite ballast for accurate connections.
5. Operating Instructions
Once properly installed and wired, the Sunlite 40170-SU SB254HOMV ballast operates automatically.
- Power On: Turn on the light switch connected to the fixture. The ballast will provide instant-start ignition, illuminating the lamps immediately.
- Silent Operation: The ballast is designed for quiet performance (Sound Rating A), making it suitable for various environments.
- Power Off: Turn off the light switch to extinguish the lamps.

Figure 5.1: The ballast ensures instant-start ignition and quiet operation for a comfortable lighting experience.
6. Maintenance
The Sunlite 40170-SU SB254HOMV ballast requires minimal maintenance. Regular inspection and cleaning of the fixture and lamps are recommended.
- Cleaning: Ensure power is off before cleaning. Use a dry, soft cloth to wipe dust from the ballast and fixture. Do not use liquid cleaners directly on the ballast.
- Inspection: Periodically inspect wiring for any signs of wear, fraying, or loose connections. Ensure the ballast is securely mounted.
- Lamp Replacement: When replacing lamps, ensure they are compatible with the ballast specifications. Always disconnect power before replacing lamps.
7. Troubleshooting
If your fluorescent fixture is not operating correctly, refer to the following troubleshooting guide:
| Problem | Possible Cause | Solution |
|---|---|---|
| Lamps do not light up. |
|
|
| Lamps flicker or dim. |
|
|
| Humming noise from fixture. |
|
|
If troubleshooting steps do not resolve the issue, contact a qualified electrician or Sunlite customer support.
8. Specifications
| Brand | Sunlite |
| Model Name | 40170-SU SB254HOMV |
| Model Number | SB254HOMV |
| Input Voltage | 120-277V AC (Multi-Volt) |
| Frequency | 50/60 Hz |
| Compatible Lamps | One or Two F54 T5 High Output, FC40T5, F55W/2G11, F50/2G11 Lamps |
| Safety Rating | UL Listed, Class P |
| Sound Rating | A |
| Material | Metal |
| Item Weight | 445 g |
9. Warranty and Support
This Sunlite ballast is covered by a 1-Year Limited Warranty from the date of purchase. This warranty covers defects in materials and workmanship under normal use.
For warranty claims, technical support, or further assistance, please contact Sunlite customer service. Keep your proof of purchase for warranty validation.
Figure 9.1: The Sunlite ballast comes with a 1-year warranty.


