
1. Introduction
The Korky Plus 2001X Toilet Flapper is designed for universal fit in both brass and plastic 2-inch flush valves. Constructed from premium red Chlorazone rubber, this flapper offers enhanced resistance to chlorine, ensuring durability and reliable performance in your toilet tank. This manual provides detailed instructions for installation, operation, maintenance, and troubleshooting to help you maintain an efficient toilet flushing system.
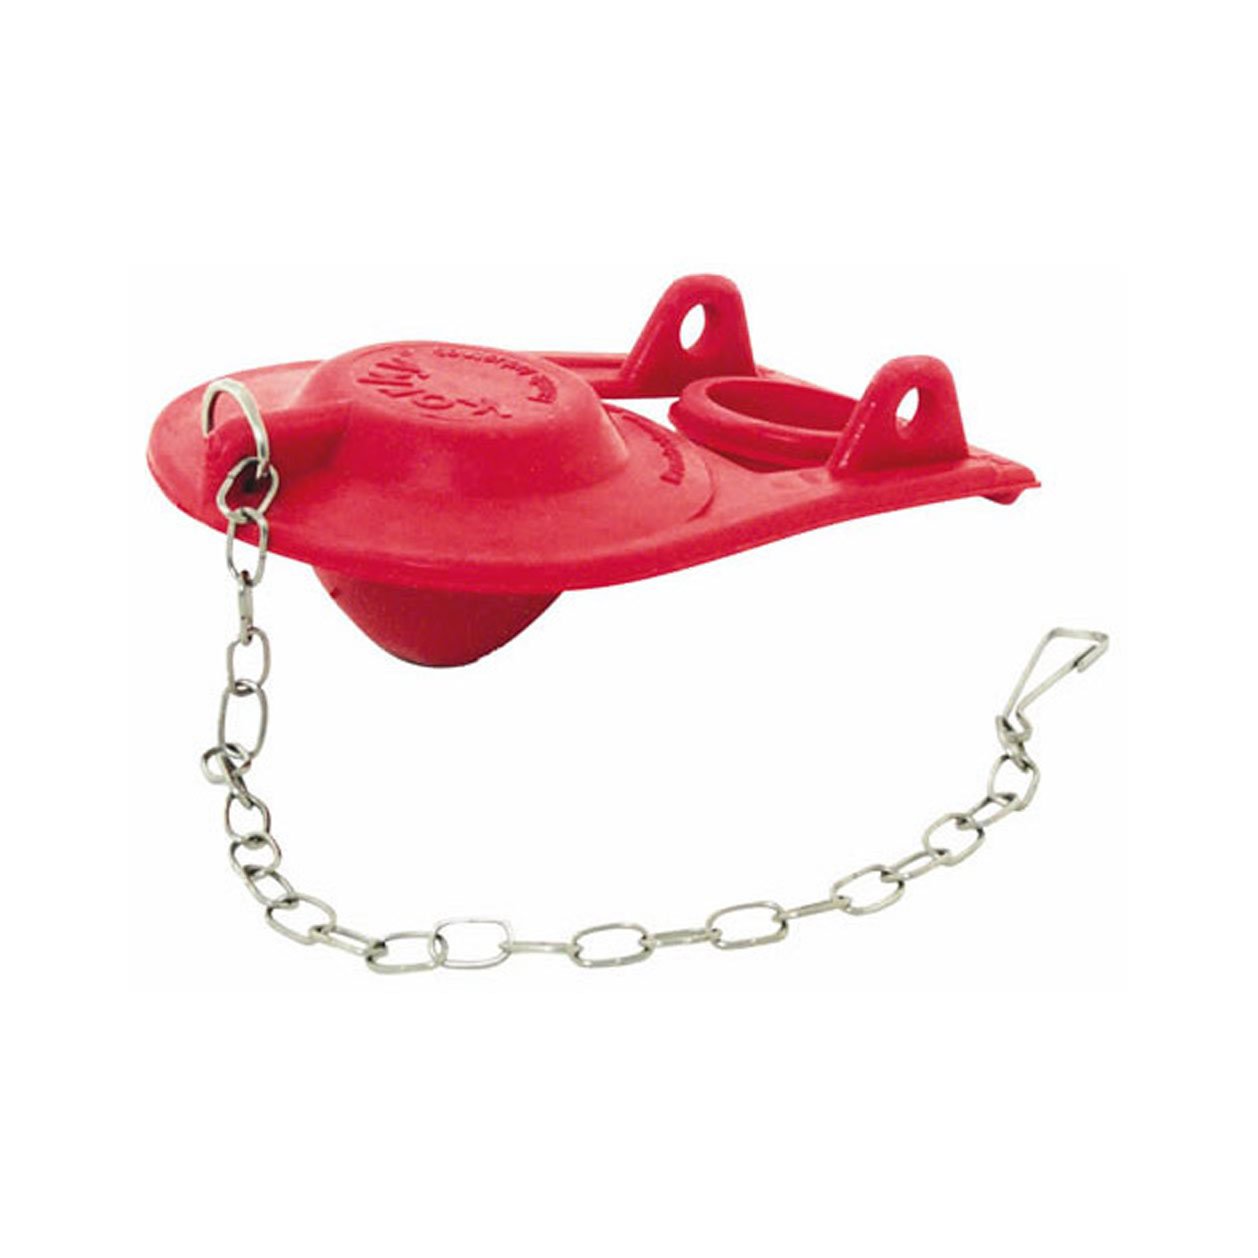
Image of the Korky Plus 2001X Toilet Flapper, showcasing its red Chlorazone rubber construction and attached stainless steel chain and hook.
2. Safety Information
- Always turn off the water supply to the toilet before beginning any installation or maintenance.
- Flush the toilet to empty the tank before working on internal components.
- Wear appropriate personal protective equipment, such as gloves, to prevent contact with tank water.
- Keep small parts away from children to prevent choking hazards.
- Do not use harsh chemicals or abrasive cleaners on the flapper, as this may damage the material.
3. Package Contents
Verify that your package contains the following item:
- One (1) Korky Plus 2001X Toilet Flapper with stainless steel chain and hook.
4. Features
- Designed to fit 2-inch flush valve openings.
- Includes a durable stainless steel chain and hook.
- Made from chemical-resistant Chlorazone rubber for extended lifespan.
- Universal design compatible with both brass and plastic flush valves.
5. Setup and Installation
Follow these steps to properly install your Korky Plus 2001X Toilet Flapper:
- Turn Off Water Supply: Locate the shut-off valve on the wall behind or near the toilet and turn it clockwise until the water flow stops completely.
- Empty Toilet Tank: Flush the toilet to drain most of the water from the tank. Hold the flush handle down until the tank is as empty as possible.
- Remove Old Flapper: Disconnect the old flapper's chain from the flush lever arm. Carefully unhook or unclip the old flapper from the overflow tube or flush valve ears at the bottom of the tank.
- Install New Flapper: Position the new Korky Plus 2001X Flapper over the 2-inch flush valve opening. Secure the flapper's ears onto the pins or hooks located on either side of the overflow tube at the base of the flush valve. Ensure it sits flat and creates a proper seal.
- Attach Flapper Chain: Connect the stainless steel chain from the new flapper to the flush lever arm. Adjust the chain length so there is a small amount of slack (approximately 1/2 to 1 inch) when the flapper is closed. Too much slack may cause a weak flush, while too little slack may prevent the flapper from sealing completely.
- Restore Water Supply: Turn the water shut-off valve counter-clockwise to restore the water supply to the toilet tank. Allow the tank to fill completely.
- Test Flush: Flush the toilet several times to ensure the flapper lifts and seals correctly, and that there are no leaks. Adjust the chain length if necessary.
6. Operating Instructions
The Korky Plus 2001X Toilet Flapper functions as a critical component in your toilet's flushing mechanism. When the toilet tank is full, the flapper rests on the flush valve opening, creating a watertight seal that holds water in the tank. Upon activation of the flush lever, the chain lifts the flapper, allowing the stored water to flow rapidly into the toilet bowl, initiating the flush cycle. Once the tank empties, the flapper naturally falls back into place, resealing the flush valve as the tank refills for the next use.
7. Maintenance
To ensure the longevity and optimal performance of your Korky Plus 2001X Toilet Flapper, consider the following maintenance tips:
- Regular Inspection: Periodically inspect the flapper for any signs of wear, cracking, warping, or deterioration. The red Chlorazone rubber is designed for durability, but extreme conditions or age can affect its integrity.
- Cleaning: If you notice mineral deposits, rust, or debris accumulating on the flapper or the flush valve seat, gently clean them with a soft brush or cloth and mild soap. Ensure the flush valve seat is smooth and free of imperfections for a proper seal.
- Avoid Harsh Chemicals: Do not use toilet bowl cleaners that contain harsh chemicals or bleach tablets directly in the tank, as these can prematurely degrade the flapper's rubber material.
- Chain Adjustment: Ensure the flapper chain maintains the correct amount of slack. Re-adjust if it becomes too tight (causing constant running) or too loose (causing a weak flush).
8. Troubleshooting
If you encounter issues with your toilet's flushing mechanism, refer to the following troubleshooting guide:
- Toilet Runs Continuously (Phantom Flush):
- Cause: Flapper not sealing properly.
- Solution: Check for debris on the flush valve seat or under the flapper. Ensure the flapper chain has adequate slack (1/2 to 1 inch) and is not holding the flapper open. Inspect the flapper for damage or wear that prevents a complete seal.
- Weak or Incomplete Flush:
- Cause: Flapper not lifting fully or closing too quickly.
- Solution: Adjust the flapper chain to ensure it is not too long, which would prevent the flapper from lifting high enough. Ensure there are no obstructions preventing the flapper from opening fully.
- No Flush When Handle is Pressed:
- Cause: Flapper chain disconnected or broken.
- Solution: Reconnect or replace the flapper chain. Ensure the flush lever arm is properly connected to the chain.
9. Specifications
| Manufacturer | Moen |
| Part Number | 2001X |
| Item Model Number | 2001X |
| Item Weight | 0.32 ounces |
| Product Dimensions | 6 x 4 x 4 inches |
| Item Package Quantity | 1 |
| Material | Premium red Chlorazone rubber |
| Compatibility | Fits 2-inch flush valve openings; universal for brass and plastic flush valves |
10. Warranty Information
The Korky Plus 2001X Toilet Flapper is backed by a 5-year warranty. This warranty covers defects in materials and workmanship under normal use and service. For specific terms, conditions, or to make a warranty claim, please retain your proof of purchase and contact the manufacturer directly.
11. Support
For additional assistance, technical support, or inquiries regarding replacement parts, please visit the official website of the manufacturer, Moen, or contact their customer service department. Contact information can typically be found on the manufacturer's packaging or website.


