1. Introduction
This manual provides comprehensive instructions for the installation, operation, and maintenance of your AeroCool GT-S Black Edition Full Tower PC Case. Designed for DIY enthusiasts and heavy-duty gamers, this high-performance chassis offers extensive compatibility and features for building a robust computing system. Please read this manual thoroughly before beginning installation to ensure proper setup and optimal performance.

Figure 1.1: Angled view of the AeroCool GT-S Black Edition Full Tower PC Case, showcasing its design and red LED fans.
2. Key Features
- High-Performance Design: 1.2mm SECC Full Tower case suitable for demanding builds.
- Extensive Compatibility: Supports FLEX ATX, Micro ATX, ATX, Mini ATX, SSI-CED, SSI-EEB, EATX, and XL-ATX motherboards.
- Tool-Free Installation: Features 10 tool-free PCI slots, 5 x 5.25" external bays, and 7 x 3.5" HDD or 2.5" HDD/SSD internal bays with easy-to-use press and pull trays.
- Advanced Cooling: Includes a 200mm Red LED front fan, a 200mm Red LED top fan, and a 140mm Red LED rear fan. Integrated fan controller supports up to 25W combined.
- Cable Management: Pre-drilled CPU holes for cooler mounting, cable routing management with rubber grommet protection.
- Dust Filtration: Removable and washable dust filter for the Power Supply Unit (PSU).
- Front Panel Connectivity: Two USB 3.0 ports, two USB 2.0 ports, and audio/microphone jacks.
- Aesthetic Design: Dual-color chassis with red accents for MB plate, HDD trays, and PCI tool-free slots. Removable magnetic front door.
3. Setup and Installation
3.1 Preparing the Case
- Unpack the AeroCool GT-S case and place it on a stable, flat surface.
- Remove the side panels by unscrewing the thumb screws at the rear of the case and sliding the panels backward.
- Identify the accessory box inside the case, which contains screws, cable ties, and other installation hardware.
3.2 Motherboard Installation
- Install the necessary motherboard standoffs into the motherboard tray according to your motherboard's form factor (FLEX ATX, Micro ATX, ATX, Mini ATX, SSI-CED, SSI-EEB, EATX, XL-ATX).
- Carefully place your motherboard onto the standoffs, aligning the screw holes.
- Secure the motherboard with the provided screws.
- Install the CPU cooler. The case features pre-drilled CPU holes for easier mounting and removal of CPU coolers.
3.3 Drive Installation (ODD, HDD/SSD)
- 5.25" Optical Drive (ODD): The case includes 5 sets of ODD screw-less kits. Remove the desired front bay cover, slide the ODD into the bay, and secure it using the tool-free mechanism.
- 3.5" HDD / 2.5" HDD/SSD: The case features 7 sets of easy-to-use press and pull HDD trays. Mount your 3.5" HDD or 2.5" HDD/SSD onto a tray and slide the tray into an available drive bay until it clicks into place.
3.4 PCI Card Installation
- Remove the tool-free PCI slot covers for the desired expansion slots. The case provides up to 10 tool-free PCI slots.
- Insert your PCI expansion card (e.g., graphics card, network card) into the motherboard slot.
- Secure the card using the tool-free mechanism.
- Note: Ensure the expansion card's bracket aligns correctly with the case's PCI slot opening. In some instances, minor adjustments to the card's bracket may be necessary for optimal alignment with the case's tool-free mechanism. Always exercise caution to avoid damaging the card or case.

Figure 3.1: Internal view of the AeroCool GT-S case, illustrating space for components and cable routing options.
3.5 Cable Management and Front Panel Connections
- Route power supply cables and data cables through the designated cable routing holes behind the motherboard tray. Utilize the rubber grommets for protection.
- Connect the front panel cables (USB 3.0, USB 2.0, HD Audio, Power, Reset, LED indicators) to their respective headers on your motherboard.
- Connect the included fans to the motherboard fan headers or the integrated fan controller.
4. Operating Instructions
4.1 Powering On
Once all components are installed and connected, replace the side panels. Connect your power supply to a wall outlet and press the power button located on the top front panel of the case.
4.2 Fan Controller Operation
The AeroCool GT-S case includes an integrated fan controller. This controller allows you to adjust the speed of connected fans to balance cooling performance and noise levels. Refer to the fan controller's specific markings or buttons on the top panel to cycle through different speed settings. The controller supports a combined maximum of 25W for connected fans.
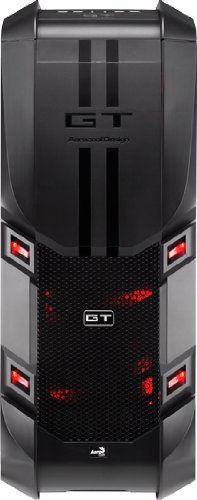
Figure 4.1: Front view of the AeroCool GT-S case, highlighting the front panel I/O and mesh intake.
5. Maintenance
5.1 Dust Filter Cleaning
The case is equipped with a removable and washable dust filter for the Power Supply Unit (PSU). Regularly check and clean this filter to maintain optimal airflow and prevent dust buildup inside your system. To clean, gently slide out the filter, rinse it with water, allow it to dry completely, and then reinsert it.
5.2 General Cleaning
Use a soft, dry cloth to wipe down the exterior of the case. For stubborn smudges, a slightly damp cloth can be used, followed by a dry cloth. Avoid using harsh chemicals or abrasive cleaners, as these can damage the finish.
6. Troubleshooting
- System Not Powering On:
- Ensure the power supply is properly connected to the wall outlet and switched on.
- Verify all power cables from the PSU are correctly connected to the motherboard and components.
- Check that the front panel power button cable is correctly connected to the motherboard's power header.
- Fans Not Spinning / LEDs Not Lighting Up:
- Confirm fan power cables are securely connected to the motherboard or the fan controller.
- If using the fan controller, ensure it is powered and set to an appropriate speed.
- PCI Card Fitment Issues:
- If an expansion card does not fit perfectly into the PCI slot opening, carefully inspect the card's metal bracket. Minor manufacturing variations in some expansion card brackets may require gentle adjustment or filing of the bracket for optimal alignment with the case's tool-free mechanism. Always exercise caution to avoid damaging the card or case.
- USB Ports Not Functioning:
- Ensure the USB 3.0 and USB 2.0 front panel cables are correctly connected to their respective headers on the motherboard.
7. Specifications
| Feature | Detail |
|---|---|
| Model Number | GT-S Black Edition |
| Case Type | Full Tower |
| Material | Alloy Steel, Plastic |
| Color | Black / Red |
| Motherboard Compatibility | FLEX ATX, Micro ATX, ATX, Mini ATX, SSI-CED, SSI-EEB, EATX, XL-ATX |
| Dimensions (LxWxH) | 32.5 x 64.3 x 70.6 cm (12.8 x 25.3 x 27.8 inches) |
| Item Weight | 16 kg (35.27 lbs) |
| External 5.25" Bays | 5 (Tool-free) |
| Internal 3.5"/2.5" Drive Bays | 7 (Tool-free, press and pull trays) |
| PCI Expansion Slots | 10 (Tool-free) |
| Front I/O Ports | 2x USB 3.0, 2x USB 2.0, HD Audio (Mic & Headphone) |
| Included Fans | 1x 200mm Red LED Front, 1x 200mm Red LED Top, 1x 140mm Red LED Rear |
| Fan Controller | Integrated, supports up to 25W combined |
| PSU Dust Filter | Removable and Washable |
| Max VGA Card Length | 333mm |
| Max CPU Cooler Height | 185mm |
8. Warranty and Support
8.1 Product Warranty
The AeroCool GT-S Black Edition Full Tower PC Case comes with a 1 Year Warranty from the date of purchase. This warranty covers manufacturing defects and material faults under normal use. Please retain your proof of purchase for warranty claims.
8.2 Customer Support
For technical assistance, troubleshooting, or warranty inquiries, please contact AeroCool customer support through their official website or authorized service centers.


