Eurotime LCD Digital Alarm Clock Model 23708-00 User Manual
Model: 23708-00
Introduction
This manual provides instructions for the setup, operation, and maintenance of your Eurotime LCD Digital Alarm Clock, Model 23708-00. Please read this manual thoroughly before using the product to ensure proper function and longevity.
The Eurotime LCD Digital Alarm Clock features an LCD display, 7-color changing LED lighting, multiple natural alarm tones, and displays time, date, day of the week, and indoor temperature. It also includes a snooze function and a countdown feature.
Safety Information
- Keep the device away from water and high humidity.
- Do not expose the device to direct sunlight or extreme temperatures.
- Use only the specified battery type (3 x 1.5V AAA batteries).
- Do not mix old and new batteries, or different types of batteries.
- Dispose of used batteries responsibly according to local regulations.
- Do not attempt to disassemble or repair the device yourself. Contact qualified personnel for service.
Package Contents
- Eurotime LCD Digital Alarm Clock (Model 23708-00)
- 3 x 1.5V AAA Batteries
- User Manual (this document)
Product Overview
Familiarize yourself with the components and controls of your alarm clock.
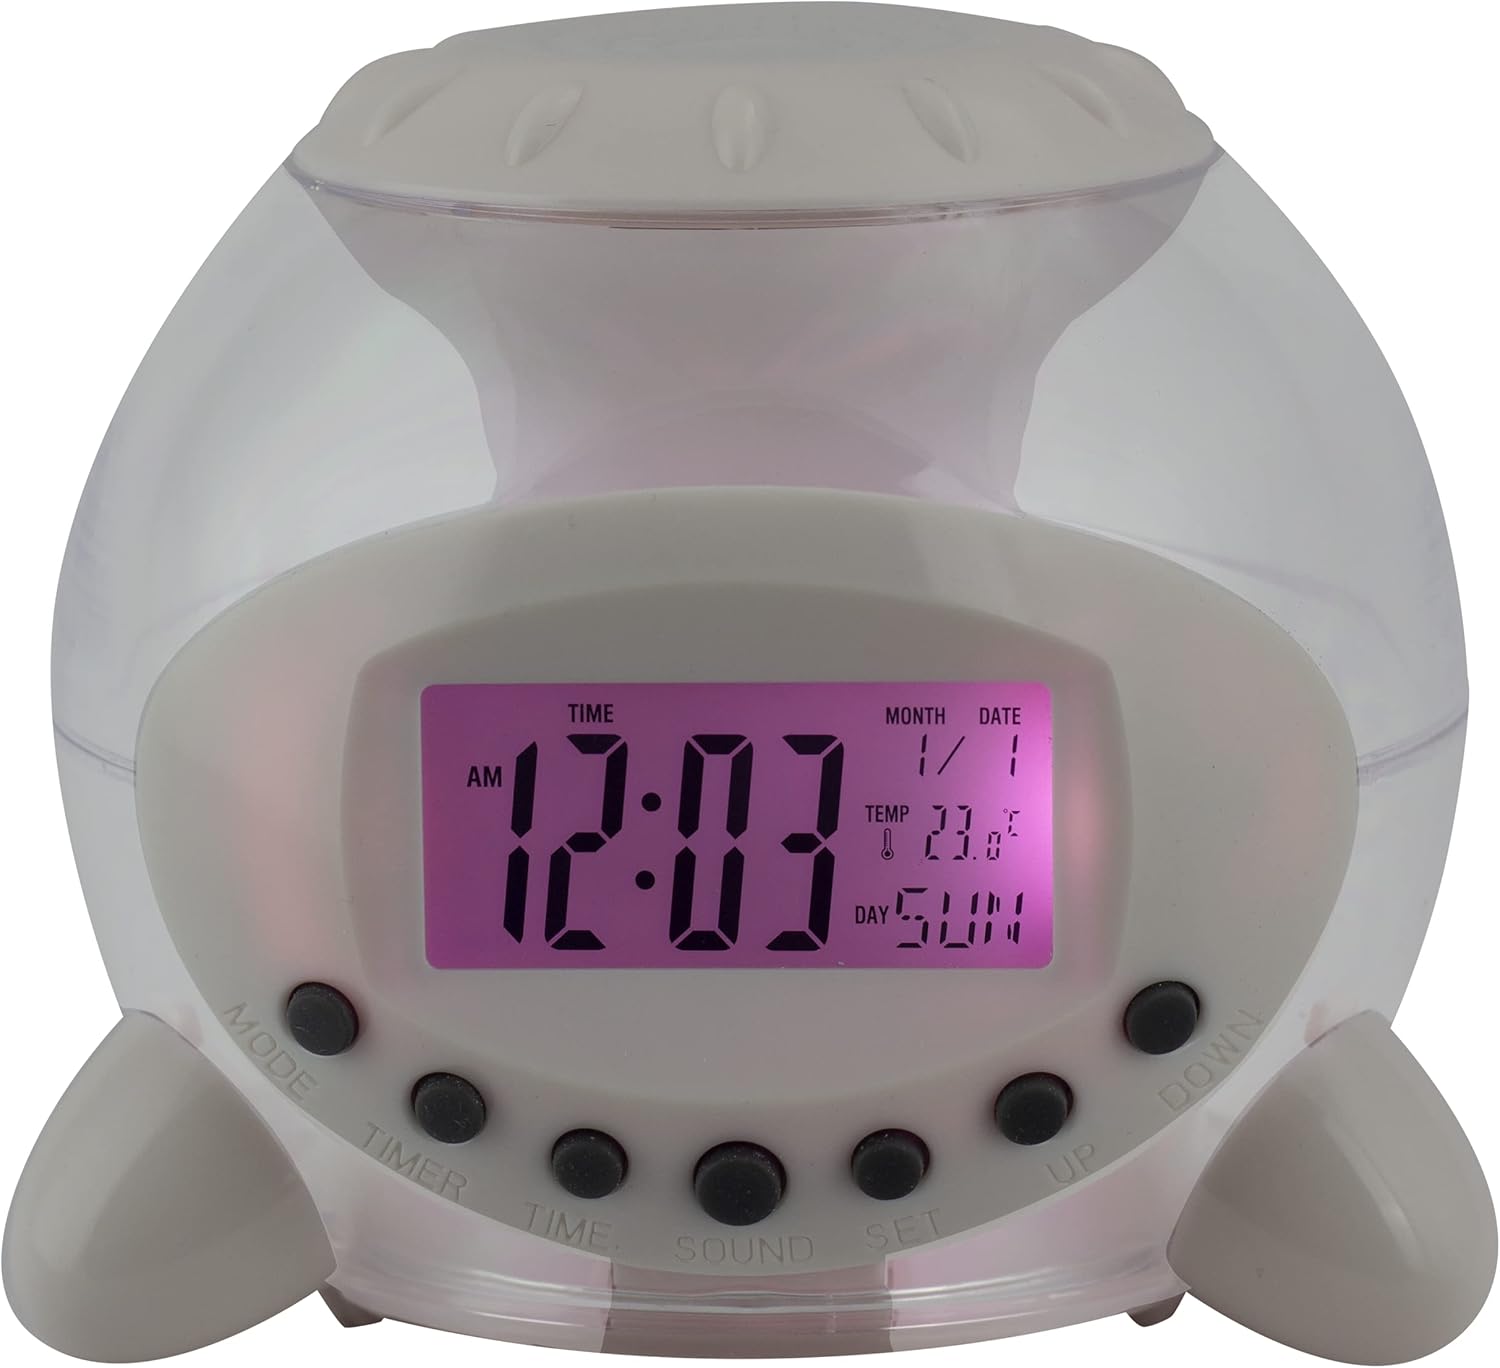
Figure 1: Front View of the Alarm Clock. This image displays the front of the Eurotime LCD Digital Alarm Clock, highlighting its transparent plastic housing and the central LCD screen. The screen shows the time (12:03 AM), month (1), date (1), temperature (23.8°C), and day (SUN). Below the screen are control buttons labeled MODE, TIMER, TIME, SOUND, and SET, along with UP and DOWN buttons.

Figure 2: Side View with Control Buttons. This image shows a side perspective of the alarm clock, emphasizing the array of control buttons located on the front-bottom edge. The transparent housing allows a glimpse of the internal structure and the LED lighting effect. The buttons are clearly visible for user interaction.

Figure 3: Side View with Internal Lighting. This image provides another side view, illustrating the transparent housing and the internal LED lighting. The light emanates from the base, creating a soft glow within the clock's structure, demonstrating its color-changing feature.
Control Buttons:
- MODE: Switches between time display, alarm setting, and countdown timer.
- TIMER: Activates and sets the countdown timer.
- TIME: Used to set the current time and date.
- SOUND: Selects alarm tones or natural sounds.
- SET: Confirms settings or enters setting mode.
- UP/DOWN: Adjusts values during setting modes.
Setup
1. Battery Installation
- Locate the battery compartment on the bottom of the alarm clock.
- Open the battery compartment cover.
- Insert three (3) 1.5V AAA batteries, ensuring correct polarity (+/-).
- Close the battery compartment cover securely.
Note: The clock will automatically power on after battery installation. The display may flash, indicating it's ready for time setting.
Operating Instructions
1. Setting Time and Date
- In normal time display mode, press the TIME button once. The hour digits will flash.
- Use the UP or DOWN buttons to adjust the hour.
- Press TIME again to move to minute setting. Adjust with UP or DOWN.
- Continue pressing TIME to cycle through year, month, and date settings, adjusting each with UP or DOWN.
- After setting the date, press TIME one last time or wait a few seconds for the settings to be saved and return to normal display.
2. Setting the Alarm
- Press the MODE button until "ALARM" appears on the display (or an alarm icon).
- Press the SET button. The alarm hour digits will flash.
- Use the UP or DOWN buttons to adjust the alarm hour.
- Press SET again to move to minute setting. Adjust with UP or DOWN.
- Press SET one last time to confirm the alarm time.
- To activate/deactivate the alarm, press the UP button in alarm display mode. An alarm icon will appear/disappear.
3. Snooze Function
When the alarm sounds, press any button (except SET or MODE) to activate the snooze function. The alarm will pause and sound again after a few minutes (duration is adjustable, refer to advanced settings if available).
To turn off the alarm completely, press the SET button when it is sounding.
4. Color Changing LED Lighting
The alarm clock features a 7-color changing LED light. This function typically activates automatically when the alarm sounds or can be manually toggled. Refer to the MODE or SET button for specific controls related to the lighting, if available.
5. Natural Alarm Tones
To select an alarm tone:
- In alarm setting mode (after pressing MODE to display alarm time), press the SOUND button.
- Use the UP or DOWN buttons to cycle through the available natural alarm tones.
- Press SET to confirm your selection.
6. Countdown Feature
To use the countdown timer:
- Press the MODE button until "TIMER" appears on the display.
- Press the TIMER button. The hour digits will flash.
- Use UP or DOWN to set the desired countdown hour.
- Press TIMER again to set minutes, then seconds.
- Press SET to start the countdown.
- To pause or resume, press SET. To reset, press MODE.
Maintenance
Cleaning
- Wipe the clock with a soft, dry cloth.
- Do not use abrasive cleaners or solvents, as they may damage the plastic housing or display.
Battery Replacement
When the display dims or functions become erratic, it is time to replace the batteries. Follow the "Battery Installation" steps in the Setup section.
Troubleshooting
| Problem | Possible Cause | Solution |
|---|---|---|
| Display is blank or dim. | Low or depleted batteries. Incorrect battery installation. | Replace batteries with new 1.5V AAA batteries. Ensure correct polarity. |
| Alarm does not sound. | Alarm is not activated. Alarm volume is too low (if adjustable). | Ensure the alarm icon is displayed. Check alarm settings. |
| Time/Date is incorrect. | Not set correctly after battery installation or power interruption. | Follow "Setting Time and Date" instructions to reset. |
| Color changing light not working. | Feature not activated or malfunction. | Check operating instructions for light activation. If problem persists, contact support. |
Specifications
- Brand: Eurotime
- Model Number: 23708-00
- Product Dimensions: 8.99 x 8.99 x 8 cm
- Weight: 120 g
- Material: Plastic
- Display Type: Digital LCD
- Special Features: Calendar display, Snooze, Alarm, 7-Color Changing LED, Natural Alarm Tones, Countdown Feature, Indoor Temperature Display
- Power Source: 3 x 1.5V AAA Batteries (included)
Warranty and Support
For warranty information or technical support, please refer to the retailer where the product was purchased or visit the official Eurotime website. Keep your purchase receipt as proof of purchase.


