
Baileigh DP-1000G
Baileigh 20-Inch Gear-Driven Drill Press
Model: DP-1000G
Introduction
This manual provides essential information for the safe operation, maintenance, and troubleshooting of your Baileigh DP-1000G Gear-Driven Drill Press. Please read this manual thoroughly before operating the machine to ensure proper use and to prevent injury or damage.

Figure 1: Baileigh DP-1000G Gear-Driven Drill Press. This image shows the complete drill press unit, including the main body, column, base, table, and work lamp.
Safety Information
WARNING: Always follow basic safety precautions to reduce the risk of fire, electric shock, and personal injury.
- Read and understand all instructions before operating the drill press.
- Wear appropriate personal protective equipment (PPE), including safety glasses, hearing protection, and gloves.
- Ensure the work area is clean, well-lit, and free from obstructions.
- Securely clamp all workpieces before drilling to prevent movement.
- Do not wear loose clothing, jewelry, or long hair that could get caught in moving parts.
- Disconnect power before performing any maintenance or adjustments.
- Keep hands clear of the rotating spindle and drill bit.
- Use the protective guard around the spindle at all times.
Setup
Before operating your Baileigh DP-1000G, ensure it is properly assembled and secured.
Unpacking and Inspection
- Carefully remove all components from the packaging.
- Inspect all parts for any shipping damage. Report any damage to your supplier immediately.
- Verify that all items listed in the "What's in the Box" section are present.
Assembly
- Attach the heavy cast iron base to the main column.
- Mount the adjustable table onto the column. The table measures 19.75" x 13.75".
- Secure the drill head assembly to the top of the column. The sturdy 4-inch diameter column is designed to reduce flexing.
- Install the halogen work light, ensuring it can be adjusted to illuminate the workpiece.
- Attach the protective guard around the spindle. This guard is crucial for operator safety.

Figure 2: Cast Iron Table. This image highlights the robust cast iron table, measuring 19.75 inches by 13.75 inches, which provides a stable work surface.

Figure 3: 4-inch Diameter Column. This image shows the robust 4-inch diameter column, which provides stability and reduces flexing during operation.

Figure 4: Halogen Work Lamp. This image displays the adjustable halogen work lamp, designed to provide bright illumination to the drilling area.

Figure 5: Protective Spindle Guard. This image shows the clear protective guard that encircles the spindle, enhancing operator safety by preventing contact with rotating parts.
Electrical Connection
The drill press requires a 110V, 1Ph power supply. Ensure the power outlet is properly grounded and capable of handling 14 Amps.
Operating Instructions
Basic Operation
- Ensure the workpiece is securely clamped to the table.
- Select the appropriate drill bit for your material and task. The drill press has a 1-inch drill capacity for mild steel.
- Insert the drill bit into the chuck and tighten it securely.
- Adjust the table height and position as needed. The gear head can also be adjusted up or down on the column.
- Turn on the power switch.
- Lower the drill bit slowly into the workpiece, applying steady pressure. The spindle has 5.3 inches of travel.
- Once drilling is complete, raise the drill bit and turn off the machine.
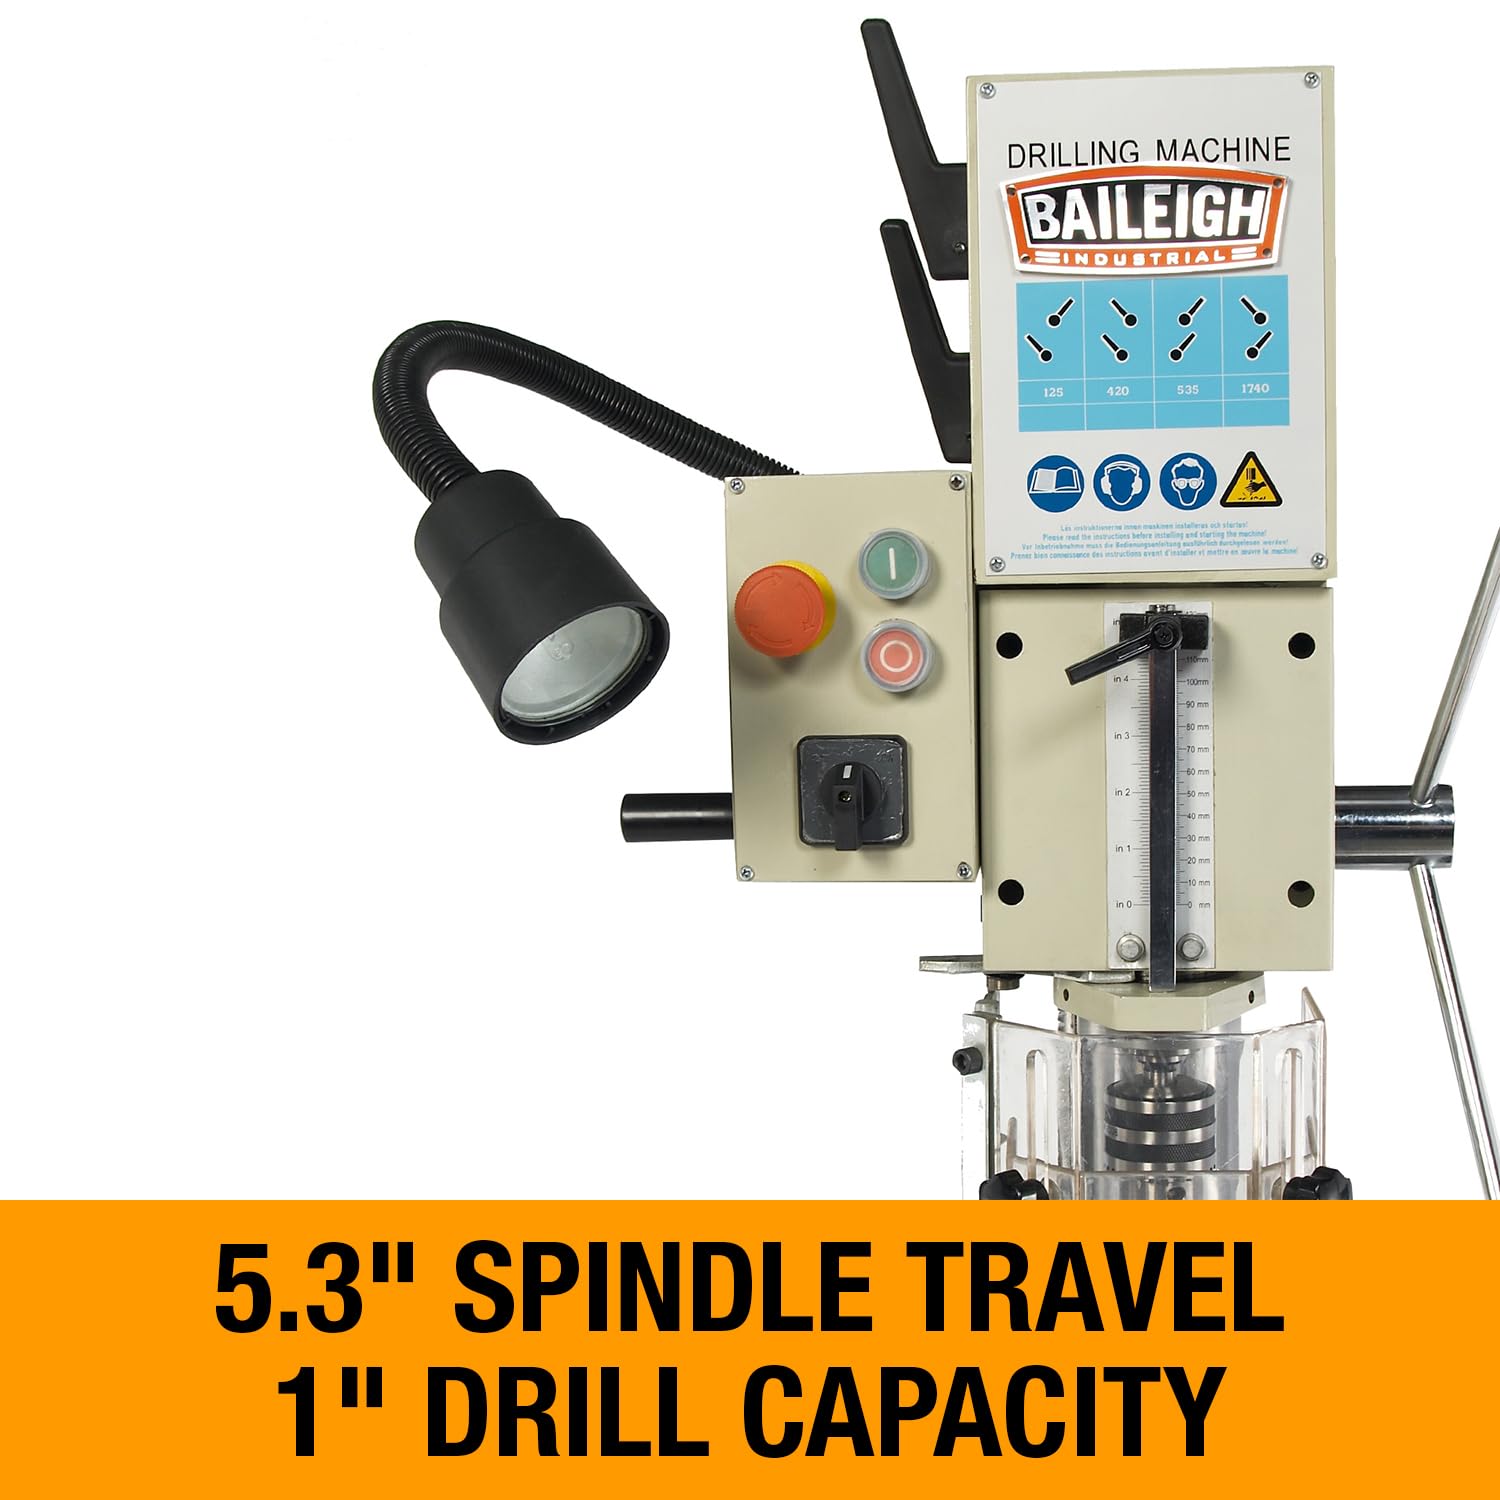
Figure 6: Spindle Travel and Drill Capacity. This image illustrates the 5.3-inch spindle travel and the 1-inch drill capacity of the machine, indicating its drilling capabilities.
Speed Adjustment
The gear-driven transmission offers multiple speeds for various materials and drilling requirements. Available speeds are 125 RPM, 420 RPM, 535 RPM, and 1740 RPM (Maximum Rotational Speed).
- Refer to the speed chart on the machine head for recommended settings based on drill bit size and material.
- To change speeds, ensure the machine is turned off and the spindle has come to a complete stop.
- Follow the instructions on the machine for engaging the correct gears to achieve the desired RPM.
Maintenance
Regular maintenance ensures the longevity and optimal performance of your drill press.
- Daily: Clean the machine after each use, removing chips and debris. Wipe down the column and table to prevent rust.
- Weekly: Check the chuck for wear and ensure it holds bits securely. Inspect the power cord for any damage.
- Monthly: Lubricate moving parts as indicated in the machine's lubrication points. Check and tighten any loose fasteners.
- Periodically: Inspect the motor and electrical connections for signs of wear or damage. Consult a qualified technician for any complex repairs.
Troubleshooting
| Problem | Possible Cause | Solution |
|---|---|---|
| Drill press does not start. | No power, emergency stop engaged, faulty switch. | Check power connection, reset emergency stop button, inspect switch. |
| Excessive vibration during operation. | Loose components, unbalanced drill bit, worn bearings. | Tighten all fasteners, replace or re-center drill bit, consult service. |
| Drill bit not cutting efficiently. | Dull drill bit, incorrect speed, insufficient pressure. | Sharpen or replace drill bit, adjust speed, apply steady pressure. |
| Oil leakage. | Damaged seal, overfilling, loose cover. | Inspect seals, ensure proper oil level, tighten covers. If persistent, contact support. |
Specifications
| Feature | Detail |
|---|---|
| Model Number | DP-1000G |
| Motor | 1-1/2 HP |
| Voltage | 110 Volts, 1 Phase |
| Amperage | 14 Amps |
| Drill Capacity (Mild Steel) | 1 inch |
| Spindle Travel | 5.3 inches |
| Column Diameter | 4 inches |
| Table Dimensions | 19.75" x 13.75" |
| Speeds (RPM) | 125, 420, 535, 1740 |
| Product Dimensions (L x W x H) | 28.22 x 19.65 x 67.3 inches |
| Weight | 484 Pounds |
| What's in the Box | Drill Press, Base, Table, Work Lamp |
Warranty and Support
The Baileigh DP-1000G Gear-Driven Drill Press is covered by a one-year parts warranty.

Figure 7: 1 Year Warranty. This image displays a graphic indicating a one-year warranty for the product.
Baileigh also provides lifetime technical support by phone for this product.
For warranty claims, technical assistance, or parts inquiries, please contact Baileigh Industrial customer service. Refer to the official Baileigh Industrial website for current contact information.
Note: Always provide your model number (DP-1000G) and serial number when contacting support.
Related documentsDP-1000G


Ask a question about this manual
Ask about setup, troubleshooting, compatibility, parts, safety, or missing instructions. Manuals+ will review the question and use this page’s manual context to help answer it.