
Behringer UM2
Behringer U-PHORIA UM2 User Manual
Audiophile 2x2 USB Audio Interface with XENYX Mic Preamplifier
1. Introduction
The Behringer U-PHORIA UM2 is an ultra-compact 2x2, 48 kHz USB audio interface designed for recording microphones and instruments. It features a studio-grade XENYX mic preamp, a combination XLR/TRS input, and an additional 1/4" instrument input. This device provides a powerful phones output for direct monitoring and is powered via USB, making it a portable solution for capturing audio.

Figure 1: The Behringer U-PHORIA UM2 USB Audio Interface, showcasing its compact design and front panel controls.
Key features include:
- Studio-Grade XENYX Mic Preamp: Offers a 100 dB dynamic range and a wide frequency response for transparent audio capture.
- Seamless DAW Integration: Compatible with popular recording software such as Avid Pro Tools, Ableton Live, and Steinberg Cubase.
- Convenient Direct Monitoring: Allows musicians to hear their performance with zero latency through the powerful headphones output.
- 48 kHz Resolution: Provides high-fidelity audio recording quality.
- USB-Powered: Eliminates the need for an external power supply, enhancing portability.
2. Setup
2.1 Unpacking and Initial Inspection
Carefully unpack the Behringer U-PHORIA UM2 and ensure all components are present. Inspect the device for any signs of damage during transit. If any damage is found, contact your retailer immediately.
The box should contain:
- Behringer U-PHORIA UM2 Audio Interface
- USB Cable
2.2 Driver Installation
For optimal performance on Windows operating systems, it is recommended to download and install the latest drivers from the official Behringer website. For macOS, the device is typically class-compliant and may not require additional driver installation.
- Visit the official Behringer support page.
- Locate the drivers for the U-PHORIA UM2 model.
- Download and run the installer, following the on-screen instructions.
- Restart your computer if prompted.
2.3 Connecting the UM2 to Your Computer
The UM2 is USB-powered, simplifying its connection process.
- Connect one end of the supplied USB cable to the USB port on the rear of the UM2.
- Connect the other end of the USB cable to an available USB port on your computer.
- The "POWER" LED on the front panel of the UM2 will illuminate, indicating that the device is receiving power.
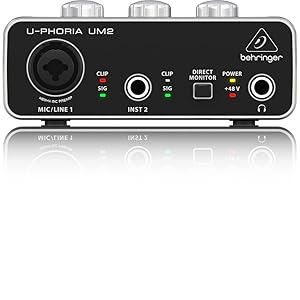
Figure 2: Close-up of the UM2 front panel, showing the MIC/LINE 1 input, INST 2 input, and control knobs.
2.4 Audio Device Selection
After connecting the UM2, you may need to select it as your primary audio input and output device in your computer's sound settings and your Digital Audio Workstation (DAW).
- Windows: Go to "Sound Settings" > "Sound Control Panel" and set the UM2 as the default playback and recording device.
- macOS: Go to "System Settings" > "Sound" and select the UM2 for both input and output.
- DAW: In your DAW's preferences or settings, select the Behringer UM2 as the audio interface (ASIO driver for Windows, Core Audio for macOS).
3. Operating the U-PHORIA UM2
3.1 Front Panel Controls and Connections
The front panel of the UM2 provides essential controls and input jacks:
- MIC/LINE 1 Input: A combination XLR/TRS jack for connecting microphones (XLR) or line-level instruments (1/4" TRS).
- INST 2 Input: A 1/4" TS jack for connecting instruments like guitars or basses.
- GAIN 1 (MIC/LINE 1): Rotary knob to adjust the input gain for the MIC/LINE 1 input.
- GAIN 2 (INST 2): Rotary knob to adjust the input gain for the INST 2 input.
- CLIP/SIG LEDs: Indicators for signal presence (SIG, green) and clipping (CLIP, red) for each input.
- +48V Phantom Power Switch: Engages 48V phantom power for condenser microphones connected to MIC/LINE 1.
- DIRECT MONITOR Switch: Enables direct monitoring of inputs, allowing you to hear your input signal directly with zero latency.
- PHONES Output: A 1/4" TRS stereo jack for connecting headphones.
- OUTPUT Knob: Adjusts the overall output level for both the PHONES output and the main RCA outputs.
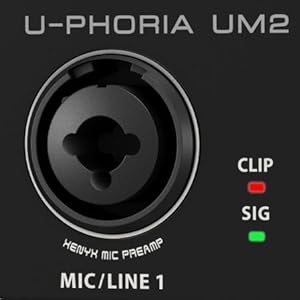
Figure 3: Detailed view of the MIC/LINE 1 input with the XENYX Mic Preamp, showing the CLIP and SIG indicators.
3.2 Connecting Microphones and Instruments
- Microphones: Connect an XLR microphone to the MIC/LINE 1 input. If using a condenser microphone, activate the +48V phantom power switch.
- Line-Level Devices: Connect line-level instruments (e.g., keyboards, mixers) to the MIC/LINE 1 input using a 1/4" TRS cable.
- Guitars/Basses: Connect an electric guitar or bass directly to the INST 2 input using a 1/4" TS cable.

Figure 4: An example setup showing a microphone and an acoustic guitar, illustrating typical input sources for the UM2.
3.3 Setting Input Levels
Properly setting input levels is crucial for clear recordings and to avoid clipping.
- Turn the corresponding GAIN knob (GAIN 1 or GAIN 2) fully counter-clockwise.
- Have the performer play or sing at their loudest anticipated level.
- Slowly increase the GAIN knob until the "SIG" LED illuminates consistently, and the "CLIP" LED flashes only occasionally during the loudest peaks. Avoid constant "CLIP" LED illumination.
3.4 Monitoring Your Audio
The UM2 offers direct monitoring to eliminate latency during recording.
- Connect headphones to the PHONES output.
- Engage the "DIRECT MONITOR" switch to hear your input signal directly from the UM2, mixed with the playback from your computer.
- Adjust the "OUTPUT" knob to control the overall listening volume.
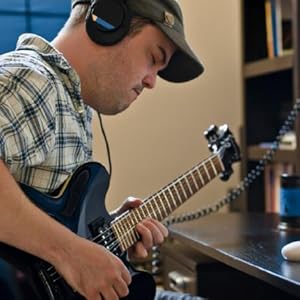
Figure 5: A musician using headphones while playing guitar, demonstrating the direct monitoring feature for real-time audio feedback.
3.5 Recording with a DAW
The UM2 integrates seamlessly with various Digital Audio Workstations.
- Ensure the UM2 is selected as the audio input/output device in your DAW's preferences.
- Create a new audio track in your DAW.
- Select the appropriate input (e.g., Input 1 for MIC/LINE 1, Input 2 for INST 2).
- Arm the track for recording and begin capturing your audio.
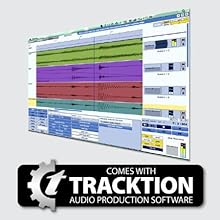
Figure 6: A screenshot of Tracktion 4 audio production software, demonstrating a typical Digital Audio Workstation interface for recording and mixing.
4. Maintenance
4.1 Cleaning
To maintain the appearance and functionality of your UM2, follow these cleaning guidelines:
- Disconnect the device from your computer before cleaning.
- Use a soft, dry cloth to wipe down the exterior.
- For stubborn marks, a slightly damp cloth with mild soap can be used, followed by a dry cloth.
- Avoid using abrasive cleaners, solvents, or harsh chemicals, as these can damage the finish and internal components.
4.2 Storage
When not in use, store the UM2 in a cool, dry place away from direct sunlight and extreme temperatures. Protect it from dust and moisture.
4.3 Environmental Considerations
The UM2 is designed for indoor use. Avoid exposing it to:
- Water or other liquids.
- Excessive heat sources (e.g., radiators, amplifiers).
- High humidity.
- Strong vibrations or impacts.
5. Troubleshooting
This section addresses common issues you might encounter with your Behringer U-PHORIA UM2.
| Problem | Possible Cause | Solution |
|---|---|---|
| No power (POWER LED off) | USB cable not connected or faulty; USB port not providing power. | Ensure USB cable is securely connected to both the UM2 and the computer. Try a different USB port or cable. |
| No sound output from headphones/speakers | Incorrect audio device selected; OUTPUT knob turned down; faulty headphones/speakers. | Verify UM2 is selected as the output device in your computer's sound settings and DAW. Increase the OUTPUT knob. Test with different headphones/speakers. |
| No input signal (SIG LED off) | Microphone/instrument not connected; GAIN knob too low; faulty cable; +48V not engaged for condenser mic. | Check all cable connections. Increase the corresponding GAIN knob. Ensure +48V is on for condenser mics. Test with a different cable or input source. |
| Distorted or clipping audio (CLIP LED constantly on) | Input gain too high. | Reduce the corresponding GAIN knob until the CLIP LED only flashes occasionally on peaks. |
| Latency during recording | Direct monitoring not enabled; DAW buffer size too high; driver issues. | Engage the "DIRECT MONITOR" switch. Reduce the buffer size in your DAW's audio settings. Ensure correct drivers are installed. |
For more detailed troubleshooting, refer to the official Troubleshooting Guide (PDF).
6. Specifications
Technical specifications for the Behringer U-PHORIA UM2.
| Feature | Detail |
|---|---|
| Model | UM2 |
| Hardware Interface | USB 2.0 |
| Connectivity Technology | USB |
| Number of Channels | 2 (1x XLR/TRS, 1x 1/4" TS) |
| Mic Preamp | XENYX Mic Preamplifier |
| Phantom Power | +48V (switchable) |
| Resolution | 48 kHz |
| Compatible Devices | Laptop, Personal Computer |
| Operating System | Windows, macOS |
| Supported Software | Tracktion 4 (and other major DAWs) |
| Connector Type | 1x XLR/TRS; 1x 1/4" TS; 2x RCA (outputs); USB |
| Color | Black |
| Body Material | Composite |
| Item Weight | 9.1 ounces (approx. 258 grams) |
| Product Dimensions (L x W x H) | 6.3 x 8.27 x 3.54 inches (approx. 16 x 21 x 9 cm) |
7. Warranty and Support
7.1 Warranty Information
For detailed warranty terms and conditions, please refer to the warranty statement provided with your product or visit the official Behringer website. Keep your proof of purchase for warranty claims.
7.2 Technical Support
If you encounter issues not covered in the troubleshooting section or require further assistance, please contact Behringer customer support. Before contacting support, ensure you have your product model number (UM2) and serial number ready.
Additional resources:
- Official User Guide (PDF)
- Official Troubleshooting Guide (PDF)
- Behringer Official Website: www.behringer.com
Related documentsUM2


Ask a question about this manual
Ask about setup, troubleshooting, compatibility, parts, safety, or missing instructions. Manuals+ will review the question and use this page’s manual context to help answer it.