
Infant Optics DXR-8AC
Infant Optics DXR-8 Add-on Camera Instruction Manual
Model: DXR-8AC
Product Overview
This manual provides essential information for the Infant Optics DXR-8 Add-on Camera, designed to expand your existing Infant Optics DXR-8 (3.5" model) video baby monitor system. This camera is not compatible with the DXR-8 PRO (5.0" model).
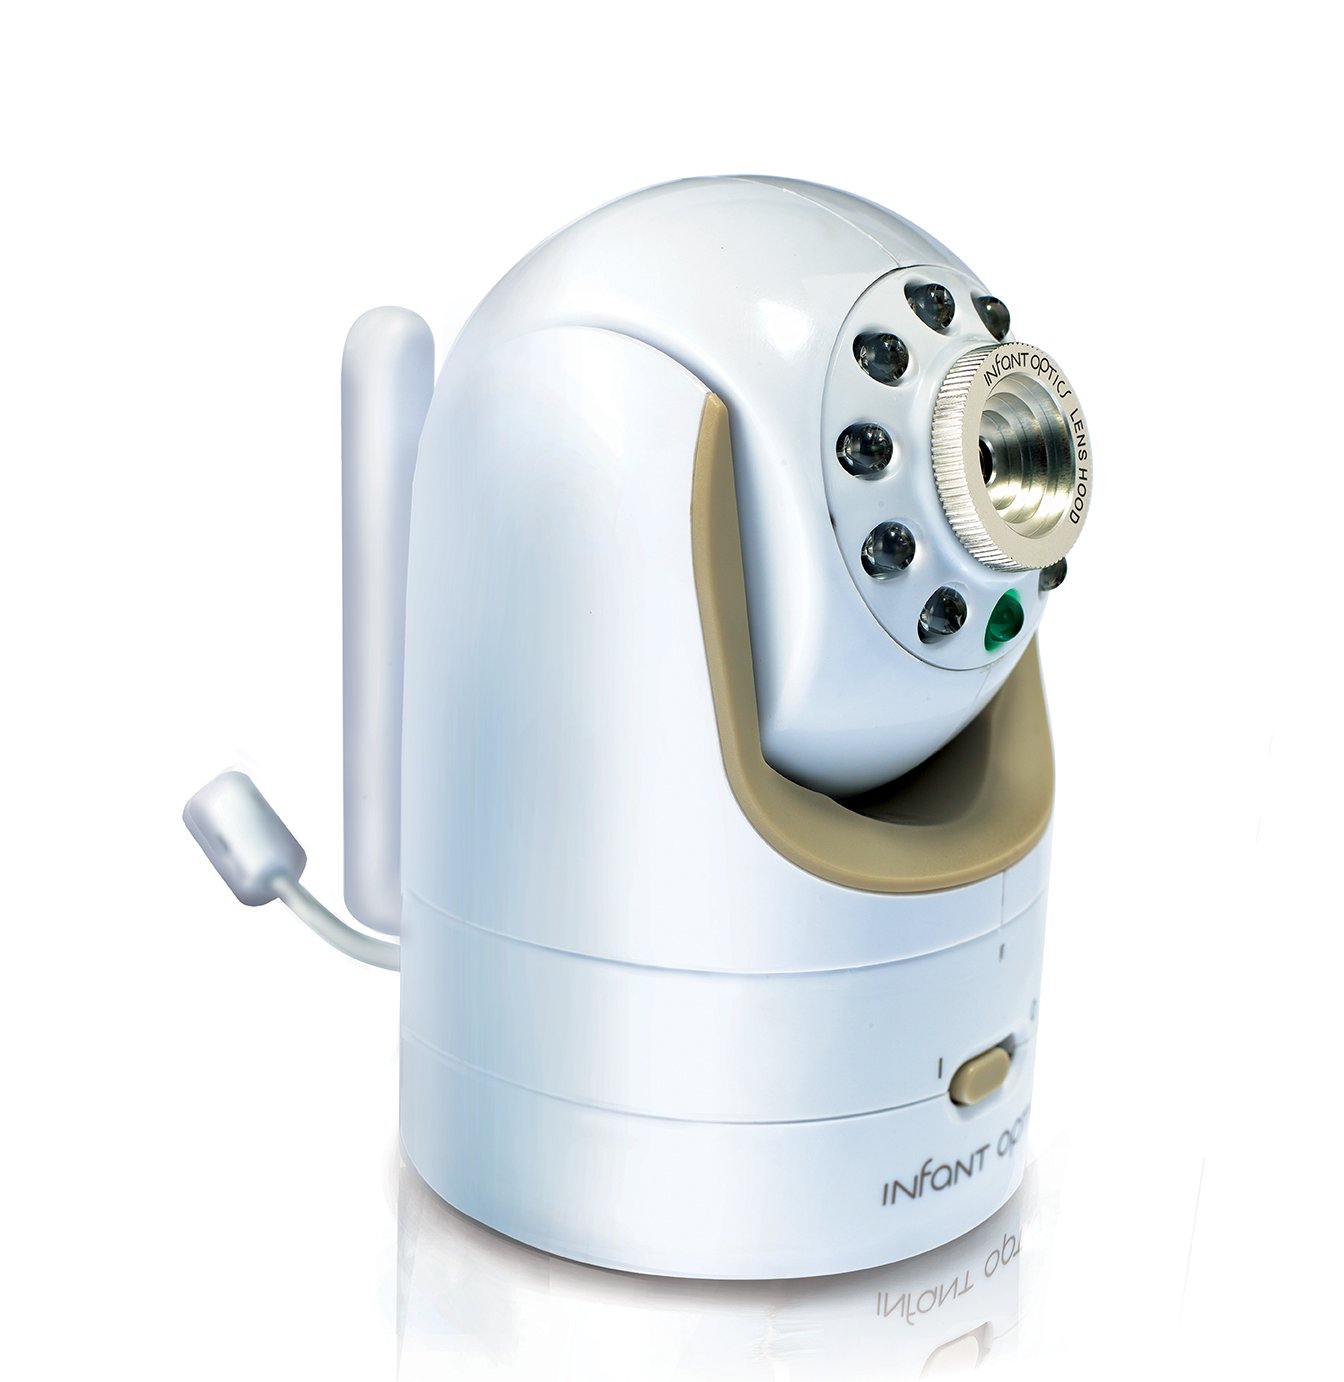
Figure 1: Infant Optics DXR-8 Add-on Camera Unit.
The DXR-8 Add-on Camera features remote pan/tilt/zoom capabilities, night vision, and a remote thermometer. It supports interchangeable optical lenses (zoom and wide-angle lenses sold separately). You can expand your DXR-8 monitor system with up to 4 camera units.
Important Safety Information
Strangulation Hazard:
- Always keep the power adapter cord out of your child's reach.
- To prevent entanglement, DO NOT place the camera unit or its adapter cord within reach of your child.
What's in the Box
- Camera Unit (DXR-8AC)
- Power Adapter for Camera Unit

Figure 2: Included Camera Unit and Power Adapter.
Setup Instructions
1. Powering the Camera Unit
- Connect the small end of the power adapter to the DC-in port on the back of the camera unit.
- Plug the other end of the power adapter into a standard electrical outlet.
- Ensure the camera's power switch (located on the bottom front) is in the 'ON' position (I).

Figure 3: Front view of the camera, showing the power switch.
2. Pairing with Your DXR-8 Monitor Unit
The DXR-8 Add-on Camera is designed to pair seamlessly with your existing Infant Optics DXR-8 (3.5" model) monitor unit. The pairing process typically takes only a few seconds.
- Ensure both your DXR-8 monitor unit and the new add-on camera unit are powered on.
- On your DXR-8 monitor unit, navigate to the camera pairing menu. (Refer to your DXR-8 monitor's instruction manual for specific steps on accessing the pairing menu).
- Press and hold the pairing button on the back of the add-on camera unit until the monitor unit indicates successful pairing.
- Once paired, the camera's video feed will appear on your monitor.
The DXR-8 monitor unit can support up to 4 camera units. If you are adding more than one camera, you can assign each camera to a different channel on your monitor.
Operating the Camera
Remote Pan, Tilt, and Zoom
The DXR-8 Add-on Camera offers remote control over its pan, tilt, and digital zoom functions directly from your DXR-8 monitor unit. This allows you to adjust the camera's view without physically entering the room.

Figure 4: Camera's pan (270°) and tilt (120°) capabilities.
- Pan: Move the camera horizontally up to 270 degrees.
- Tilt: Move the camera vertically up to 120 degrees.
- Zoom: Digitally zoom in on the image for a closer view.
Refer to your DXR-8 monitor's manual for detailed instructions on using the pan, tilt, and zoom controls.
Night Vision
The camera is equipped with automatic infrared night vision, allowing you to see clearly in low-light or dark conditions. The camera will automatically switch to night vision mode when the ambient light is insufficient.
Remote Thermometer
The camera unit includes a built-in thermometer that transmits the room temperature to your DXR-8 monitor unit, helping you ensure a comfortable environment for your child.
Interchangeable Lenses
The DXR-8 Add-on Camera supports interchangeable optical lenses. The standard lens is pre-installed. Optional zoom and wide-angle lenses are sold separately and can be easily swapped to suit your monitoring needs.

Figure 5: Diagram showing the interchangeable lens feature.
To change a lens, gently twist the current lens counter-clockwise to remove it. Align the new lens with the camera's lens mount and twist clockwise until secure.
Maintenance
- Cleaning: Use a soft, dry cloth to clean the camera unit. Do not use abrasive cleaners or solvents.
- Lens Care: If the lens requires cleaning, use a lens cleaning cloth specifically designed for optical surfaces.
- Storage: If storing the camera for an extended period, disconnect it from power and store it in a cool, dry place.
Troubleshooting
| Problem | Possible Cause | Solution |
|---|---|---|
| No video feed from camera. | Camera not powered on or not paired. | Ensure camera power switch is ON. Re-pair the camera with the monitor unit (refer to Setup Instructions). |
| Poor video quality. | Obstruction, distance, or dirty lens. | Ensure clear line of sight between camera and monitor. Reduce distance if possible. Clean the camera lens. |
| Remote pan/tilt/zoom not responding. | Interference or camera not fully connected. | Move camera closer to monitor. Power cycle both camera and monitor. |
| Temperature reading is inaccurate. | Camera placed near heat source/vent. | Relocate the camera to a more central location in the room, away from direct sunlight, vents, or heating elements. |
Specifications
| Feature | Detail |
|---|---|
| Model Number | DXR-8AC |
| Compatible Monitor | Infant Optics DXR-8 (3.5" model) |
| Power Source | AC/DC Adapter (Included) |
| Connectivity Technology | Wireless (Non-Wi-Fi for secure connection) |
| Video Capture Resolution | 480p |
| Pan Angle | Up to 270 degrees |
| Tilt Angle | Up to 120 degrees |
| Night Vision | Automatic Infrared |
| Included Components | Camera Unit, Power Adapter |
| Dimensions (L x W x H) | 2.5 x 2.5 x 4 inches |
| Item Weight | 8 ounces (approx. 0.5 lbs) |
| Color | White/Beige |
| UPC | 858779002516 |
Warranty and Support
For information regarding product warranty, technical support, or to purchase additional accessories (such as zoom or wide-angle lenses), please visit the official Infant Optics website or contact their customer service directly.
You can also visit the Infant Optics Store on Amazon for more product information and support resources.
Related documentsDXR-8AC


Ask a question about this manual
Ask about setup, troubleshooting, compatibility, parts, safety, or missing instructions. Manuals+ will review the question and use this page’s manual context to help answer it.