1. Product Overview
The SanDisk Connect Wireless Media Drive is a portable storage device designed for wirelessly storing and streaming media content to smartphones and tablets. It features 64GB of built-in flash storage and an SDHC/SDXC card slot for expanded capacity. This device allows multiple users to stream high-definition content simultaneously without requiring an internet connection, cables, or connectors.
2. Key Features
- Wireless media sharing: Share multimedia files across iPad, iPhone, Kindle, or Android devices via Wi-Fi using the free SanDisk app or a web browser.
- Simultaneous streaming: Stream HD videos to up to 5 devices concurrently; supports up to 8 connections for other data access.
- Integrated storage: Includes 64GB of built-in flash storage.
- Extended battery life: Provides up to 8 hours of continuous streaming on a single charge.
- Expandable storage: Features an SDHC/SDXC memory card slot for additional storage and direct viewing of camera memory card content.
- Portable design: Compact and lightweight for on-the-go use.
- Security: Optional Wi-Fi password protection for data security.
- Compatibility: Compatible with iOS 5.0 or later, Android 2.3 or later via the SanDisk app, or any Wi-Fi-enabled device with a web browser.
- Connectivity: USB 2.0 port for computer connection and charging. AC adapter and cable are included.
3. Package Contents
Verify that all items are present in your package:
- SanDisk Connect Wireless Media Drive (SDWS1-064G-A57)
- USB 2.0 Cable
- AC Power Adapter
4. Device Layout

Figure 4.1: Front view of the SanDisk Connect Wireless Media Drive with an SD card inserted into its slot.

Figure 4.2: Top view of the device, featuring the SanDisk logo on the textured surface.

Figure 4.3: Side view of the device, highlighting the power button.

Figure 4.4: Side view of the device, showing the Wi-Fi, internet, and battery indicator lights.
The SanDisk Connect Wireless Media Drive features a compact, square design. On one side, you will find the power button. The opposite side houses indicator lights for Wi-Fi activity, internet connection status, and battery level. An SD card slot is located on another side for memory expansion. The device also includes a micro-USB port for charging and connecting to a computer.
5. Setup
5.1 Initial Charge
Before first use, fully charge the device. Connect the included USB cable to the device and the AC power adapter, then plug it into a wall outlet. The battery indicator light will show charging status.
5.2 Powering On/Off
- To Power On: Press and hold the power button for approximately 2-3 seconds until the indicator lights illuminate.
- To Power Off: Press and hold the power button for approximately 2-3 seconds until the indicator lights turn off.
5.3 Installing the SanDisk Connect App
To manage and stream content, download the free SanDisk Connect app from your device's app store (Apple App Store for iOS or Google Play Store for Android). Alternatively, you can access the device via a web browser on any Wi-Fi-enabled device.
6. Connecting to the Device
- Ensure the SanDisk Connect Wireless Media Drive is powered on.
- On your smartphone or tablet, go to your Wi-Fi settings.
- Locate and select the Wi-Fi network named "SanDisk Connect" (or similar).
- If prompted, enter the default password (usually found on a sticker on the device or in the quick start guide). You can change this password later through the app or web interface.
- Once connected, open the SanDisk Connect app or a web browser and navigate to the device's IP address (e.g., www.sandisk.com/connect).
The device broadcasts its own Wi-Fi signal, allowing direct connection without an existing internet network. You can also configure the device to pass through an internet connection, though this may affect performance and security.
7. Using the SanDisk Connect App

Figure 7.1: Example of the SanDisk Connect app interface on a smartphone, showing media categories.
The SanDisk Connect app provides an interface to browse, stream, and manage files on your Wireless Media Drive. After connecting to the device's Wi-Fi network, launch the app.
7.1 Browsing Content
The app typically organizes content into categories such as Photos, Videos, Music, and Files. Tap on a category to view its contents. You can also use the search function to find specific files.
7.2 Streaming Media
To stream a file, simply tap on it. The app will begin playback. Multiple devices can stream different content simultaneously.
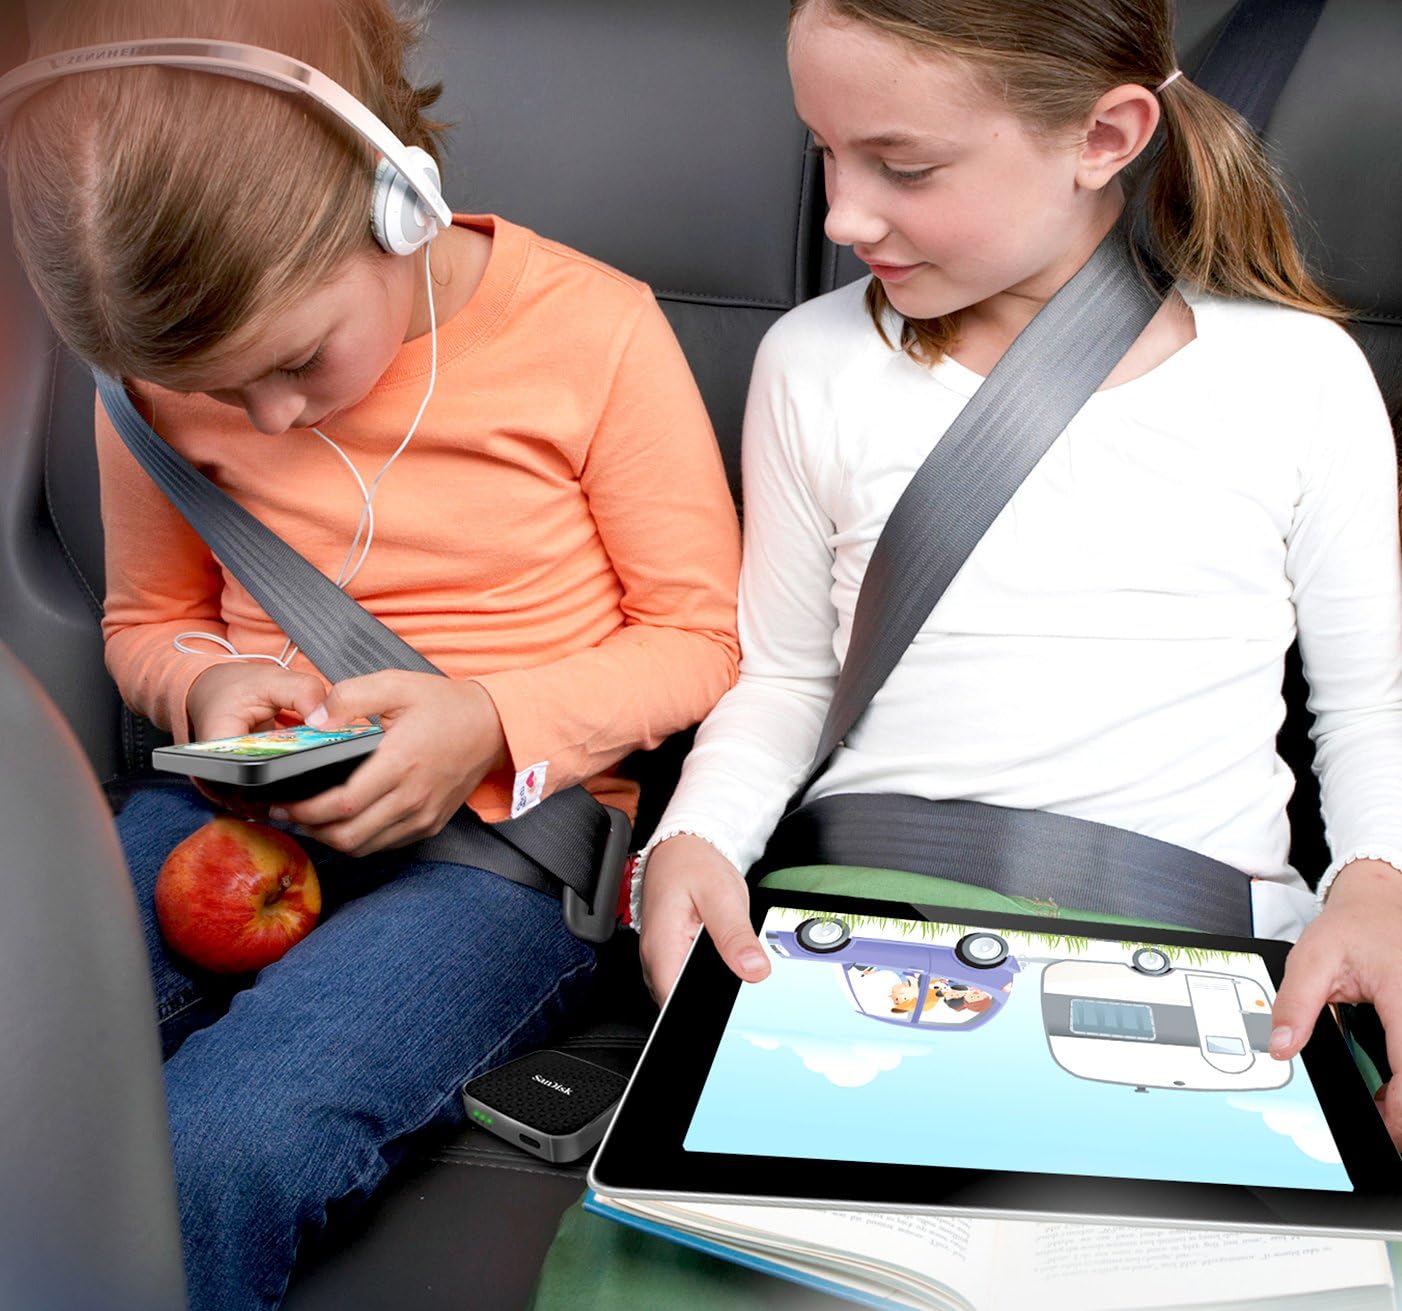
Figure 7.2: The SanDisk Connect device enabling multiple users to stream media in a car setting.
7.3 Transferring Files
The app allows you to upload files from your connected device to the Wireless Media Drive and download files from the drive to your device. Look for upload/download icons or options within the app interface.
7.4 SD Card Slot Usage
Insert an SDHC or SDXC card into the designated slot to expand storage. The app will automatically detect the inserted card, allowing you to access and manage its contents.
8. Transferring Files via USB
When connected to a computer via the USB 2.0 cable, the SanDisk Connect Wireless Media Drive functions as a standard USB flash drive. You can drag and drop files to and from the device's internal storage or the inserted SD card.
- Power off the Wireless Media Drive.
- Connect the device to your computer using the provided USB cable.
- The device will appear as a removable storage drive on your computer.
- Transfer files as you would with any other external drive.
- Safely eject the device from your computer before disconnecting the USB cable.
9. Charging the Device
The SanDisk Connect Wireless Media Drive is powered by a rechargeable Lithium Ion battery. To charge:
- Connect the small end of the USB cable to the micro-USB port on the device.
- Connect the large end of the USB cable to the included AC power adapter.
- Plug the AC power adapter into a standard wall outlet.
- The battery indicator light will show the charging status. A full charge provides up to 8 hours of streaming.
You can also charge the device by connecting it to a computer's USB port, though charging may be slower.
10. Maintenance
- Cleaning: Use a soft, dry cloth to clean the exterior of the device. Avoid using liquid cleaners or solvents.
- Storage: Store the device in a cool, dry place away from direct sunlight and extreme temperatures.
- Battery Care: For optimal battery life, avoid fully discharging the device frequently. If storing for an extended period, charge the device to about 50% before storage.
- Firmware Updates: Periodically check for firmware updates through the SanDisk Connect app or the SanDisk website to ensure optimal performance and compatibility.
11. Troubleshooting
11.1 Device Not Powering On
- Ensure the device is fully charged. Connect it to the AC adapter and allow it to charge for at least 30 minutes before attempting to power on again.
- Try a different USB cable or power adapter.
11.2 Cannot Connect to Wi-Fi Network
- Verify the device is powered on and the Wi-Fi indicator light is active.
- Ensure you are within range of the device's Wi-Fi signal.
- Double-check the Wi-Fi password if one is set.
- Restart both the Wireless Media Drive and your connecting device (smartphone/tablet).
- Forget the network on your device and try reconnecting.
11.3 Streaming Issues or Slow Performance
- Reduce the number of connected devices streaming simultaneously.
- Ensure your device is close to the Wireless Media Drive to maintain a strong Wi-Fi signal.
- Check the file format of the media. Some formats may not be natively supported by your streaming device or the app.
- If the device is configured to pass through an internet connection, try disabling this feature to see if it improves local streaming performance.
11.4 Device Not Recognized by Computer via USB
- Ensure the Wireless Media Drive is powered off before connecting to the computer.
- Try a different USB port on your computer.
- Use the original SanDisk USB cable if possible, or another known good quality USB 2.0 cable.
12. Specifications
| Model Name | SDWS1-064G-A57 |
| Storage Capacity | 64 GB (Internal Flash) |
| Expandable Storage | SDHC/SDXC card slot |
| Wireless Type | 802.11a/b/g/n |
| Hardware Interface | USB 2.0 |
| Number of USB 2.0 Ports | 1 |
| Battery Type | 1 Lithium Ion battery (included) |
| Battery Life (Streaming) | Up to 8 hours |
| Item Weight | 2.72 ounces (approx. 0.17 lbs) |
| Product Dimensions (LxWxH) | 0.55 x 2.6 x 2.6 inches |
| Compatible Devices | Smartphones, Tablets, Cameras |
| Operating System Compatibility | iOS 5.0+, Android 2.3+, Wi-Fi-enabled devices with web browser |
13. Warranty and Support
This SanDisk product comes with a limited warranty. For specific warranty terms and conditions, please refer to the documentation included with your product or visit the official SanDisk website.
For technical support, frequently asked questions, and additional resources, please visit the SanDisk support page or contact their customer service. You can find more information and support resources on the SanDisk Store on Amazon.


