1. Introduction
Thank you for purchasing the SEIKO SQ767W Digital Alarm Clock. This compact and versatile clock features a digital display, dual alarms, a calendar, and displays both temperature and humidity. It is designed for convenience on your bedside table or desktop. This manual provides essential information for setup, operation, and maintenance to ensure optimal performance.
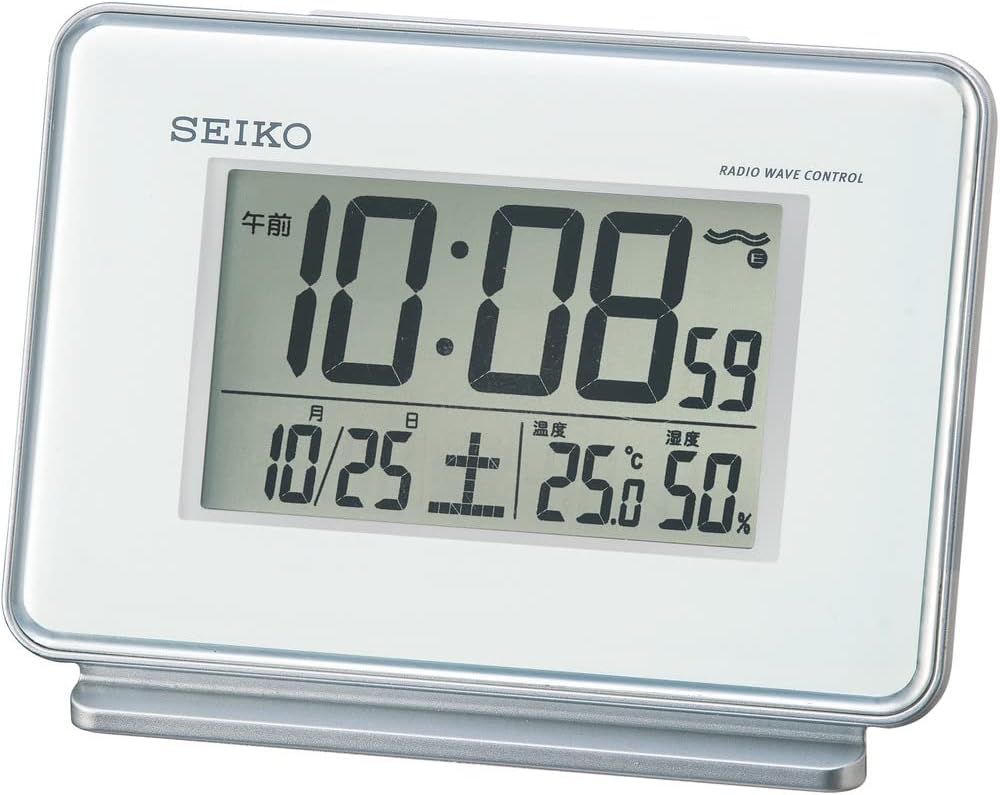
Figure 1: Front view of the SEIKO SQ767W Digital Alarm Clock.
2. Product Features
- Dual Alarms: Set two independent alarm times.
- Radio Wave Correction: Automatically corrects time by receiving standard radio waves (40 kHz/60 kHz automatic selection). Includes a radio wave off function.
- Digital Display: Clear display of time, date, temperature, and humidity.
- Snooze Function: Temporarily pauses the alarm.
- Light Function: Illuminates the display for visibility in low light.
- Alarm Monitor: Allows checking the alarm sound.
- Alarm Auto Stop: Alarm automatically stops after 5 minutes.
- Full Auto Calendar: Displays the correct date automatically.
- Temperature/Humidity Display: Provides current room temperature and humidity readings.
3. Setup
3.1 Battery Installation
- Open the battery compartment cover located on the back of the clock.
- Insert two (2) AA manganese batteries, ensuring correct polarity (+/-).
- Close the battery compartment cover securely.
The clock requires 2 AA batteries, which are included with the product.
3.2 Initial Power On and Radio Wave Reception
Upon battery installation, the clock will attempt to receive radio waves to set the time automatically. For best reception:
- Place the clock near a window.
- Avoid locations with potential radio interference, such as:
- Inside buildings, basements, or areas with thick walls.
- Near high-voltage lines, TV towers, or train rails.
- Close to electronic appliances (TVs, refrigerators, air conditioners, computers, etc.).
- In vehicles (automotive, train, airplane).
- Near metal furniture like steel desks.
If radio waves are not received, the clock will operate with quartz accuracy. Reception may vary depending on environmental conditions.

Figure 2: Radio wave coverage map for time synchronization.
4. Operating Instructions
The control buttons are located on the back of the clock. Refer to Figure 3 for button identification.

Figure 3: Back view with control buttons.
4.1 Setting Time and Date
- Automatic Setting (Radio Wave): The clock attempts to set the time and date automatically via radio wave reception. Ensure the clock is placed in an optimal reception area.
- Manual Setting: If radio wave reception is not possible or desired, you can manually set the time and date using the '時刻/日付合わせ' (Time/Date Adjustment) button and other relevant controls on the back. Consult the detailed instructions for specific button sequences.
4.2 Setting Alarms (Alarm 1 & Alarm 2)
The clock features two independent alarms.
- Use the 'アラーム時刻合わせ' (Alarm Time Adjustment) button to select Alarm 1 or Alarm 2.
- Adjust the desired alarm time using the appropriate adjustment buttons.
- Toggle the 'アラーム1 ON/OFF' or 'アラーム2 ON/OFF' switch to activate or deactivate each alarm.
4.3 Snooze and Light Function
Press the large button on top of the clock to activate the snooze function when an alarm sounds. This button also illuminates the display temporarily when pressed outside of an alarm event.
4.4 Temperature and Humidity Display
The clock continuously displays the current room temperature and humidity on its screen. No special action is required to view these readings.

Figure 4: Close-up of the digital display.
5. Maintenance
5.1 Cleaning
Wipe the clock with a soft, dry cloth. Do not use abrasive cleaners or solvents, as they may damage the casing or display.
5.2 Battery Replacement
Replace batteries when the display dims or the clock's functions become unreliable. Always replace both batteries at the same time with new AA manganese batteries. Dispose of used batteries according to local regulations.
6. Troubleshooting
- Clock not displaying time/functions: Check battery installation and ensure batteries are not depleted.
- Time is incorrect: Ensure the clock is in an optimal location for radio wave reception. If automatic correction fails, manually set the time.
- Alarm not sounding: Verify that the alarm is set to 'ON' and the alarm time is correctly configured.
- Display is dim: Replace the batteries.
- Radio wave reception issues: Relocate the clock away from electronic devices, metal objects, or large structures that may interfere with signals.
7. Specifications
| Feature | Detail |
|---|---|
| Brand | SEIKO |
| Model Number | SQ767W |
| Display Type | Digital |
| Color | White |
| Product Dimensions | 3.5 x 5.0 x 2.3 inches (9.0 x 12.7 x 5.8 cm) |
| Item Weight | 0.4 lbs (210 grams / 7.4 ounces) |
| Material | Plastic |
| Power Source | Battery Powered (2 AA batteries required, included) |
| Special Features | Calendar Display, Loud Alarm, Temperature/Humidity Display, Radio Wave Correction |
| Alarm Channels | 2 |
| Alarm Auto Stop | 5 minutes |
| Connectivity Technology | Radio |
| Mounting Type | Freestanding |
| Country of Origin | China |
8. Warranty and Support
For warranty information or technical support, please refer to the documentation included with your purchase or contact SEIKO customer service. Keep your purchase receipt as proof of purchase.


