
1. Introduction
This manual provides essential information for the safe and effective use of the Dixon Valve 4DF4-S Automatic Industrial Interchange Pneumatic Fitting. Please read these instructions carefully before installation, operation, or maintenance to ensure proper function and longevity of the product.
The Dixon 4DF4-S is a high-quality stainless steel 303 pneumatic fitting designed for industrial applications, featuring an automatic interchange coupler and a 1/2-inch NPTF female thread connection. It is built for durability and reliable performance in demanding environments.
Key Features:
- Automatic industrial interchange pneumatic fitting coupler.
- Constructed from durable Stainless Steel 303.
- Nitrile (Buna-N) seals for a temperature range of -40°F to +250°F (-40°C to +121°C).
- 1/2-inch coupling and 1/2-inch NPTF female thread.
- 1-1/16-inch hex size for secure installation.
2. Setup and Installation
Proper installation is crucial for the safe and efficient operation of the pneumatic fitting. Ensure all components are clean and free from debris before assembly.

Figure 1: Angled view of the Dixon Valve 4DF4-S pneumatic fitting, showing the coupler and threaded end.
Connection Steps:
- Prepare the Threaded Connection: Ensure the male NPTF thread on your air line or tool is clean and undamaged. Apply an appropriate thread sealant (e.g., PTFE tape or pipe thread compound) to the male threads.
- Attach the Fitting: Thread the 1/2-inch NPTF female end of the Dixon 4DF4-S coupler onto the prepared male thread.
- Tighten Securely: Use a wrench on the 1-1/16-inch hex size of the fitting to tighten it securely. Do not overtighten, as this can damage the threads or fitting. Ensure a leak-free seal.
- Verify Connection: Once tightened, visually inspect the connection for proper alignment and tightness.
3. Operating Instructions
The Dixon 4DF4-S is an automatic industrial interchange coupler designed for quick and secure connections in pneumatic systems.
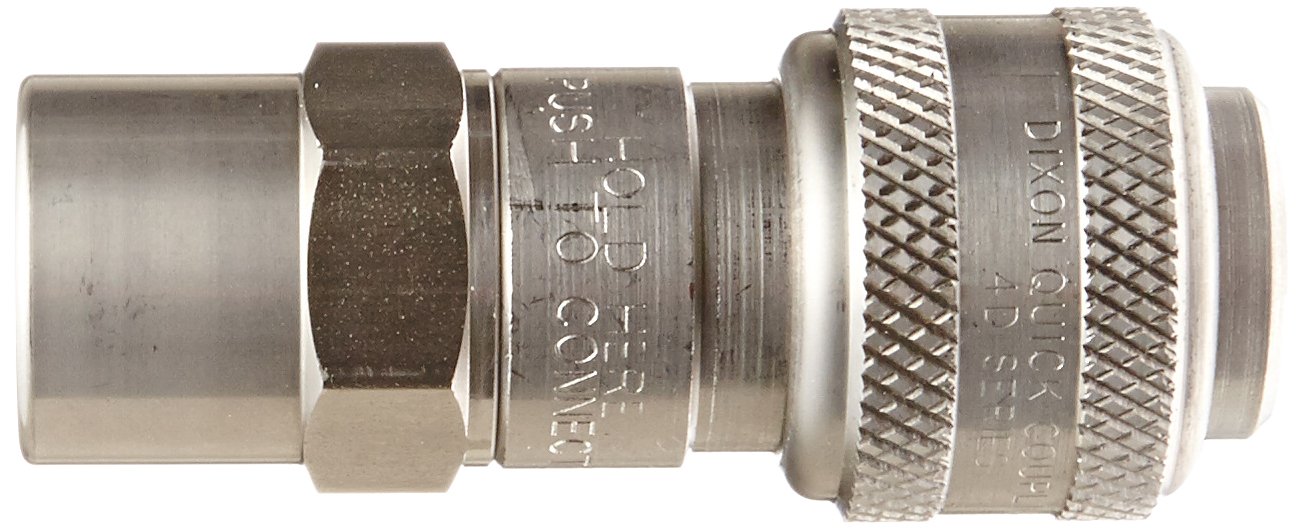
Figure 2: Side view of the Dixon Valve 4DF4-S pneumatic fitting, highlighting the 'PUSH HOLD TO CONNECT' marking on the sleeve.
Connecting an Air Plug:
- Prepare the Plug: Ensure the air plug (male connector) is clean and compatible with industrial interchange standards.
- Insert the Plug: Push the air plug firmly into the coupler. The sleeve of the coupler will automatically retract and then spring forward to lock the plug in place.
- Verify Connection: Gently pull on the plug to ensure it is securely locked. A proper connection will prevent air leaks and accidental disconnections.
Disconnecting an Air Plug:
- Depressurize (if necessary): If the system is under high pressure, it is advisable to depressurize the line before disconnecting to prevent sudden air release.
- Retract the Sleeve: Grasp the knurled sleeve of the coupler and pull it back towards the threaded end of the fitting.
- Remove the Plug: While holding the sleeve back, pull the air plug out of the coupler. Release the sleeve once the plug is removed.
4. Maintenance
Regular maintenance ensures optimal performance and extends the lifespan of your Dixon 4DF4-S fitting.
- Cleaning: Periodically clean the fitting to remove dirt, dust, and debris. Use a clean cloth and, if necessary, a mild, non-corrosive cleaning solution. Ensure no residue remains.
- Inspection: Regularly inspect the fitting for signs of wear, damage, or corrosion. Pay close attention to the seals and the locking mechanism.
- Seal Integrity: Check the Nitrile (Buna-N) seals for cracks, hardening, or deformation. Worn seals can lead to air leaks. Replace the fitting if seals are compromised and cannot be serviced.
- Lubrication: A small amount of pneumatic-grade lubricant can be applied to the moving parts of the coupler sleeve to ensure smooth operation, if needed. Avoid excessive lubrication.
- Storage: When not in use, store the fitting in a clean, dry environment away from extreme temperatures and corrosive substances.
5. Troubleshooting
This section addresses common issues you might encounter with your pneumatic fitting.
| Problem | Possible Cause | Solution |
|---|---|---|
| Air Leak at Connection |
|
|
| Plug Does Not Lock Securely |
|
|
| Difficulty Connecting/Disconnecting |
|
|
6. Specifications
Detailed technical specifications for the Dixon Valve 4DF4-S pneumatic fitting.
| Specification | Detail |
|---|---|
| Model Number | 4DF4-S |
| Material | Stainless Steel 303 |
| Seal Material | Nitrile (Buna-N) |
| Temperature Range (Seals) | -40°F to +250°F (-40°C to +121°C) |
| Coupling Size | 1/2-inch |
| Thread Type | 1/2-inch - 14 NPTF Female |
| Hex Size | 1-1/16-inches |
| Maximum Outer Diameter (OD) | 1.38-inches |
| Length | 3.30-inches |
| Weight | Approximately 8.8 ounces |
| Interchange Type | Industrial Interchange (Automatic) |
7. Warranty and Support
No specific warranty information is provided within this manual. For details regarding warranty coverage, technical support, or replacement parts for your Dixon Valve 4DF4-S fitting, please contact Dixon Valve & Coupling directly or refer to their official website.
Manufacturer: Dixon Valve & Coupling
For further assistance, please visit the official Dixon website or contact their customer service department.


