
1. Introduction
This manual provides essential information for the safe and efficient operation, installation, and maintenance of your Einhell House Waterworks GE-WW 5537 E. Please read these instructions carefully before using the device for the first time and keep them for future reference. This house waterworks system is designed for pumping clear water from reservoirs, wells, and shafts to supply irrigation systems, washing machines, toilets, and similar applications.
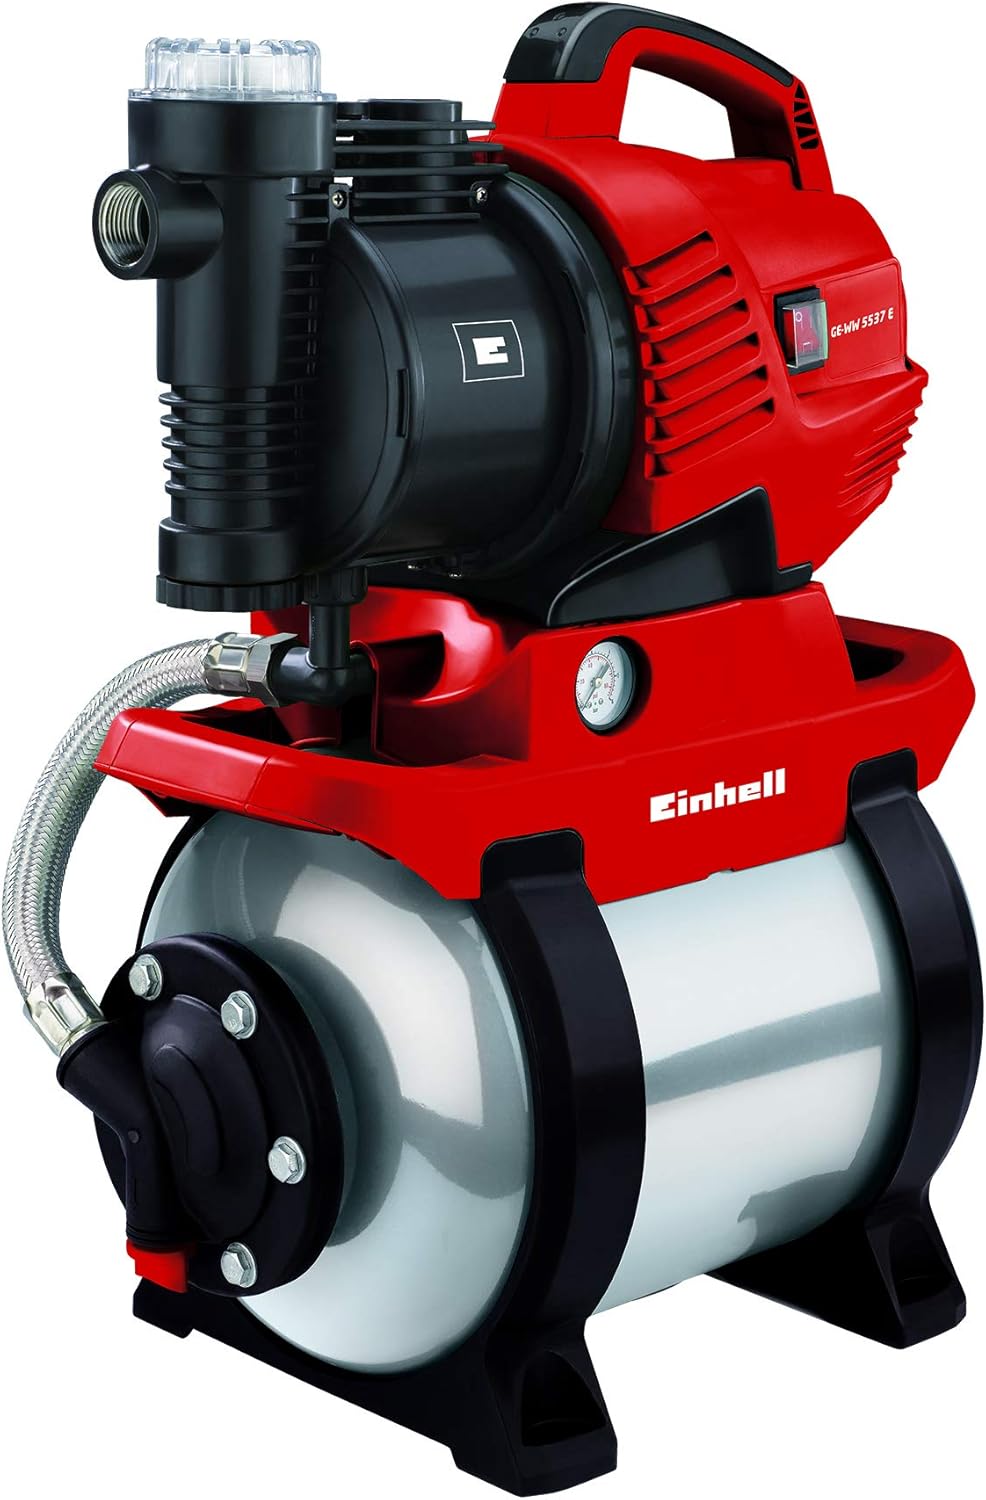
Figure 1: Einhell House Waterworks GE-WW 5537 E. This image shows the complete house waterworks unit, featuring the red pump housing, black motor, clear pre-filter, and the silver 20-liter pressure tank.
2. Safety Instructions
Always observe the following safety precautions to prevent injury and damage to the equipment:
- Ensure the power supply matches the specifications on the rating plate.
- Do not operate the pump in the presence of flammable liquids or gases.
- Protect the device from frost. Drain the unit completely before freezing temperatures.
- Never run the pump dry. Ensure there is always water in the suction line and pump housing during operation.
- Keep children and unauthorized persons away from the operating area.
- Disconnect the power plug before any maintenance, cleaning, or repair work.
- Use only original spare parts and accessories.
3. Product Overview
The Einhell House Waterworks GE-WW 5537 E is designed for efficient water supply with several key features:
- ECO Power Technology: Provides high flow rates with reduced power consumption.
- Integrated Pre-Filter: Improves water quality and protects the pump from contamination.
- Check Valve: Prevents unwanted idle of the pump housing.
- 20 Litre Pressure Container: Ensures the pump does not start with every small water draw-off.
- Manometer: For quick reading of the water pressure.
- Large Water Filling Opening: Facilitates easy initial filling.
- Water Drain Plug: For convenient emptying of the pressure tank.
- Carry Handles: Three integrated handles for easy transportation.
3.1 Key Components

Figure 2: Pre-filter and Inlet. This close-up shows the transparent pre-filter housing and the threaded inlet connection, designed to protect the pump from debris.
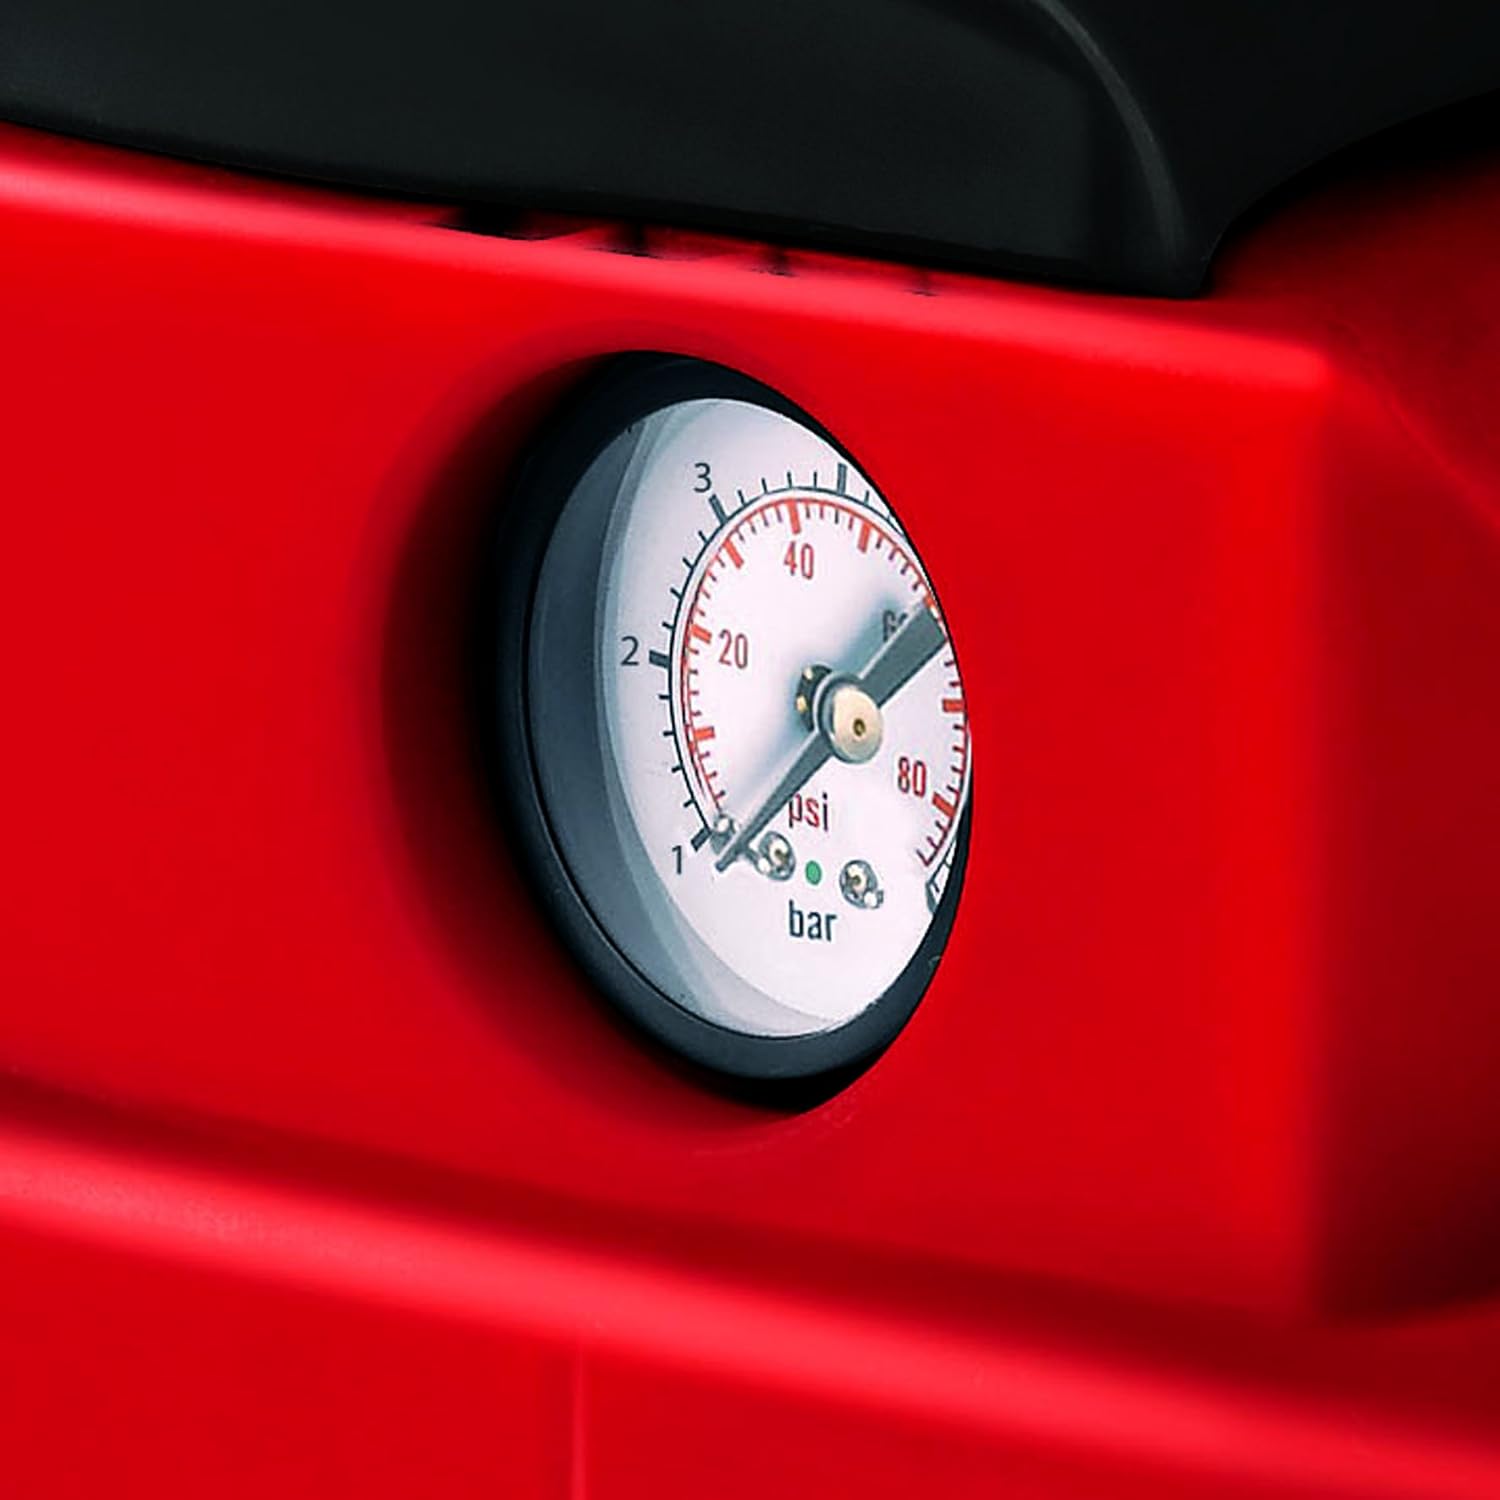
Figure 3: Pressure Manometer. A detailed view of the integrated manometer, which displays the current system pressure in bar and psi for easy monitoring.

Figure 4: Water Filling Opening. This image highlights the large, easily accessible opening for filling the pump with water before initial operation or after maintenance.

Figure 5: Water Drain Plug. A close-up of the red drain plug located at the bottom of the pump, used for completely emptying the unit, especially for winterization.
4. Technical Specifications
| Feature | Specification |
|---|---|
| Model | GE-WW 5537 E |
| Power | 590 W |
| Max. Flow Capacity | 3750 l/h |
| Max. Pressure | 3.8 bar |
| Pressure Container Volume | 20 Litre |
| Voltage | 230 V |
| Frequency | 50 Hz |
| Max. Suction Height | 8 m |
| Max. Delivery Height | 38 m |
| Pressure Tank Material | Stainless Steel (as specified) |
| Weight | 11.91 kg |
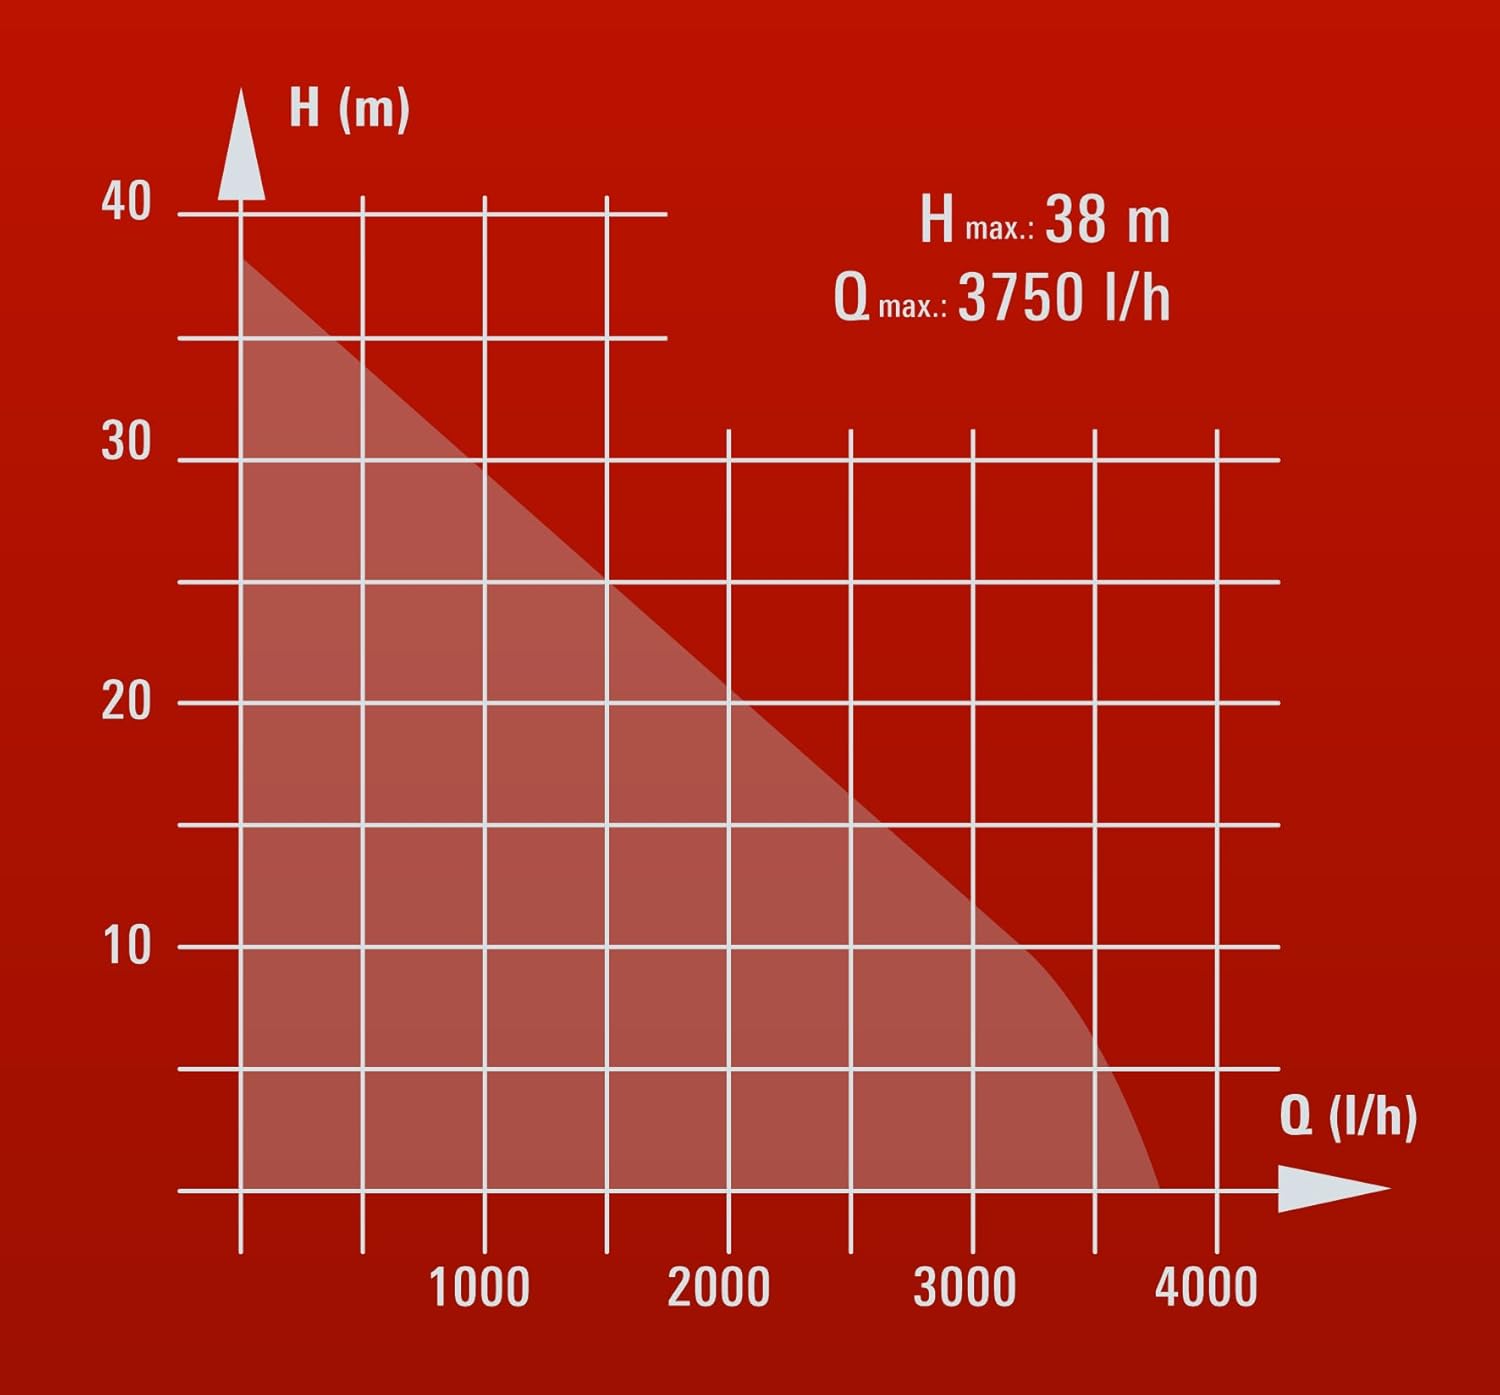
Figure 6: Performance Curve. This graph illustrates the relationship between the delivery height (H in meters) and the flow rate (Q in liters per hour) for the GE-WW 5537 E.
5. Setup
5.1 Placement
Place the house waterworks on a firm, level surface, protected from frost and direct sunlight. Ensure adequate ventilation around the unit.
5.2 Connecting Suction Line
Connect a suction hose (minimum 1 inch diameter) to the pump's inlet. Ensure all connections are airtight to prevent air ingress, which can impair pump performance. It is recommended to use a foot valve with a filter at the end of the suction hose in the water source.
5.3 Connecting Pressure Line
Connect the pressure line to the pump's outlet. Use appropriate fittings and ensure secure, leak-free connections.
5.4 Filling the Pump
Before initial operation, the pump housing must be completely filled with water. Open the water filling opening (Figure 4) and pour water until the housing is full. Close the opening securely.
5.5 Electrical Connection
Connect the power plug to a properly installed and grounded electrical outlet (230V, 50Hz). Ensure the electrical circuit is protected by a residual current device (RCD).

Figure 7: Typical Installation. This diagram illustrates a common setup for the house waterworks, showing the maximum suction height (H max: 8m) and maximum delivery height (H max: 38m), along with the pressure tank and connections.
6. Operation
6.1 Starting the Pump
After filling the pump and ensuring all connections are secure, switch on the power. The pump will start and build up pressure in the system. The manometer (Figure 3) will display the current pressure.
6.2 Automatic Operation
The integrated pressure switch automatically turns the pump on when the pressure in the system drops (e.g., when a tap is opened) and turns it off when the maximum pressure is reached. The 20-liter pressure tank reduces the frequency of pump cycles, extending its lifespan and saving energy.

Figure 8: ECO Power Technology. This diagram visually compares past energy consumption for a given delivery rate with the current ECO Power technology, highlighting up to 10% energy savings.
7. Maintenance
Regular maintenance ensures optimal performance and longevity of your house waterworks.
7.1 Cleaning the Pre-Filter
Periodically check and clean the integrated pre-filter (Figure 2). To do this, disconnect the power, relieve system pressure, unscrew the filter housing, remove and clean the filter insert under running water. Reassemble carefully, ensuring the O-ring is correctly seated.
7.2 Winterization
Before the first frost, completely drain the house waterworks to prevent damage from freezing water. Disconnect the power, open all taps in the pressure line, and remove the water drain plug (Figure 5) to empty the tank and pump housing. Store the unit in a frost-free location.
7.3 General Cleaning
Clean the exterior of the unit with a damp cloth. Do not use aggressive cleaning agents.
8. Troubleshooting
Here are some common issues and their potential solutions:
| Problem | Possible Cause | Solution |
|---|---|---|
| Pump does not start | No power supply; Motor overload; Pressure switch fault | Check power connection/fuse; Allow motor to cool; Consult service technician |
| Pump runs but no water is delivered | Pump not filled; Air in suction line; Suction height too high; Foot valve blocked | Fill pump with water; Check suction line for leaks; Reduce suction height; Clean foot valve |
| Low pressure or flow rate | Pre-filter clogged; Air in system; Leak in pressure line; Insufficient water supply | Clean pre-filter; Bleed system; Check for leaks; Ensure adequate water source |
| Pump switches on and off frequently | Leak in pressure system; Pressure tank pre-charge pressure incorrect; Pressure switch faulty | Check for leaks; Check/adjust pressure tank pre-charge; Consult service technician |
If you cannot resolve the issue using this table, please contact customer support.
9. Warranty & Support
Einhell products are manufactured with care and undergo strict quality controls. This product is covered by a manufacturer's warranty. Please refer to the warranty card included with your purchase for specific terms and conditions, including the warranty period and claim procedures. For technical support, spare parts, or warranty claims, please contact your authorized Einhell dealer or visit the official Einhell website for customer service contact information.
Keep your purchase receipt as proof of purchase for any warranty claims.
