
Motion Pro 08-0388
Motion Pro T-6 Trail Bead Buddy Instruction Manual
Model: 08-0388
Introduction
The Motion Pro T-6 Trail Bead Buddy is a compact and essential tool designed to assist in the removal and installation of motorcycle tires, particularly in trailside or workshop environments. It is engineered to hold the tire bead down in the drop center of the rim, making tire lever use significantly easier and preventing the bead from springing back up. This manual provides detailed instructions for the proper use, maintenance, and care of your T-6 Trail Bead Buddy.
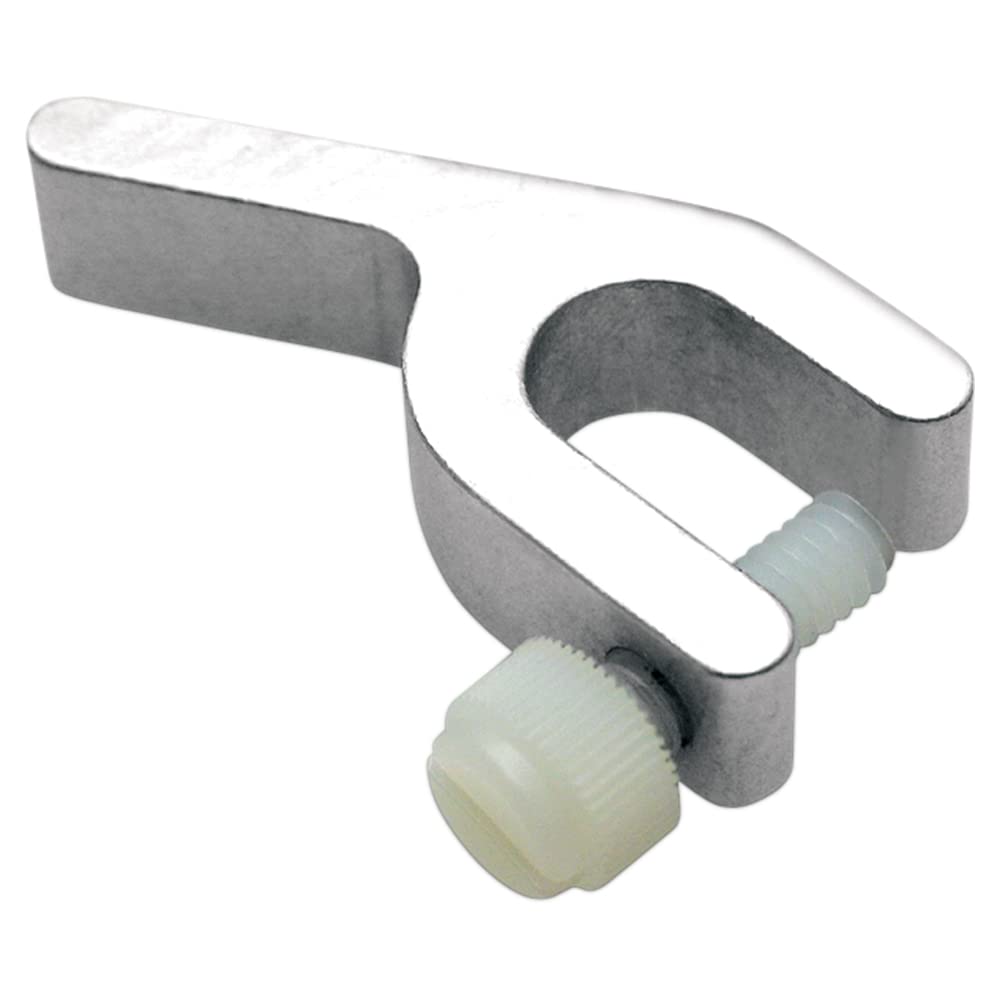
Figure 1: The Motion Pro T-6 Trail Bead Buddy. This image shows the compact, U-shaped metal tool with two white plastic thumb screws designed to secure the tire bead.
Setup and Preparation
Before using the T-6 Trail Bead Buddy, ensure you have all necessary tools for tire removal or installation, including tire levers, a valve core remover, and a pump. The Bead Buddy is designed to work in conjunction with these tools.
- Inspect the Tool: Before each use, visually inspect the T-6 Trail Bead Buddy for any signs of damage, wear, or deformation. Ensure the plastic thumb screws are intact and thread smoothly.
- Prepare the Tire: If removing a tire, fully deflate the tire by removing the valve core. Break the tire bead from the rim on both sides using appropriate methods (e.g., a bead breaker tool or by standing on the tire).
- Locate Drop Center: Identify the drop center of the rim. This is the deepest part of the rim well, where the tire bead needs to sit to provide slack for removal or installation.
Operating Instructions
Follow these steps for effective use of your T-6 Trail Bead Buddy:
- Position the Bead Buddy: Once the tire bead is broken from the rim, insert the T-6 Trail Bead Buddy over the rim edge and onto the tire bead. Position it directly opposite where you intend to start prying the tire.
- Secure the Bead: Gently tighten the two plastic thumb screws until the tool firmly holds the tire bead down into the drop center of the rim. Do not overtighten, as this can damage the bead or the tool. The goal is to keep the bead from popping back up.
- Use Tire Levers: With the bead held securely in the drop center by the Bead Buddy, use your tire levers to pry the tire bead over the rim edge. The Bead Buddy creates the necessary slack to make this process significantly easier.
- Reposition (if necessary): For stubborn tires, you may need to reposition the Bead Buddy or use multiple Bead Buddies to maintain sufficient slack around the rim.
- Removal/Installation: Continue working the tire bead around the rim with your levers until it is fully removed or installed.
- Remove Bead Buddy: Once the tire operation is complete, loosen the thumb screws and remove the T-6 Trail Bead Buddy from the rim.
Tip: Lubricating the tire bead with tire mounting paste or soapy water can further assist in the process.
Maintenance
Proper maintenance will ensure the longevity and reliable performance of your T-6 Trail Bead Buddy:
- Cleaning: After each use, wipe down the tool with a clean cloth to remove any dirt, grease, or tire mounting residue.
- Storage: Store the Bead Buddy in a dry place, away from direct sunlight and extreme temperatures. A tool roll or box is ideal for protection.
- Inspection: Periodically check the plastic thumb screws for wear or damage. While durable, these components can wear over time with heavy use. Replacement parts may be available from Motion Pro.
- Lubrication: The metal body of the tool does not require lubrication. Ensure the threads of the plastic screws are clean and free of debris for smooth operation.
Troubleshooting
If you encounter issues while using the T-6 Trail Bead Buddy, consider the following:
| Problem | Possible Cause | Solution |
|---|---|---|
| Bead not staying in drop center | Bead Buddy not tightened enough; bead not fully broken; insufficient lubrication. | Ensure thumb screws are snug; fully break bead around entire rim; apply more tire lubricant. |
| Difficulty inserting/removing Bead Buddy | Tire bead not fully in drop center; rim protector interfering. | Push tire bead further into drop center; adjust or remove rim protectors temporarily. |
| Plastic thumb screws stripping or breaking | Overtightening; excessive force; worn threads. | Do not overtighten; replace worn screws with genuine Motion Pro parts. |
Specifications
| Feature | Detail |
|---|---|
| Model Number | 08-0388 |
| Manufacturer | Motion Pro |
| Material | Aluminum body, plastic thumb screws |
| Dimensions (Approx.) | 8 x 4.7 x 1.2 inches (20.3 x 11.9 x 3.0 cm) |
| Weight (Approx.) | 3.2 ounces (90.7 grams) |
| Application | Motorcycle tire bead management |
Warranty and Support
For specific warranty information regarding your Motion Pro T-6 Trail Bead Buddy, please refer to the official Motion Pro website or contact their customer support directly. Motion Pro stands behind the quality of its products. For technical assistance or replacement parts, please visit www.motionpro.com or contact their authorized dealers.
Ask a question about this manual
Ask about setup, troubleshooting, compatibility, parts, safety, or missing instructions. Manuals+ will review the question and use this page’s manual context to help answer it.