
MaximalPower ABCD
MaximalPower PTT Speaker Microphone and Surveillance Earpiece User Manual
Model: ABCD
1. Introduction
This manual provides instructions for the proper use and maintenance of your MaximalPower Push-to-Talk (PTT) Speaker Microphone with an integrated Coil Cord Surveillance Earpiece. This accessory is designed to enhance communication for users of compatible Motorola two-way radios, offering hands-free operation and clear audio in various environments.
2. Product Overview
The MaximalPower PTT Speaker Microphone system includes a speaker microphone unit, a coil cord surveillance earpiece, and a durable cable with a two-pin connector for your radio.
- Speaker Microphone Unit: Features a built-in speaker and microphone for clear audio transmission and reception. Includes a Push-to-Talk (PTT) button for communication and a swivel clip for attachment to clothing.
- Coil Cord Surveillance Earpiece: A transparent acoustic tube earpiece designed for discreet and clear audio reception. It connects to the speaker microphone unit via a 3.5mm jack.
- Durable Cable: A flexible, heavy-duty cord connecting the speaker microphone to your two-way radio.
- Two-Pin Connector: Specifically designed for compatibility with a wide range of Motorola two-way radios.

Figure 1: Overview of the MaximalPower PTT Speaker Microphone and Surveillance Earpiece system.
3. Compatibility
This PTT Speaker Microphone and Earpiece is compatible with numerous Motorola two-way radio models. Please verify your radio model against the list below for proper functionality.
CP Series: CP88, CP040, CP100, CP110, CP125, CP140, CP150, CP160, CP180, CP200, CP250, CP300
CLS Series: CLS446, CLS1110, CLS1410, CLS1413, CLS1450, CLS1450C, CLS1450CB, CLS1453CH
XTN Series: XTN446, XTN500, XTN600
XTNi Series: XTNi, XTNiD
VL Series: VL50, VL130
P100 Series: P140, P145, P160, P165, P180, P185
DTR Series: DTR2430, DRT2450, DTR410, DTR450, DTR510, DTR550, DTR610, DTR650
P Series: P10, P50, P50+, P040, P080, P100, P110, P200, P1225, P1225LS, PR400
PRO Series: PRO1150, PRO2150, PRO3150
Spirit Series: SV10, SV11, SV11D, SV21, SV12, SV22, SV22C, SU210, SU22, SU22C, SU220, Spirit, Spirit Pro, Spirit Pro+, Spirit HP10
Spirit MU Series: MU11, MU11C, MU11CV, MU12, MU12C, MU12CV, MU21C, MU21CV, MU22CVS, MU24CV, MU24CVS, MU24CVST
Spirit MV Series: MV11, MV11C, MV11CV, MV12, MV12CV, MV21C, MV21CV, MV22, MV22CV, MV24CVS
GP Series: GP63, GP68, GP88, GP88S, GP280, GP300, GP308, GP350, GP600, GP2000, GP2100, GP3188
SP Series: SP10, SP21, SP50, SP50 Plus
CT Series: CT150, CT250, CT450, CT450LS
XTN XV Series: XV1100, XV1400, XV2100, XV2600, XV4100
XTN XU Series: XU1100, XU2100, XU2600, XU4100
XTN AX Series: AXV5100, AXU4100
4. Setup Instructions
- Connect to Radio: Locate the two-pin accessory port on your Motorola two-way radio. Align the two-pin connector from the MaximalPower speaker microphone with the radio's port and firmly insert it. Ensure a secure connection.

Figure 2: The two-pin connector for connecting to your Motorola radio.
- Attach Earpiece: The coil cord surveillance earpiece connects to the 3.5mm jack located on the side of the speaker microphone unit. Insert the earpiece plug into this jack until it clicks into place.

Figure 3: Connecting the earpiece to the speaker microphone's 3.5mm jack.
- Position Earpiece: Gently place the acoustic tube earpiece into your ear. Adjust the clear coil cord for comfort and optimal sound delivery.
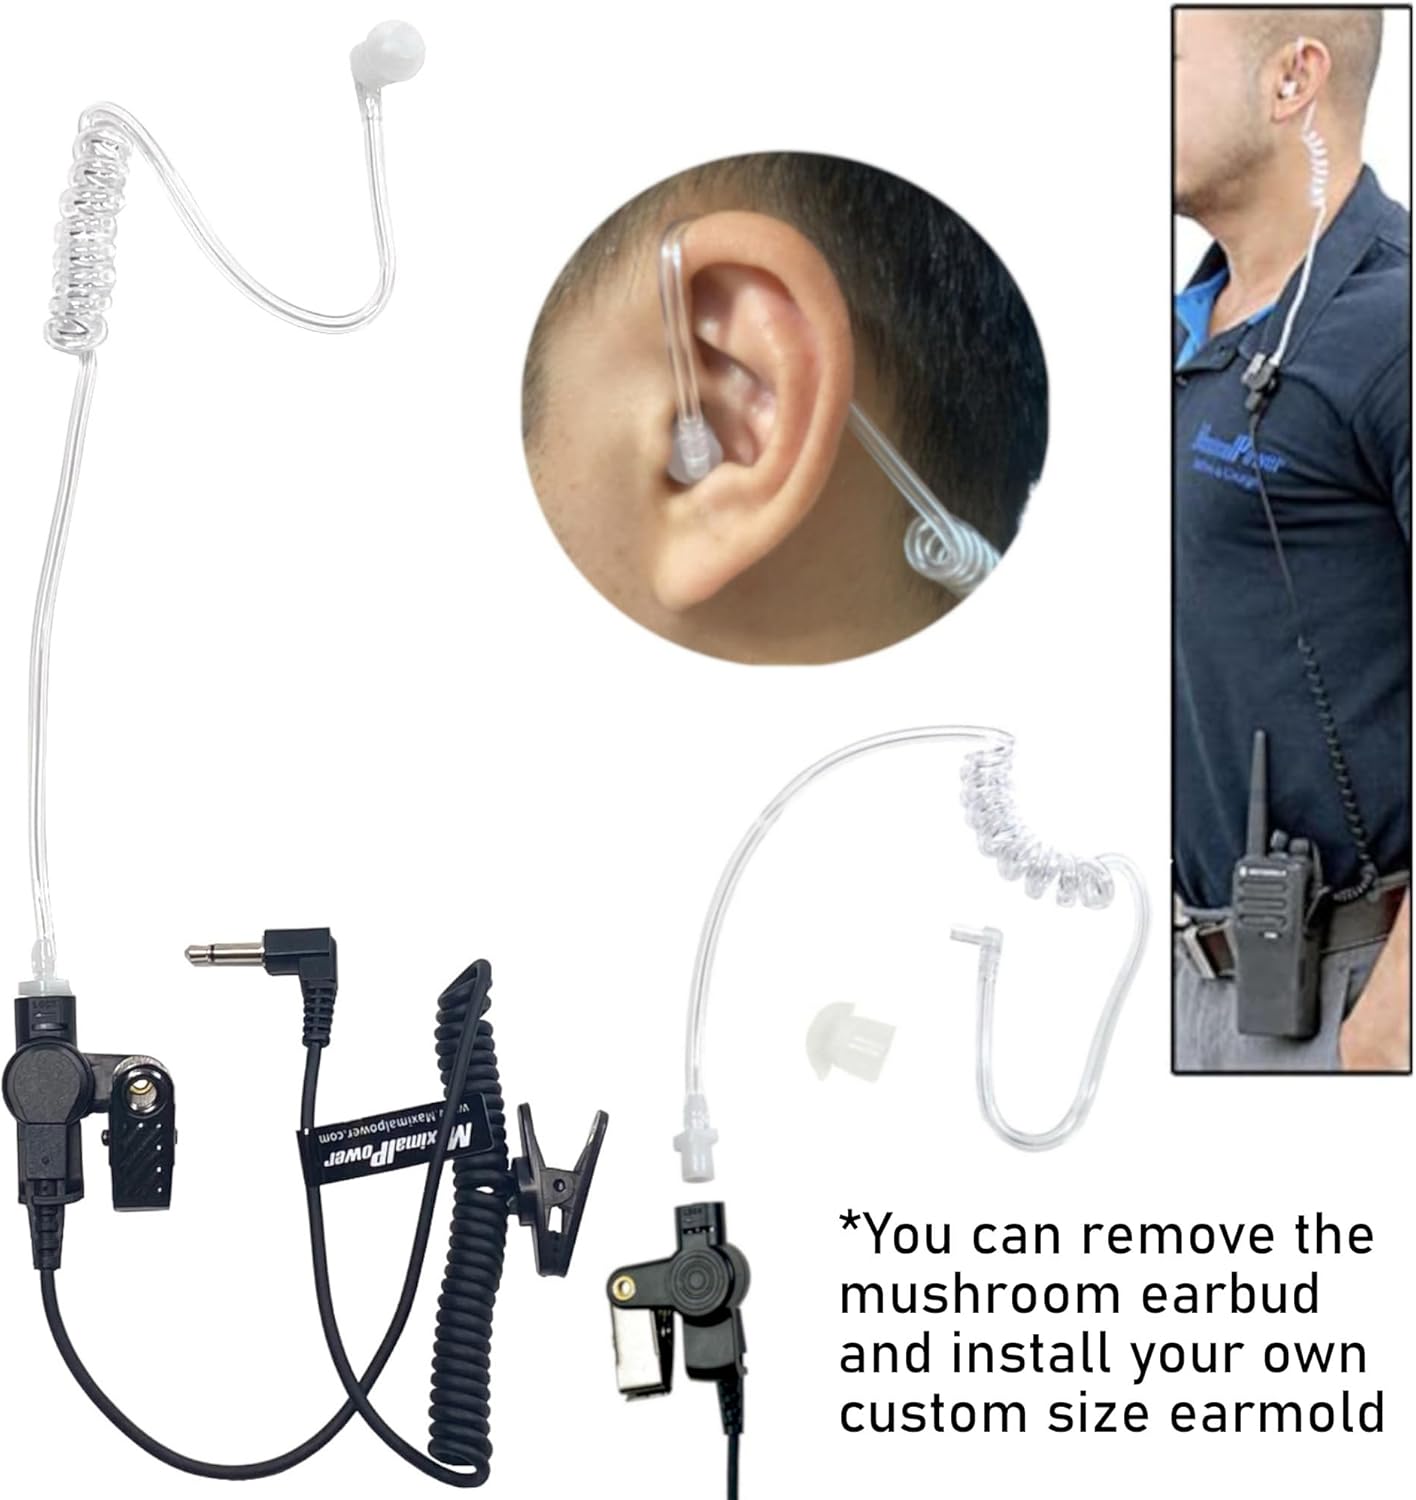
Figure 4: The surveillance earpiece with its mushroom earbud. The earbud can be replaced with a custom earmold if desired.
- Secure Speaker Microphone: Use the swivel clip on the back of the speaker microphone to attach it to your collar, lapel, or other convenient location on your clothing. Ensure the microphone is positioned to capture your voice clearly.

Figure 5: The swivel clip on the back of the speaker microphone for secure attachment.
5. Operation
- Receiving Audio: When the earpiece is connected, all incoming radio transmissions will be routed through the surveillance earpiece. The speaker on the microphone unit will be muted. Ensure the earpiece is properly seated in your ear for clear reception.
- Transmitting Audio (Push-to-Talk): To transmit, press and hold the Push-to-Talk (PTT) button located on the side of the speaker microphone unit. Speak clearly into the microphone. Release the PTT button when you have finished speaking to return to receive mode.
- Volume Control: Adjust the volume directly on your Motorola two-way radio. The speaker microphone and earpiece do not have independent volume controls.
6. Maintenance
- Cleaning: Wipe the speaker microphone unit and cables with a soft, damp cloth. Do not use harsh chemicals or abrasive cleaners.
- Earpiece Care: The mushroom earbud can be removed and cleaned with mild soap and water. Ensure it is completely dry before reattaching. For hygiene, consider replacing earbuds periodically.
- Storage: Store the unit in a cool, dry place away from direct sunlight and extreme temperatures when not in use. Avoid tightly coiling the cords to prevent damage.
- Inspection: Regularly inspect cables and connectors for any signs of wear or damage.
7. Troubleshooting
| Problem | Possible Cause | Solution |
|---|---|---|
| No audio from earpiece. |
|
|
| Cannot transmit or intermittent transmission. |
|
|
| Poor audio quality (static, muffled sound). |
|
|
8. Specifications
- Model Number: ABCD
- Connectivity: Two-pin connector for Motorola radios, 3.5mm jack for earpiece.
- Microphone Type: Omnidirectional
- Cable Length: Approximately 6 feet (heavy-duty flexible cord)
- Earpiece Type: Coil Cord Surveillance Earpiece with mushroom earbud.
- Special Features: Swivel clip, Push-to-Talk (PTT) button.
- Item Weight: 7.2 ounces
- Package Dimensions: 5.6 x 3.2 x 2.6 inches
Ask a question about this manual
Ask about setup, troubleshooting, compatibility, parts, safety, or missing instructions. Manuals+ will review the question and use this page’s manual context to help answer it.