
1. Important Safety Information
Always observe basic safety precautions when using power tools to reduce the risk of fire, electric shock, and personal injury. Read all instructions before operating this tool.
- Eye Protection: Always wear ANSI Z87.1 compliant eye protection with side shields.
- Hearing Protection: Wear hearing protection during extended use.
- Work Area: Keep the work area clean and well-lit. Cluttered or dark areas invite accidents.
- Disconnect Power: Always remove the battery pack before making any adjustments, changing accessories, or storing the tool.
- Tool Condition: Do not operate the tool if it is damaged or malfunctioning.
- Proper Grip: Maintain a firm grip on the tool and keep proper balance at all times.
2. Product Overview
The Ryobi P320 Airstrike 18V ONE+ Cordless Brad Nailer is designed for driving 18-gauge brad nails. It features Airstrike Technology, eliminating the need for compressors and hoses, offering cordless convenience. Key features include an LED work light, a belt clip for portability, and a tool-free depth adjustment dial.

Image 2.1: The Ryobi P320 Airstrike 18V ONE+ Cordless Brad Nailer, shown with a strip of 18-gauge brad nails. This tool operates without the need for an air compressor or hose, providing cordless freedom for various nailing tasks.
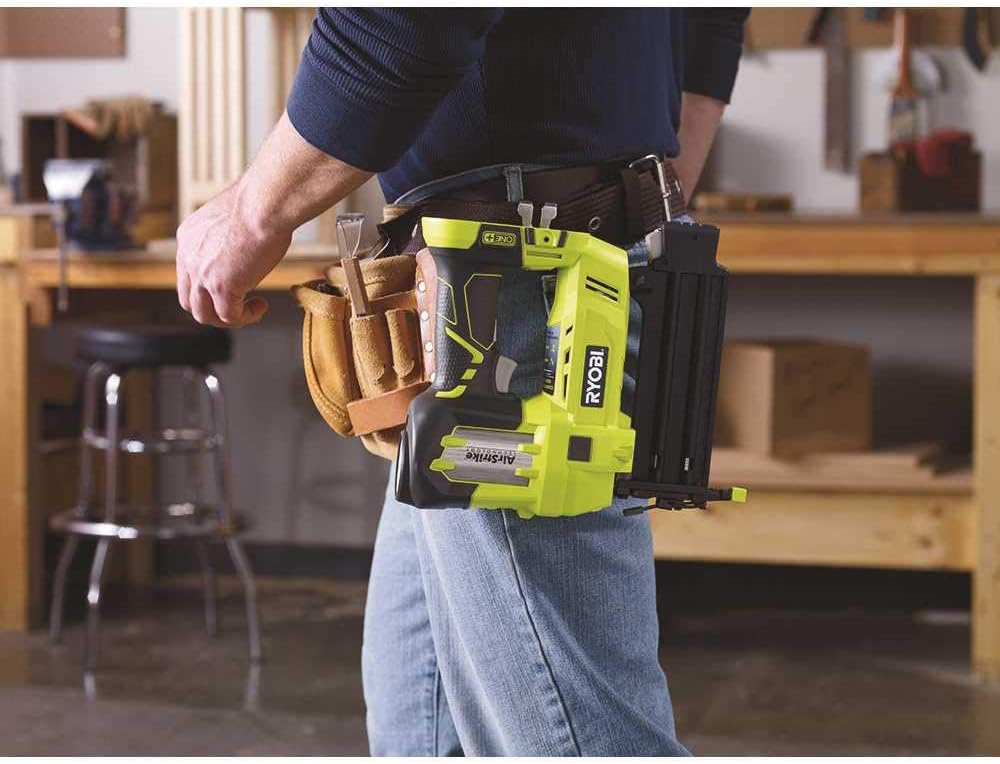
Image 2.2: A user demonstrates the portability of the Ryobi P320 Brad Nailer, which can be conveniently carried on a tool belt using its integrated belt clip. This feature allows for easy access and hands-free movement around the job site.
3. Setup
3.1 Battery Installation
The Ryobi P320 operates with an 18V ONE+ Lithium-Ion battery (sold separately). Ensure the battery is fully charged before use.
- Align the ribs on the battery pack with the grooves in the tool's battery port.
- Slide the battery pack into the tool until the latch snaps into place.
- To remove, depress the latch and pull the battery pack out.
3.2 Loading Nails
The nailer uses 18-gauge brad nails. Always ensure the battery is removed before loading nails.
- Pull back the pusher assembly until it locks into place.
- Insert a strip of 18-gauge brad nails into the magazine slot with the nail points facing down.
- Release the pusher assembly, allowing it to push the nails forward.

Image 3.1: A hand is shown loading a strip of 18-gauge brad nails into the magazine of the Ryobi P320 nailer. Proper loading ensures smooth operation and prevents nail jams.
3.3 Adjusting Depth
The tool-free depth adjustment dial allows you to control how deep the nail is driven into the material.
- Locate the depth adjustment dial near the nosepiece of the tool.
- Rotate the dial clockwise to drive nails deeper or counter-clockwise to drive nails less deep.
- Test on a scrap piece of material to achieve the desired depth before working on your project.

Image 3.2: A top-down view of the Ryobi P320 nailer highlights the depth adjustment dial. This dial allows users to precisely control the depth at which nails are driven, accommodating various material thicknesses and project requirements.
4. Operating Instructions
4.1 Powering On/Off
The tool is activated by inserting a charged battery. There is no separate power switch. The tool is ready to fire when the battery is installed and the nosepiece is depressed.
4.2 Firing Nails
The P320 features a sequential firing mode for controlled operation.
- Place the nosepiece firmly against the workpiece where the nail is to be driven.
- Depress the trigger to fire a nail. The LED light will illuminate the work area.
- Lift the tool, reposition, and repeat for subsequent nails.

Image 4.1: A user is shown operating the Ryobi P320 nailer to install decorative trim around a door frame. The cordless design allows for easy maneuverability and precise nail placement in various applications.

Image 4.2: This image depicts a user utilizing the Ryobi P320 nailer for installing crown molding along a ceiling. The tool's lightweight and cordless nature facilitate overhead work and intricate detailing.
4.3 Low-Nail Indicator
The tool is equipped with a low-nail indicator, typically a window or a mechanism that prevents firing when the nail count is low. This feature helps prevent dry firing and potential damage to the workpiece or tool.
5. Maintenance
5.1 Cleaning
Regular cleaning helps maintain tool performance and extends its lifespan.
- Always remove the battery pack before cleaning.
- Use a clean, dry cloth to wipe down the exterior of the tool.
- Clear any sawdust or debris from the nosepiece and magazine area using compressed air or a small brush.
5.2 Jam Clearing
In the event of a nail jam, follow these steps carefully:
- Remove Battery: Immediately remove the battery pack from the tool.
- Open Latch: Locate and open the jam clearing latch on the nosepiece.
- Clear Jam: Use pliers or a small screwdriver to carefully remove the jammed nail and any debris. Do not force it.
- Close Latch: Close the jam clearing latch securely.
- Test: Reinsert the battery and test the tool on a scrap piece of material.
5.3 Storage
Store the tool in a dry, secure location out of reach of children. Remove the battery pack before storing for extended periods.
6. Troubleshooting
| Problem | Possible Cause | Solution |
|---|---|---|
| Nailer does not fire | Battery not installed or discharged Nosepiece not fully depressed Nail magazine empty Tool jam | Install charged battery Ensure nosepiece is firmly against workpiece Reload nails Clear jam (see Section 5.2) |
| Nails not setting properly (too deep/shallow) | Depth adjustment incorrect Wrong nail length for material | Adjust depth dial (see Section 3.3) Use appropriate nail length for material thickness |
| Nail jams frequently | Incorrect nail size/type Damaged nails Debris in magazine/nosepiece | Use recommended 18-gauge brad nails Use new, undamaged nails Clean tool thoroughly (see Section 5.1) |
| LED light not working | Battery discharged Tool malfunction | Charge or replace battery Contact customer support |
7. Specifications
| Feature | Specification |
|---|---|
| Model Number | P320 |
| Voltage | 18 Volts |
| Nail Gauge | 18 Gauge Brad Nails |
| Item Weight | 6 pounds |
| Product Dimensions | 10 x 3 x 7 inches |
| Manufacturer | Ryobi |
| Batteries Included | No |
| Batteries Required | No |
8. Warranty and Support
For warranty information, service, or technical support, please refer to the documentation included with your purchase or visit the official Ryobi website. Keep your proof of purchase for warranty claims.
Online Resources: For additional support, product registration, and frequently asked questions, please visit the official Ryobi Tools website.


