1. Product Overview
The Coleman Mach Manual RV Thermostat (Model 7330G3351) provides straightforward control over your RV's heating and cooling systems. This analog thermostat is designed for ease of use, allowing you to manage your air conditioner, heat pump, gas, hydronic, or electric strip heating, and fans from a single, convenient wall-mounted unit. Its simple slide selection switch and thermistor air temperature sensor ensure your ideal environment is maintained efficiently.
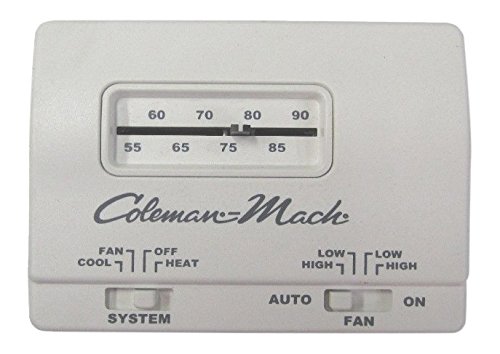
Image: A white rectangular thermostat with a digital display showing '79 COOL LO AUTO' and three gray buttons below the display.
2. Key Features
- Analog Display: Clear and easy-to-read temperature and mode indicators.
- Heating and Cooling Control: Manages both air conditioning and various heating types (heat pump, gas, hydronic, electric strip).
- Fan Speed Settings: Adjustable fan speeds (High, Low, Auto) for personalized comfort.
- Push Button Interface: Simple up/down buttons for temperature adjustment and a mode button for function selection.
- Wired Connectivity: Ensures reliable communication with your RV's HVAC system.
- Battery Powered: Operates independently, typically using standard batteries (check specifications for type).
- Wall Mount Design: Compact and stylish, designed to complement RV interiors.
3. Setup and Installation
Installation of the Coleman Mach Manual RV Thermostat is designed to be straightforward, often utilizing existing wiring from previous Coleman Mach thermostats. If you are replacing an older unit, ensure the power to your RV's HVAC system is turned off before beginning.
3.1 Wiring
- Disconnect Power: Turn off all power to your RV's heating and cooling system at the circuit breaker.
- Remove Old Thermostat: Carefully remove the old thermostat from the wall. Note the color and connection point of each wire. It is recommended to label each wire as you disconnect it.
- Connect New Thermostat: Connect the wires from your RV to the corresponding terminals on the new Coleman Mach thermostat. The wiring colors are typically consistent with previous Coleman Mach units. Refer to the detailed wiring diagram provided in the packaging for specific connections.
- Secure Wiring: Ensure all wire connections are secure and properly insulated.
3.2 Mounting
- Position Thermostat: Place the new thermostat's backplate against the wall, aligning it with the existing mounting holes if possible.
- Secure to Wall: Use the provided screws to firmly attach the thermostat backplate to the wall.
- Attach Front Cover: Snap the front cover of the thermostat onto the mounted backplate.
- Restore Power: Turn the power back on to your RV's HVAC system.
4. Operating Instructions
The Coleman Mach Manual RV Thermostat offers intuitive controls for managing your RV's climate.
4.1 Setting Temperature
- Use the Up (▲) and Down (▼) arrow buttons to adjust the desired temperature. The display will show the set temperature.
4.2 Changing Modes
- Press the Mode button (typically the bottom rectangular button) to cycle through the available operating modes:
- COOL: Activates the air conditioning.
- HEAT: Activates the heating system.
- FAN: Operates the fan only, without heating or cooling.
- OFF: Turns off all heating, cooling, and fan functions.
4.3 Fan Speed Settings
When in COOL or FAN mode, you can adjust the fan speed:
- Press the Mode button repeatedly until the desired fan speed appears on the display (e.g., LO, HI, AUTO).
- LO (Low): Fan runs continuously at a low speed.
- HI (High): Fan runs continuously at a high speed.
- AUTO: Fan operates only when heating or cooling is active, and cycles on/off with the system to maintain the set temperature. This is generally the most energy-efficient setting.
5. Maintenance
Regular maintenance ensures optimal performance and longevity of your thermostat.
- Cleaning: Periodically wipe the thermostat's exterior with a soft, dry cloth. Avoid using abrasive cleaners or solvents.
- Battery Replacement: If your model uses batteries (e.g., for display backlight or memory), replace them annually or when the low battery indicator appears. Refer to the product packaging or specific model instructions for battery type and replacement procedure.
- Clear Obstructions: Ensure no furniture, curtains, or other objects block the airflow around the thermostat, as this can affect temperature readings.
6. Troubleshooting
If you encounter issues with your thermostat, try the following troubleshooting steps:
- Thermostat Not Turning On:
- Check if the RV's main power supply to the HVAC system is on.
- Verify that the thermostat is securely mounted and all wiring connections are firm.
- If battery-powered, replace the batteries.
- Inaccurate Temperature Reading:
- Ensure the thermostat is not exposed to direct sunlight, drafts, or heat sources (e.g., lamps, appliances) that could affect its sensor.
- Clean any dust or debris from the thermostat's vents.
- System Not Reaching Set Temperature:
- Confirm the thermostat is set to the correct mode (COOL for cooling, HEAT for heating).
- Check if the fan speed is set to AUTO; if so, the fan will only run when the system is actively heating or cooling. Try setting it to LO or HI to see if the fan operates continuously.
- Ensure RV windows and doors are closed to prevent heat/cool loss.
- Verify that your RV's HVAC unit (AC or furnace) is functioning correctly.
- Display Not Lighting Up (if applicable):
- Replace the batteries.
If these steps do not resolve the issue, contact a qualified RV technician or Coleman customer support.
7. Specifications
| Attribute | Detail |
|---|---|
| Brand | Coleman |
| Model Name | 7330G3351 |
| Controller Type | Push Button |
| Special Feature | Manual Control |
| Color | Gray |
| Specific Uses For Product | Heating and Cooling |
| Temperature Control Type | Cooling |
| Connectivity Technology | Wired |
| Included Components | Thermostat |
| Power Source | Battery Powered |
| Item Weight | 0.2 Pounds (3.2 ounces) |
| Product Dimensions | 5 x 5 x 5 inches |
| Display Type | Manual |
| Control Method | Touch (referring to button presses) |
| Mounting Type | Wall Mount |
| Backlight | No |
8. Warranty and Support
For specific warranty information, please refer to the documentation included with your product or visit the official Coleman website. For technical support, troubleshooting assistance beyond this manual, or to inquire about replacement parts, please contact Coleman customer service directly.
Online Support: www.coleman.com


