
1. Product Overview
The SMART SENSOR AR907A+ is a lightweight, battery-powered insulation resistance tester designed for ease of operation. It features a large display with backlight and offers five adjustable measurement ranges, enabling high-voltage measurements for various applications. This device is essential for checking the insulation integrity of electrical systems and components.
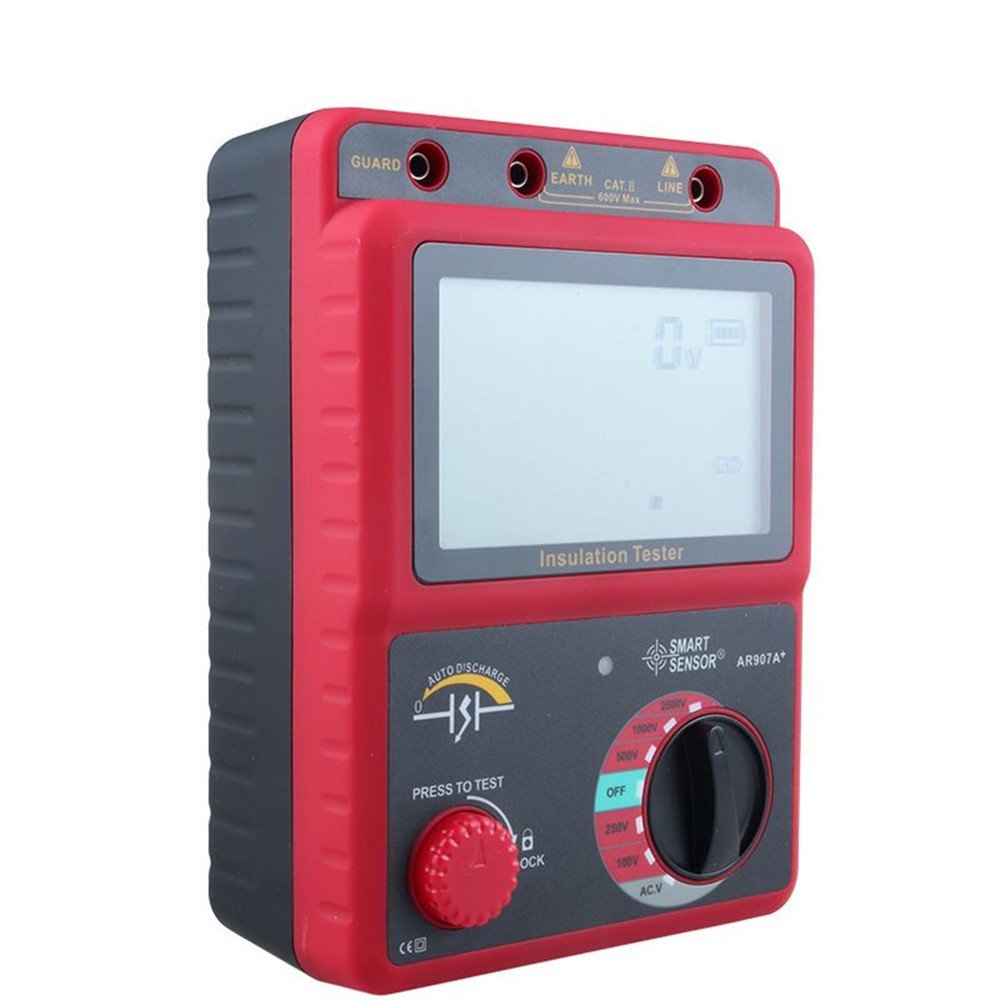
Figure 1: Front view of the SMART SENSOR AR907A+ Insulation Tester, showing the display, control knob, and test button.
2. Safety Information
Always observe the following safety precautions to prevent electric shock, injury, or damage to the meter:
- Do not use the meter if it appears damaged or if the test leads are compromised.
- Ensure the battery cover is securely closed before operation.
- Do not operate the meter in explosive atmospheres or in the presence of flammable gases or dust.
- Always disconnect power to the circuit under test before connecting or disconnecting test leads.
- Wear appropriate personal protective equipment (PPE), such as insulated gloves and safety glasses.
- Do not touch the test leads or the circuit under test during measurement.
- Verify the meter's functionality on a known voltage source before use.
- Adhere to local and national safety codes.
3. Package Contents
Verify that all items are present and undamaged upon unpacking:
- SMART SENSOR AR907A+ Insulation Tester
- Test Leads (Red, Black, Green)
- User Manual
- Carrying Case (if included with your model)
4. Setup
4.1 Battery Installation
The AR907A+ requires six (6) AAA batteries for operation. To install:
- Locate the battery compartment cover on the rear of the device.
- Unscrew or slide the cover to open the compartment.
- Insert six AAA batteries, ensuring correct polarity (+/-) as indicated inside the compartment.
- Replace the battery compartment cover and secure it.

Figure 2: Side view of the AR907A+ showing the general form factor. The battery compartment is typically on the rear.
4.2 Connecting Test Leads
Connect the test leads to the appropriate terminals on the meter:
- Connect the red test lead to the LINE terminal.
- Connect the black test lead to the EARTH terminal.
- Connect the green test lead to the GUARD terminal (for three-terminal measurements, if applicable).

Figure 3: Angled view of the AR907A+ highlighting the input terminals for test leads (Guard, Earth, Line).
5. Operating Instructions
5.1 Powering On/Off
- To power on, rotate the central rotary switch from the "OFF" position to any desired measurement range (e.g., 100V, 250V, 500V, 1000V, 2500V, or AC.V).
- To power off, rotate the switch back to the "OFF" position.
- The backlight can be activated by pressing the dedicated backlight button (if present, typically indicated by a light bulb icon).
5.2 Selecting Measurement Range
The AR907A+ offers five insulation resistance test voltages and an AC/DC voltage measurement function. Select the appropriate range using the rotary switch:
- Insulation Resistance: 100V, 250V, 500V, 1000V, 2500V. Choose a test voltage suitable for the insulation rating of the device under test.
- AC/DC Voltage: Select "AC.V" for measuring AC or DC voltage.
5.3 Performing Insulation Resistance Measurement
- Ensure the circuit under test is de-energized and safely discharged.
- Connect the test leads to the circuit: Red to the conductor, Black to ground/earth.
- Select the desired test voltage (e.g., 500V) using the rotary switch.
- Press and hold the "PRESS TO TEST" button. The test voltage will be applied, and the insulation resistance value will be displayed.
- Release the "PRESS TO TEST" button to stop the test. The circuit will automatically discharge.
- Read the displayed value.
5.4 AC/DC Voltage Measurement
- Select the "AC.V" position on the rotary switch.
- Connect the test leads across the points where voltage is to be measured.
- The meter will automatically display the AC or DC voltage.
6. Maintenance
- Cleaning: Wipe the meter casing with a damp cloth. Do not use abrasive cleaners or solvents.
- Storage: Store the meter in a cool, dry place, away from direct sunlight and extreme temperatures. If storing for extended periods, remove the batteries to prevent leakage.
- Battery Replacement: Replace batteries when the low battery indicator appears on the display. Dispose of old batteries according to local regulations.
- Calibration: For accurate measurements, periodic calibration by a qualified service center is recommended.
7. Troubleshooting
| Problem | Possible Cause | Solution |
|---|---|---|
| Meter does not power on. | Dead or incorrectly installed batteries. | Check battery polarity; replace batteries. |
| No reading during insulation test. | Test leads not properly connected; circuit not de-energized; "PRESS TO TEST" button not held. | Ensure secure lead connections; confirm circuit is off; press and hold the test button. |
| Inaccurate readings. | Dirty test leads or terminals; meter out of calibration; environmental interference. | Clean leads/terminals; consider professional calibration; test in a stable environment. |
| Display shows "OL" (Overload). | Measurement exceeds the selected range. | Select a higher measurement range or verify the circuit conditions. |
8. Specifications
| Parameter | Value |
|---|---|
| Brand | SMART SENSOR |
| Model | AR907A+ |
| Output Voltage | 100V / 250V / 500V / 1000V / 2500V |
| Measurement Range (100V) | 0.0 ~ 199.9 MΩ |
| Measurement Range (250V) | 0.0 ~ 499.9 MΩ |
| Measurement Range (500V) | 0.0 ~ 999.9 MΩ |
| Measurement Range (1000V) | 0.0 ~ 19.9 GΩ |
| Measurement Range (2500V) | 0.0 ~ 49.9 GΩ |
| Accuracy | ±5%rdg ±5dgt |
| AC/DC Voltage Measurement | 30 ~ 600V |
| Voltage Resolution | 1.0V |
| Overload Protection | AC 1200V / 10 seconds |
| Withstand Voltage | AC 8320V / 5 seconds |
| Insulation Impedance | 1000 MΩ |
| Maximum Short-Circuit Current | 1.3mA |
| Operating Environment | 0 ~ 50°C |
| Storage Temperature | -20 ~ 70°C |
| Power Supply | AAA Battery × 6 |
| Weight | 330g |
| Dimensions (L×W×H) | 173 × 101 × 55mm |
9. Warranty and Support
This SMART SENSOR AR907A+ Insulation Tester is covered by a manufacturer's warranty. Please refer to the warranty card included with your product for specific terms and conditions.
For technical support, service, or warranty claims, please contact your local distributor or the SMART SENSOR customer service department. Contact information can typically be found on the manufacturer's official website or on the product packaging.
