
1. Introduction
This manual provides detailed instructions for the installation, setup, operation, and maintenance of your MTX Audio THUNDER75.4 Thunder Series 4-Channel Car Amplifier. Designed for optimal audio performance, this amplifier features Class A/B Topology, Variable LPF and HPF, Surface Mount PCB, and a Small Footprint Design. Please read this manual thoroughly before use to ensure proper function and safety.
2. Safety Information
Always observe the following safety precautions to prevent injury or damage to the amplifier or vehicle:
- Disconnect the vehicle's negative battery terminal before starting any installation.
- Ensure proper grounding of the amplifier to the vehicle chassis.
- Use appropriate gauge power and speaker wires as recommended.
- Avoid mounting the amplifier in areas exposed to moisture or excessive heat.
- Do not operate the amplifier if it is damaged or malfunctioning.
- Professional installation is recommended for optimal performance and safety.
3. What's in the Box
Your MTX Audio THUNDER75.4 amplifier package should contain the following items:
- MTX Audio THUNDER75.4 Amplifier
- Owner's Manual
- Mounting Hardware (screws, Allen wrenches)

4. Product Overview
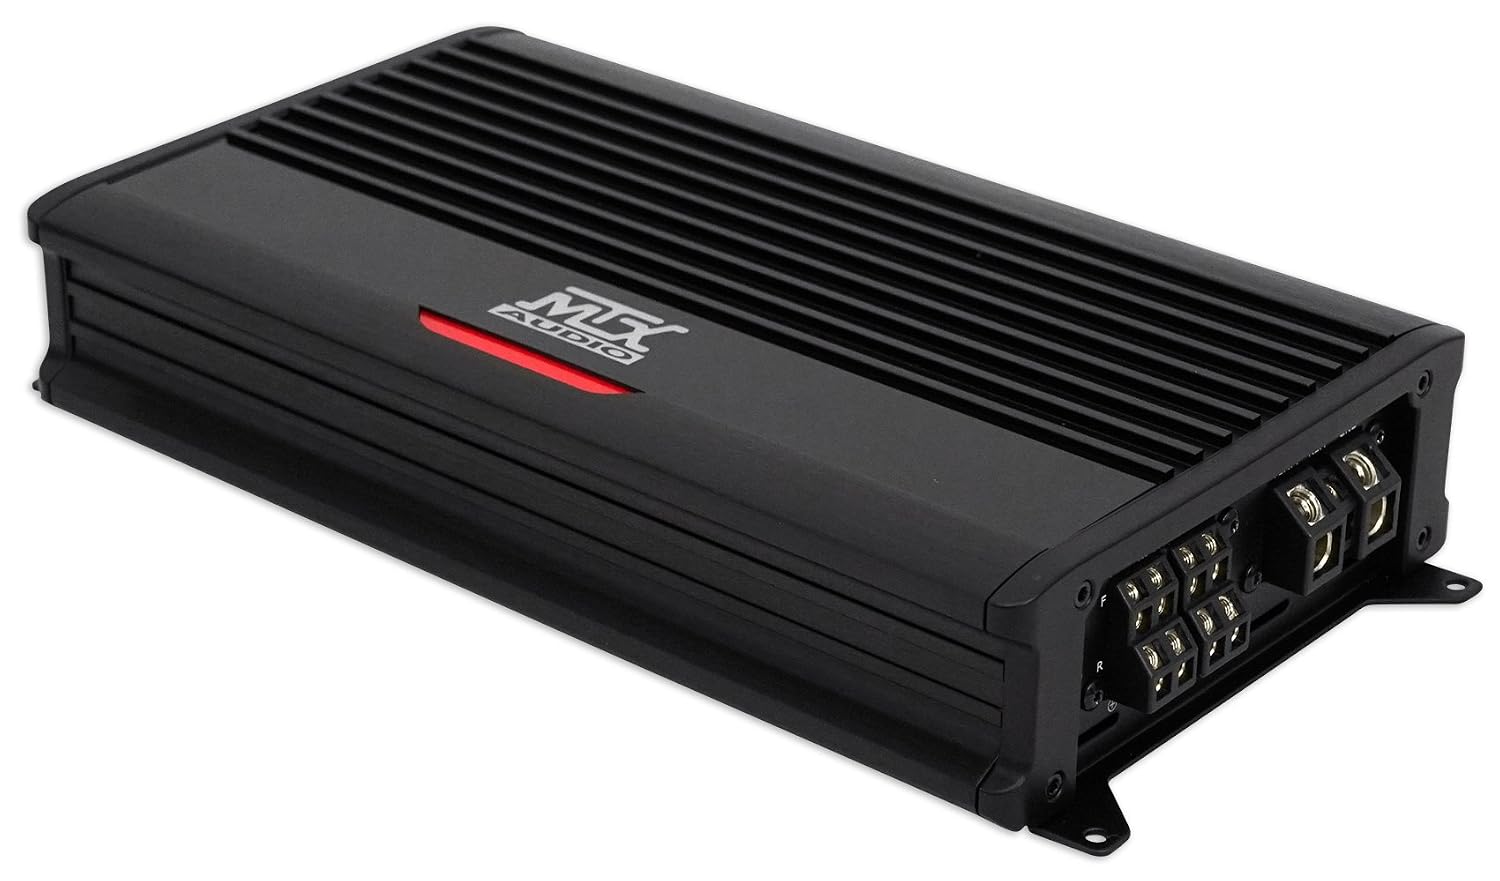
The MTX Audio THUNDER75.4 is a 4-channel car amplifier designed to deliver clear and powerful audio. Below are images highlighting the amplifier's key components and connections.

4.1. Input and Power Connections

The rear panel of the amplifier houses the main power, ground, remote turn-on, and speaker output terminals. These are screw compression terminals for secure connections. Fuses are also located here for protection.
4.2. Control Panel

The front panel features RCA input jacks for connecting to your head unit, along with various adjustment controls:
- INPUT (RCA): Connects to the RCA outputs of your head unit.
- GAIN: Adjusts the input sensitivity to match the output of your head unit. This is not a volume control.
- BASS BOOST: Increases bass output at a specific frequency.
- SUB SONIC: A high-pass filter for subwoofers, removing ultra-low frequencies that are inaudible and can damage speakers.
- LPF (Low Pass Filter): Allows frequencies below the set point to pass through, typically used for subwoofers.
- HPF (High Pass Filter): Allows frequencies above the set point to pass through, typically used for full-range speakers.
- PWR/PROTECT: Indicators for power status and protection mode.
5. Installation
Proper installation is crucial for the performance and longevity of your amplifier. Ensure all connections are secure and correctly polarized.
5.1. Mounting the Amplifier
Mount the amplifier in a location that allows for adequate ventilation and is protected from moisture. Avoid mounting directly on carpet or in enclosed spaces without airflow. Use the provided mounting hardware to secure the amplifier.
5.2. Wiring Connections
- Power (BATT+): Connect a heavy-gauge wire from the amplifier's +BATT terminal directly to the positive terminal of the vehicle's battery. Install an in-line fuse within 18 inches of the battery.
- Ground (GND): Connect a heavy-gauge wire from the amplifier's GND terminal to a clean, unpainted metal surface on the vehicle chassis. Ensure a solid electrical connection.
- Remote Turn-On (REM): Connect a smaller gauge wire from the amplifier's REM terminal to the remote turn-on output of your head unit.
- RCA Inputs: Connect RCA cables from your head unit's pre-amp outputs to the amplifier's INPUT jacks.
- Speaker Outputs: Connect your speakers to the SPEAKER terminals. For 4-channel operation, connect each speaker to its respective channel. For bridged operation (e.g., for subwoofers), refer to the 4Ω BRIDGED markings on the amplifier for correct wiring.
For a visual guide on proper installation, you can visit the MTX Thunderforce YouTube channel: MTX Thunderforce Installation Guide
6. Setup & Initial Configuration
Setting the amplifier's gain correctly is crucial for achieving optimal sound quality and preventing damage to your speakers and amplifier. The gain control should be set to match the output voltage of your head unit, not as a volume control.
6.1. Setting Amplifier Gain (Using Ohm's Law)
Follow these steps to accurately set the gain using a multimeter and a test tone:
- Calculate Target Voltage: Use the formula V = √(P × R), where V is the desired RMS voltage, P is the amplifier's RMS power output, and R is the speaker load resistance. For example, for a 500W amplifier at 2Ω, V = √(500 × 2) = √1000 ≈ 31.62 volts.
- Prepare Test Tone: Obtain a 50Hz test tone recorded at 0dB (a normal CD level).
- Disconnect Speakers: Unload the amplifier by disconnecting all speakers. This prevents stress on the speakers during the setup process.
- Head Unit Settings: Turn the head unit volume to its maximum clean output level (usually around 75-85% of max volume to avoid distortion). Ensure all EQ, bass boost, and other sound enhancements on the head unit are flat or off.
- Amplifier Settings: Turn the amplifier's GAIN control all the way down (minimum). Set BASS BOOST, SUB SONIC, and LPF controls to their minimum or off positions. Set HPF to its maximum or off position to provide the widest bandwidth.
- Connect Multimeter: Connect your multimeter (set to AC voltage) to the amplifier's speaker output terminals.
- Play Test Tone: Play the 50Hz test tone through your head unit.
- Adjust Gain: Slowly increase the amplifier's GAIN control until the multimeter reads your calculated target voltage (e.g., 31.62 volts).
- Disconnect Multimeter: Once the target voltage is reached, disconnect the multimeter.
- Reconnect Speakers: Turn down the head unit volume, reconnect your speakers, and then you can adjust your filters and bass boost as desired.
Watch the official MTX Audio video for a visual demonstration of setting your amplifier gains:
6.2. Filter and Bass Boost Adjustment
- LPF (Low Pass Filter): Adjust this control to set the upper frequency limit for your subwoofers. A common starting point is 80-100Hz.
- HPF (High Pass Filter): Adjust this control to set the lower frequency limit for your full-range speakers. A common starting point is 80-100Hz, matching the LPF of your subwoofer amplifier.
- SUB SONIC: If using a subwoofer, adjust this filter to remove frequencies below the subwoofer's usable range (e.g., 20-30Hz) to improve efficiency and prevent damage.
- BASS BOOST: Use this sparingly. Excessive bass boost can introduce distortion and potentially damage speakers. Adjust to taste after all other settings are finalized.
7. Operation
Once properly installed and configured, your MTX Audio THUNDER75.4 amplifier will provide reliable audio performance. Operate your audio system responsibly to avoid hearing damage or disturbing others.
- Always turn on your head unit before the amplifier (remote turn-on handles this automatically).
- Adjust volume from your head unit. The amplifier's gain is a sensitivity setting, not a volume control.
- If you notice any distortion, reduce the volume immediately to prevent speaker damage.
8. Maintenance
The MTX Audio THUNDER75.4 amplifier requires minimal maintenance. Regular checks can help ensure its longevity:
- Cleaning: Periodically wipe the amplifier's exterior with a soft, dry cloth. Do not use harsh chemicals or abrasive cleaners.
- Connections: Occasionally check all power, ground, remote, and speaker connections to ensure they are tight and free from corrosion.
- Ventilation: Ensure the amplifier's cooling fins are free from obstructions to allow proper heat dissipation.
9. Troubleshooting
If you experience issues with your amplifier, refer to the following common problems and solutions:
| Problem | Possible Cause | Solution |
|---|---|---|
| No Power / No Sound | Blown fuse, loose power/ground/remote wire, amplifier in protect mode. | Check fuses, verify all power connections, ensure proper grounding, check for shorted speaker wires. |
| Distorted Sound | Gain set too high, improper filter settings, damaged speakers. | Re-adjust gain using a multimeter, check LPF/HPF/Sub Sonic settings, inspect speakers for damage. |
| Amplifier Overheating | Insufficient ventilation, impedance too low, prolonged high-volume use. | Ensure proper airflow around the amplifier, verify speaker impedance, reduce volume. |
10. Specifications
Key technical specifications for the MTX Audio THUNDER75.4 amplifier:
- Model Number: THUNDER75.4
- Output Power: 400 Watt RMS (as per product title, though specifications list 100 Watts, the title is more prominent for RMS)
- Number of Channels: 4
- Topology: Class A/B
- Voltage: 12 Volts (DC)
- Minimum Supply Voltage: 12 Volts
- Maximum Supply Voltage: 15 Volts
- Item Weight: 4.5 pounds
- Product Dimensions (L x W x H): 14.43 x 7.5 x 4 inches
- Material: Metal
- UPC: 715442241729
11. Warranty and Support
For warranty information, please refer to the documentation included with your product or visit the official MTX Audio website. If you require technical assistance or have further questions regarding your THUNDER75.4 amplifier, please contact MTX Audio Technical Support.
MTX Audio Technical Support: 800.225.5689


