
Introduction
This manual provides detailed instructions for the safe installation, operation, and maintenance of your Progress Lighting Ashmore Collection 3-Light Water Seeded Glass New Traditional Outdoor Medium Wall Lantern Light (Model P5650-20). This lantern features classic, old-world styling and a durable cast aluminum housing. A seeded water glass diffuser works to reduce glare and to minimize cleaning requirements. UV resistant painted finish. Please read all instructions carefully before beginning installation.
Important Safety Information
- Always turn off the power at the main circuit breaker before installing, servicing, or cleaning this fixture.
- Consult a qualified electrician if you are unsure about the installation process.
- All wiring connections must be in accordance with local and national electrical codes.
- This product may expose you to chemicals known to the State of California to cause cancer and birth defects or other reproductive harm. For more information, go to www.P65Warnings.ca.gov.
Package Contents
Verify that all components are present before beginning installation. The package includes the product and an installation sheet. If any parts are missing or damaged, do not attempt to assemble or install the product.
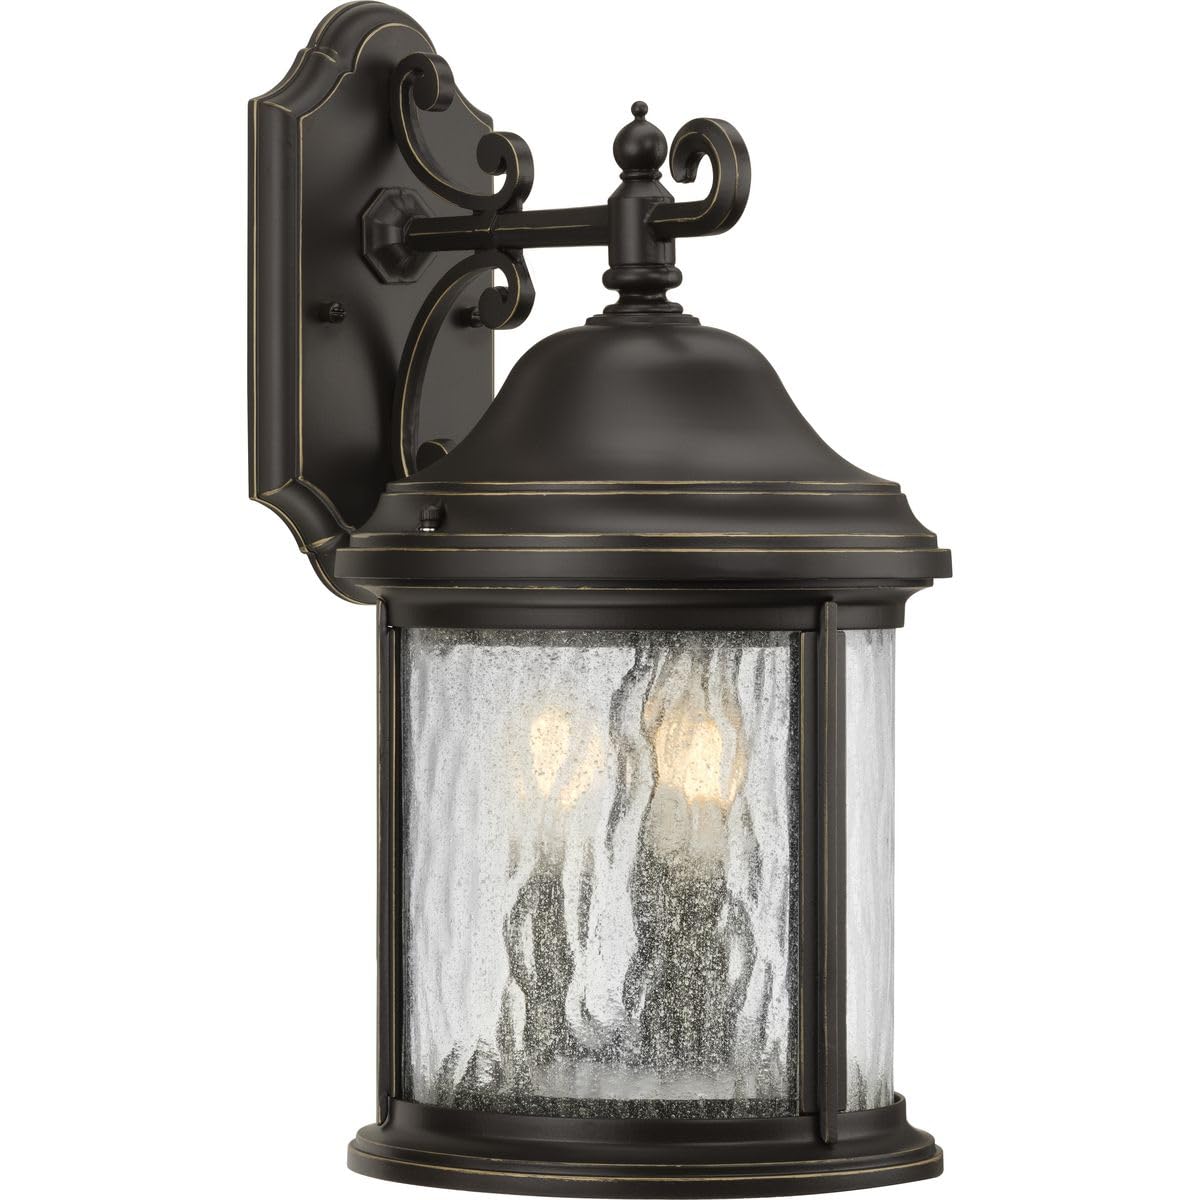
Figure 1: Front view of the Ashmore outdoor wall lantern. This image displays the overall design, including the antique bronze finish and the textured water seeded glass panels.
Installation Instructions
This section provides general guidelines for installing your outdoor wall lantern. Refer to the included installation sheet for specific, detailed steps and diagrams.
1. Sizing and Placement
Proper sizing and placement are crucial for optimal aesthetic and functional lighting. Consider the height of your door and the width of the area where the fixture will be mounted.
Video 1: Official guide on "Outdoor Lighting - Sizing and Selection" by Progress Lighting. This video provides general recommendations for selecting the appropriate size and mounting height for outdoor lighting fixtures, including wall lanterns, for various applications like entryways and garages.
- For entrances and garages, select fixtures that measure 1/4 to 1/3 of the door's height.
- Mount wall lanterns at eye level, approximately 5.5 to 6 feet from the ground to the fixture's center.
- For double entry doors, mount lights on either side, 8 to 10 feet apart.
- For single-car garages, use one wall lantern. For two or more car garages, mount lights on either side of the doors or across the top for even illumination.

Figure 2: Sizing guide for wall lanterns. This diagram illustrates that wall lanterns should measure approximately 1/4 the height of the door for balanced aesthetics. For example, a 96-inch door would pair well with a 24-inch tall fixture.

Figure 3: Garage lighting placement. This image demonstrates how to size and place wall lanterns around a garage door, suggesting a 24-inch tall fixture for a 16-foot wide garage door, placed on either side.
2. Mounting the Fixture
- Ensure the power is off at the circuit breaker.
- Attach the mounting bracket to the junction box using the provided screws.
- Connect the fixture wires to the house wires according to the included wiring diagram (typically black to black, white to white, and ground to ground). Secure connections with wire nuts.
- Carefully tuck all wires into the junction box.
- Align the fixture with the mounting bracket and secure it with the decorative nuts or screws.

Figure 4: Detail of the fixture's mounting arm. This image highlights the decorative scrollwork and the sturdy connection point to the backplate, which attaches to the wall.
3. Installing Bulbs and Glass Panels
- Install three incandescent bulbs (E12 base, 60 watts maximum each) into the sockets. Do not exceed the maximum wattage.
- Carefully place the water seeded glass panels into the fixture frame. Ensure they are securely seated.

Figure 5: Detail of the water seeded glass. This close-up shows the unique texture of the glass, designed to reduce glare and add a traditional aesthetic.
Operating Instructions
Once installed, restore power at the circuit breaker. The fixture can be operated via a standard wall switch or an app, depending on your home's electrical setup and any smart home integrations.
Maintenance
- Cleaning: To clean the fixture, turn off the power and wipe it with a soft, damp cloth. Do not use abrasive cleaners or solvents, as these may damage the finish or glass.
- Bulb Replacement: Ensure power is off before replacing bulbs. Allow bulbs to cool completely before handling. Replace with E12 base, 60-watt maximum incandescent bulbs.
- UV Resistant Finish: The UV resistant painted finish helps maintain the fixture's appearance over time. Regular cleaning will help preserve its longevity.
Troubleshooting
| Problem | Possible Cause | Solution |
|---|---|---|
| Fixture does not light. |
|
|
| Bulbs burn out quickly. |
|
|
Specifications
| Brand | Progress Lighting |
| Model Number | P5650-20 |
| Color | Bronze |
| Material | Aluminum, Glass |
| Style | Traditional |
| Light Fixture Form | Sconce |
| Indoor/Outdoor Usage | Outdoor |
| Power Source | AC |
| Light Source | Incandescent |
| Number of Light Sources | 3 |
| Voltage | 120 Volts |
| Wattage | 60 watts (per bulb, max) |
| Bulb Base | E12 |
| Water Resistance Level | Water Resistant |
| Brightness | 2340 lumen |
| Item Dimensions (L x W x H) | 8.38"L x 10.38"W x 16.5"H |
| Item Weight | 1 Pounds |
| Required Assembly | Yes |
Warranty and Support
This Progress Lighting product comes with a 1-year Limited Warranty. This warranty guarantees your complete satisfaction with your purchase and includes professional after-sales customer service support. For warranty claims or technical assistance, please contact Progress Lighting customer service.


