1. Introduction
This manual provides detailed instructions for the installation, operation, and maintenance of your Plextor PX-128M5PRO 128GB Solid State Drive (SSD). The PX-128M5PRO is a high-performance 2.5-inch internal SSD designed to enhance your computer's speed and responsiveness with its SATA III interface.
2. Safety Information
- Always handle the SSD with care to avoid physical damage.
- Ensure your computer is powered off and unplugged before installation.
- Discharge static electricity by touching a grounded metal object before handling the SSD.
- Do not expose the SSD to extreme temperatures or moisture.
- Refer to your computer's manual for specific instructions on opening the case and installing internal components.
3. Package Contents
Verify that your package contains the following items:
- Plextor PX-128M5PRO 128GB Solid State Drive
- Quick Installation Guide (if included)
Note: Mounting screws and SATA cables are typically not included and may need to be purchased separately.
4. Setup and Installation
Follow these steps to install your Plextor PX-128M5PRO SSD into a desktop or laptop computer.
4.1 Physical Installation (Desktop)
- Prepare your system: Power off your computer and unplug all cables. Open the computer case.
- Locate a drive bay: Find an available 2.5-inch drive bay. If your case only has 3.5-inch bays, you may need a 2.5-inch to 3.5-inch adapter bracket.
- Mount the SSD: Secure the SSD into the drive bay or adapter bracket using appropriate screws.
- Connect cables: Connect one end of a SATA data cable to the SSD and the other end to an available SATA port on your motherboard. Connect a SATA power cable from your power supply unit to the SSD.

Image: Plextor PX-128M5PRO SSD showing the SATA data and power connectors on the side.
4.2 Physical Installation (Laptop)
- Prepare your system: Power off your laptop, unplug the AC adapter, and remove the battery.
- Access the drive bay: Refer to your laptop's manual to locate and open the hard drive bay. This usually involves removing a panel on the bottom of the laptop.
- Remove old drive (if applicable): Carefully disconnect and remove the existing hard drive.
- Install the SSD: Slide the Plextor PX-128M5PRO SSD into the drive bay, ensuring it connects securely to the SATA connector. Secure it with any retaining clips or screws.
- Reassemble: Close the drive bay cover, reinsert the battery, and plug in the AC adapter.
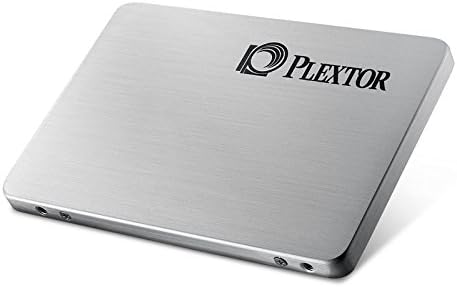
Image: Angled view of the Plextor PX-128M5PRO SSD, illustrating its compact 2.5-inch form factor suitable for laptops and desktops.
4.3 Initializing and Formatting the SSD (Windows)
After physical installation, the SSD needs to be initialized and formatted for use.
- Boot your computer: Start your computer.
- Open Disk Management: Right-click on the Start button (Windows 10/8.1) or 'My Computer' (Windows 7), select 'Disk Management'.
- Initialize Disk: A dialog box should appear prompting you to initialize the new disk. Select 'GPT' (GUID Partition Table) for drives larger than 2TB or for UEFI systems, or 'MBR' (Master Boot Record) for older systems or drives under 2TB. Click 'OK'.
- Create New Simple Volume: Right-click on the 'Unallocated' space of your new SSD and select 'New Simple Volume'. Follow the wizard to assign a drive letter, choose a file system (NTFS is recommended for Windows), and perform a quick format.
4.4 Operating System Installation (Optional)
If you intend to use the SSD as your primary boot drive, you will need to install an operating system on it. This typically involves booting from an OS installation media (USB drive or DVD) and selecting the Plextor SSD as the target drive for installation.
5. Operating the SSD
Once installed and formatted, your Plextor PX-128M5PRO SSD operates like any other storage drive. However, SSDs have specific characteristics that optimize their performance and longevity.
- Performance: The SATA III interface provides high-speed data transfer, significantly reducing boot times and application loading times compared to traditional hard drives.
- TRIM Support: Ensure your operating system has TRIM enabled. TRIM helps the SSD maintain its performance over time by efficiently managing data blocks. Windows 7 and later versions typically enable TRIM by default for SSDs.
- No Defragmentation: Unlike HDDs, SSDs do not benefit from defragmentation. In fact, defragmenting an SSD can reduce its lifespan. Ensure your operating system's defragmentation utility is set to skip SSDs.
- Over-provisioning: The drive utilizes internal over-provisioning to manage wear leveling and garbage collection, contributing to its durability and consistent performance.
6. Maintenance
Proper maintenance ensures the longevity and optimal performance of your SSD.
- Firmware Updates: Periodically check the official Plextor website for firmware updates. Firmware updates can improve performance, stability, and compatibility. Follow the instructions provided by Plextor carefully when performing a firmware update.
- Monitor Drive Health: Use S.M.A.R.T. (Self-Monitoring, Analysis, and Reporting Technology) tools to monitor the health and lifespan of your SSD. Many third-party utilities are available for this purpose.
- Maintain Free Space: While not strictly necessary, keeping some free space on your SSD (e.g., 10-15%) can help maintain performance, especially for garbage collection and wear leveling algorithms.
7. Troubleshooting
If you encounter issues with your Plextor PX-128M5PRO SSD, refer to the following common troubleshooting steps.
7.1 Drive Not Detected
- Check physical connections: Ensure both the SATA data and power cables are securely connected to the SSD and the motherboard/PSU.
- Check BIOS/UEFI settings: Enter your computer's BIOS/UEFI setup and verify that the SATA port the SSD is connected to is enabled. Ensure the SATA mode is set to AHCI for optimal SSD performance.
- Try a different port/cable: Test the SSD with a different SATA data cable, power cable, or SATA port on the motherboard.
- Check Disk Management: If the drive is detected in BIOS but not in Windows Explorer, check Disk Management to see if it needs to be initialized and formatted (refer to Section 4.3).
7.2 Slow Performance
- Verify SATA III connection: Ensure the SSD is connected to a SATA III (6Gb/s) port on your motherboard. Connecting to a SATA II (3Gb/s) port will limit performance.
- Check TRIM status: Confirm that TRIM is enabled for your SSD. You can check this via the command prompt (admin) using
fsutil behavior query disabledeletenotify. A result of 0 means TRIM is enabled. - Avoid defragmentation: Ensure your operating system is not attempting to defragment the SSD.
- Update drivers/firmware: Ensure your motherboard's SATA drivers and the SSD's firmware are up to date.
8. Specifications
| Feature | Specification |
|---|---|
| Model Number | PX-128M5PRO |
| Capacity | 128 GB |
| Form Factor | 2.5-inch |
| Interface | SATA III (6Gb/s) |
| Dimensions (LxWxH) | 4 x 2.8 x 0.4 inches (101.6 x 71.1 x 10.2 mm) |
| Weight | 3.2 ounces (90.7 grams) |
| Hardware Platform Compatibility | PC, Mac (with appropriate SATA connections) |
| Installation Type | Internal Hard Drive |

Image: Top-down view of the Plextor PX-128M5PRO SSD, highlighting its sleek design and branding.
9. Warranty and Support
The Plextor PX-128M5PRO SSD comes with a 5-year warranty from the date of purchase. This warranty covers defects in materials and workmanship under normal use.
For technical support, warranty claims, or further assistance, please visit the official Plextor website or contact their customer service department. Keep your proof of purchase for warranty validation.
Please note that the warranty does not cover damage caused by improper installation, misuse, unauthorized modification, or natural disasters.


