
Introduction
The Martha Stewart Crafts Circle Edge Paper Punch Starter Kit allows you to create decorative die-cut borders on paper circles ranging from 6-inch to 12-inch diameters. This innovative tool eliminates the need for pre-trimming paper, simplifying the crafting process. It is ideal for making doilies, decorations, placemats, and cards with unique borders. The kit includes a base, an eyelet doily punch cartridge, and instructions for use. Additional punch designs are available separately to expand your creative options.
- Punch circles with die-cut borders without requiring paper trimming.
- Create circles from 6-inch to 12-inch in diameter using a single tool.
- Includes an eyelet doily design punch cartridge.
Setup
Before using your Circle Edge Paper Punch, ensure all components are present and properly assembled.
- Unpack Components: Carefully remove the punch base and the eyelet doily punch cartridge from the packaging.
- Assemble the Base: The punch base is designed to hold the paper and guide the cartridge. Ensure it is placed on a stable, flat surface.
- Insert Punch Cartridge: Slide the eyelet doily punch cartridge into the designated slot on the base. Ensure it clicks securely into place. The cartridge should fit snugly to prevent movement during operation.

Description of Image: This image displays the Martha Stewart Crafts Circle Edge Paper Punch Starter Kit. It shows the white punch base with a decorative eyelet doily cartridge inserted. A light blue square piece of paper is positioned on the base, indicating where paper is placed for punching. A small, white, dome-shaped component, likely a guide or center marker, is also visible on the paper.
Operating Instructions
Follow these steps to create decorative circle edges with your punch kit:
- Prepare Paper: Select your desired paper. The punch can accommodate various paper types. No pre-trimming is necessary for the initial circle shape.
- Position Paper: Place the paper onto the punch base, ensuring it is flat and centered. The base has guides to help align the paper for different circle diameters (6-inch to 12-inch).
- Align Cartridge: Slide the punch cartridge along the edge of the paper, aligning the cutting mechanism with the desired starting point. The magnetic guides on the base will help hold the paper and cartridge in place.
- Punch: Firmly press down on the cartridge handle to punch the design into the paper.
- Rotate and Repeat: Lift the cartridge slightly, rotate the paper to the next alignment mark on the base, and then re-engage the cartridge. Repeat the punching process until the entire circle edge is complete. Ensure consistent alignment for a continuous pattern.
- Remove Finished Piece: Once all sections are punched, carefully remove your decorative circle from the base.
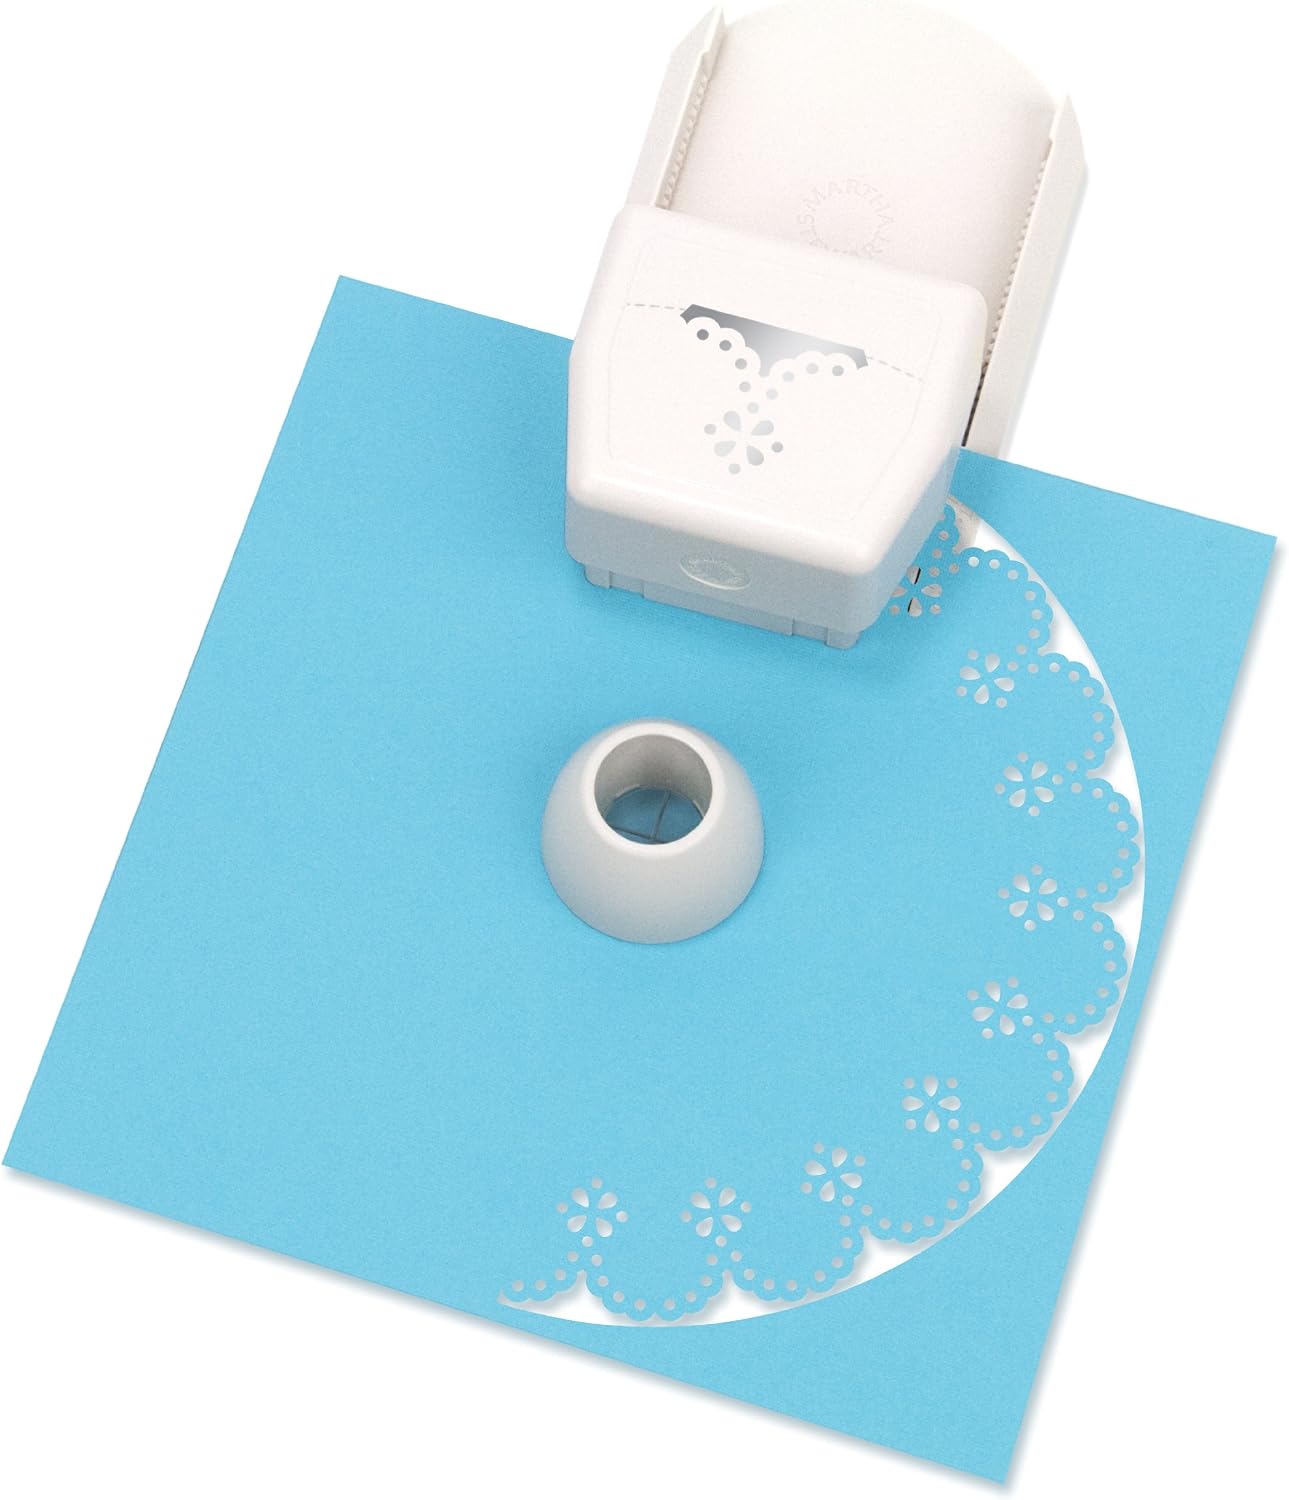
Description of Image: This image shows the Martha Stewart Crafts Circle Edge Paper Punch actively being used. A white punch mechanism is positioned over a light blue square of paper, which has already been partially punched to form a scalloped, decorative edge. A small, white, dome-shaped guide is visible in the center of the paper, assisting with circular alignment during the punching process.
Maintenance
Proper maintenance ensures the longevity and optimal performance of your punch kit.
- Cleaning: Periodically clean the punch mechanism to remove any paper dust or debris. If the punch leaves oily residue on paper, gently wipe the cutting edges with a clean, dry cloth.
- Sharpening: To maintain sharp cutting edges, punch through wax paper occasionally to lubricate the blades. For minor sharpening, punch through aluminum foil several times.
- Storage: Store the punch kit in a clean, dry place away from excessive moisture or extreme temperatures. Keep cartridges securely stored to prevent damage to the cutting elements.
Troubleshooting
If you encounter issues while using your Circle Edge Paper Punch, refer to the following common problems and solutions:
- Uneven Cuts or "Hanging Chads":
Cause: Dull blades, paper not fully inserted, or inconsistent pressure.
Solution: Try sharpening the blades using wax paper or aluminum foil (see Maintenance). Ensure paper is fully inserted and apply firm, even pressure when punching. - Punch Gets Stuck in Paper:
Cause: Paper too thick, dull blades, or debris in the mechanism.
Solution: Ensure you are using paper within the recommended thickness. Clean the punch mechanism. Sharpen the blades if they are dull. - Pattern Does Not Line Up Correctly:
Cause: Inaccurate rotation or misalignment of the cartridge.
Solution: Pay close attention to the alignment marks on the base when rotating the paper. Ensure the cartridge is securely seated and guided along the edge. - Punch Mechanism Feels Stiff or Difficult to Press:
Cause: Lack of lubrication or internal debris.
Solution: Punch through wax paper to lubricate. Inspect for any visible debris and carefully remove it. - Product Breaks After Repeated Use:
Note: This product is designed for crafting and may not withstand continuous heavy-duty industrial use. If breakage occurs under normal use, refer to the warranty information (if applicable) or contact customer support.
Specifications
| Feature | Detail |
|---|---|
| Brand | Wilton |
| Model Number (ASIN) | B00B2GK4KW |
| Item Weight | 1.3 Pounds |
| Operation Mode | Manual |
| Material (for punching) | Paper |
| Sheet Count | 1 (one sheet at a time) |
| UPC / GTIN | 798804823955, 744161533723, 683203109536, 015586959413 |
Warranty and Support
Specific warranty information for the Martha Stewart Crafts Circle Edge Paper Punch Starter Kit is not provided in this manual. For details regarding warranty coverage, returns, or technical support, please refer to the product packaging or contact Wilton customer service directly.
You may visit the official Wilton website or contact their support channels for assistance with product inquiries, replacement parts, or operational guidance not covered in this manual.