
1. Introduction
Thank you for purchasing the KLH R5100 Surround Sound Receiver. This receiver is designed to provide high-quality audio and video performance for your home entertainment system. It features multiple audio and video inputs, surround sound processing, and a powerful amplifier to deliver an immersive listening experience. Please read this manual thoroughly before operating the unit to ensure proper setup and optimal performance.
2. Important Safety Information
To reduce the risk of electric shock, fire, or damage to the unit, please observe the following safety precautions:
- Power Source: Connect the unit only to an AC 120V, 60Hz power supply.
- Ventilation: Ensure adequate ventilation. Do not block ventilation openings. Allow sufficient space around the unit for proper airflow.
- Water and Moisture: Do not expose the unit to rain, moisture, or excessive humidity. Do not place objects filled with liquids, such as vases, on the unit.
- Heat: Keep the unit away from heat sources such as radiators, heat registers, stoves, or other apparatus (including amplifiers) that produce heat.
- Cleaning: Unplug the unit from the wall outlet before cleaning. Use a dry cloth for cleaning.
- Servicing: Do not attempt to service this unit yourself. Refer all servicing to qualified service personnel.
- Cables: Protect the power cord from being walked on or pinched, particularly at plugs, convenience receptacles, and the point where they exit from the unit.
3. Package Contents
Please check that your package contains the following items:
- KLH R5100 Surround Sound Receiver
- Remote Control Unit
- User's Manual
- Audio/Video Cables (RCA type)
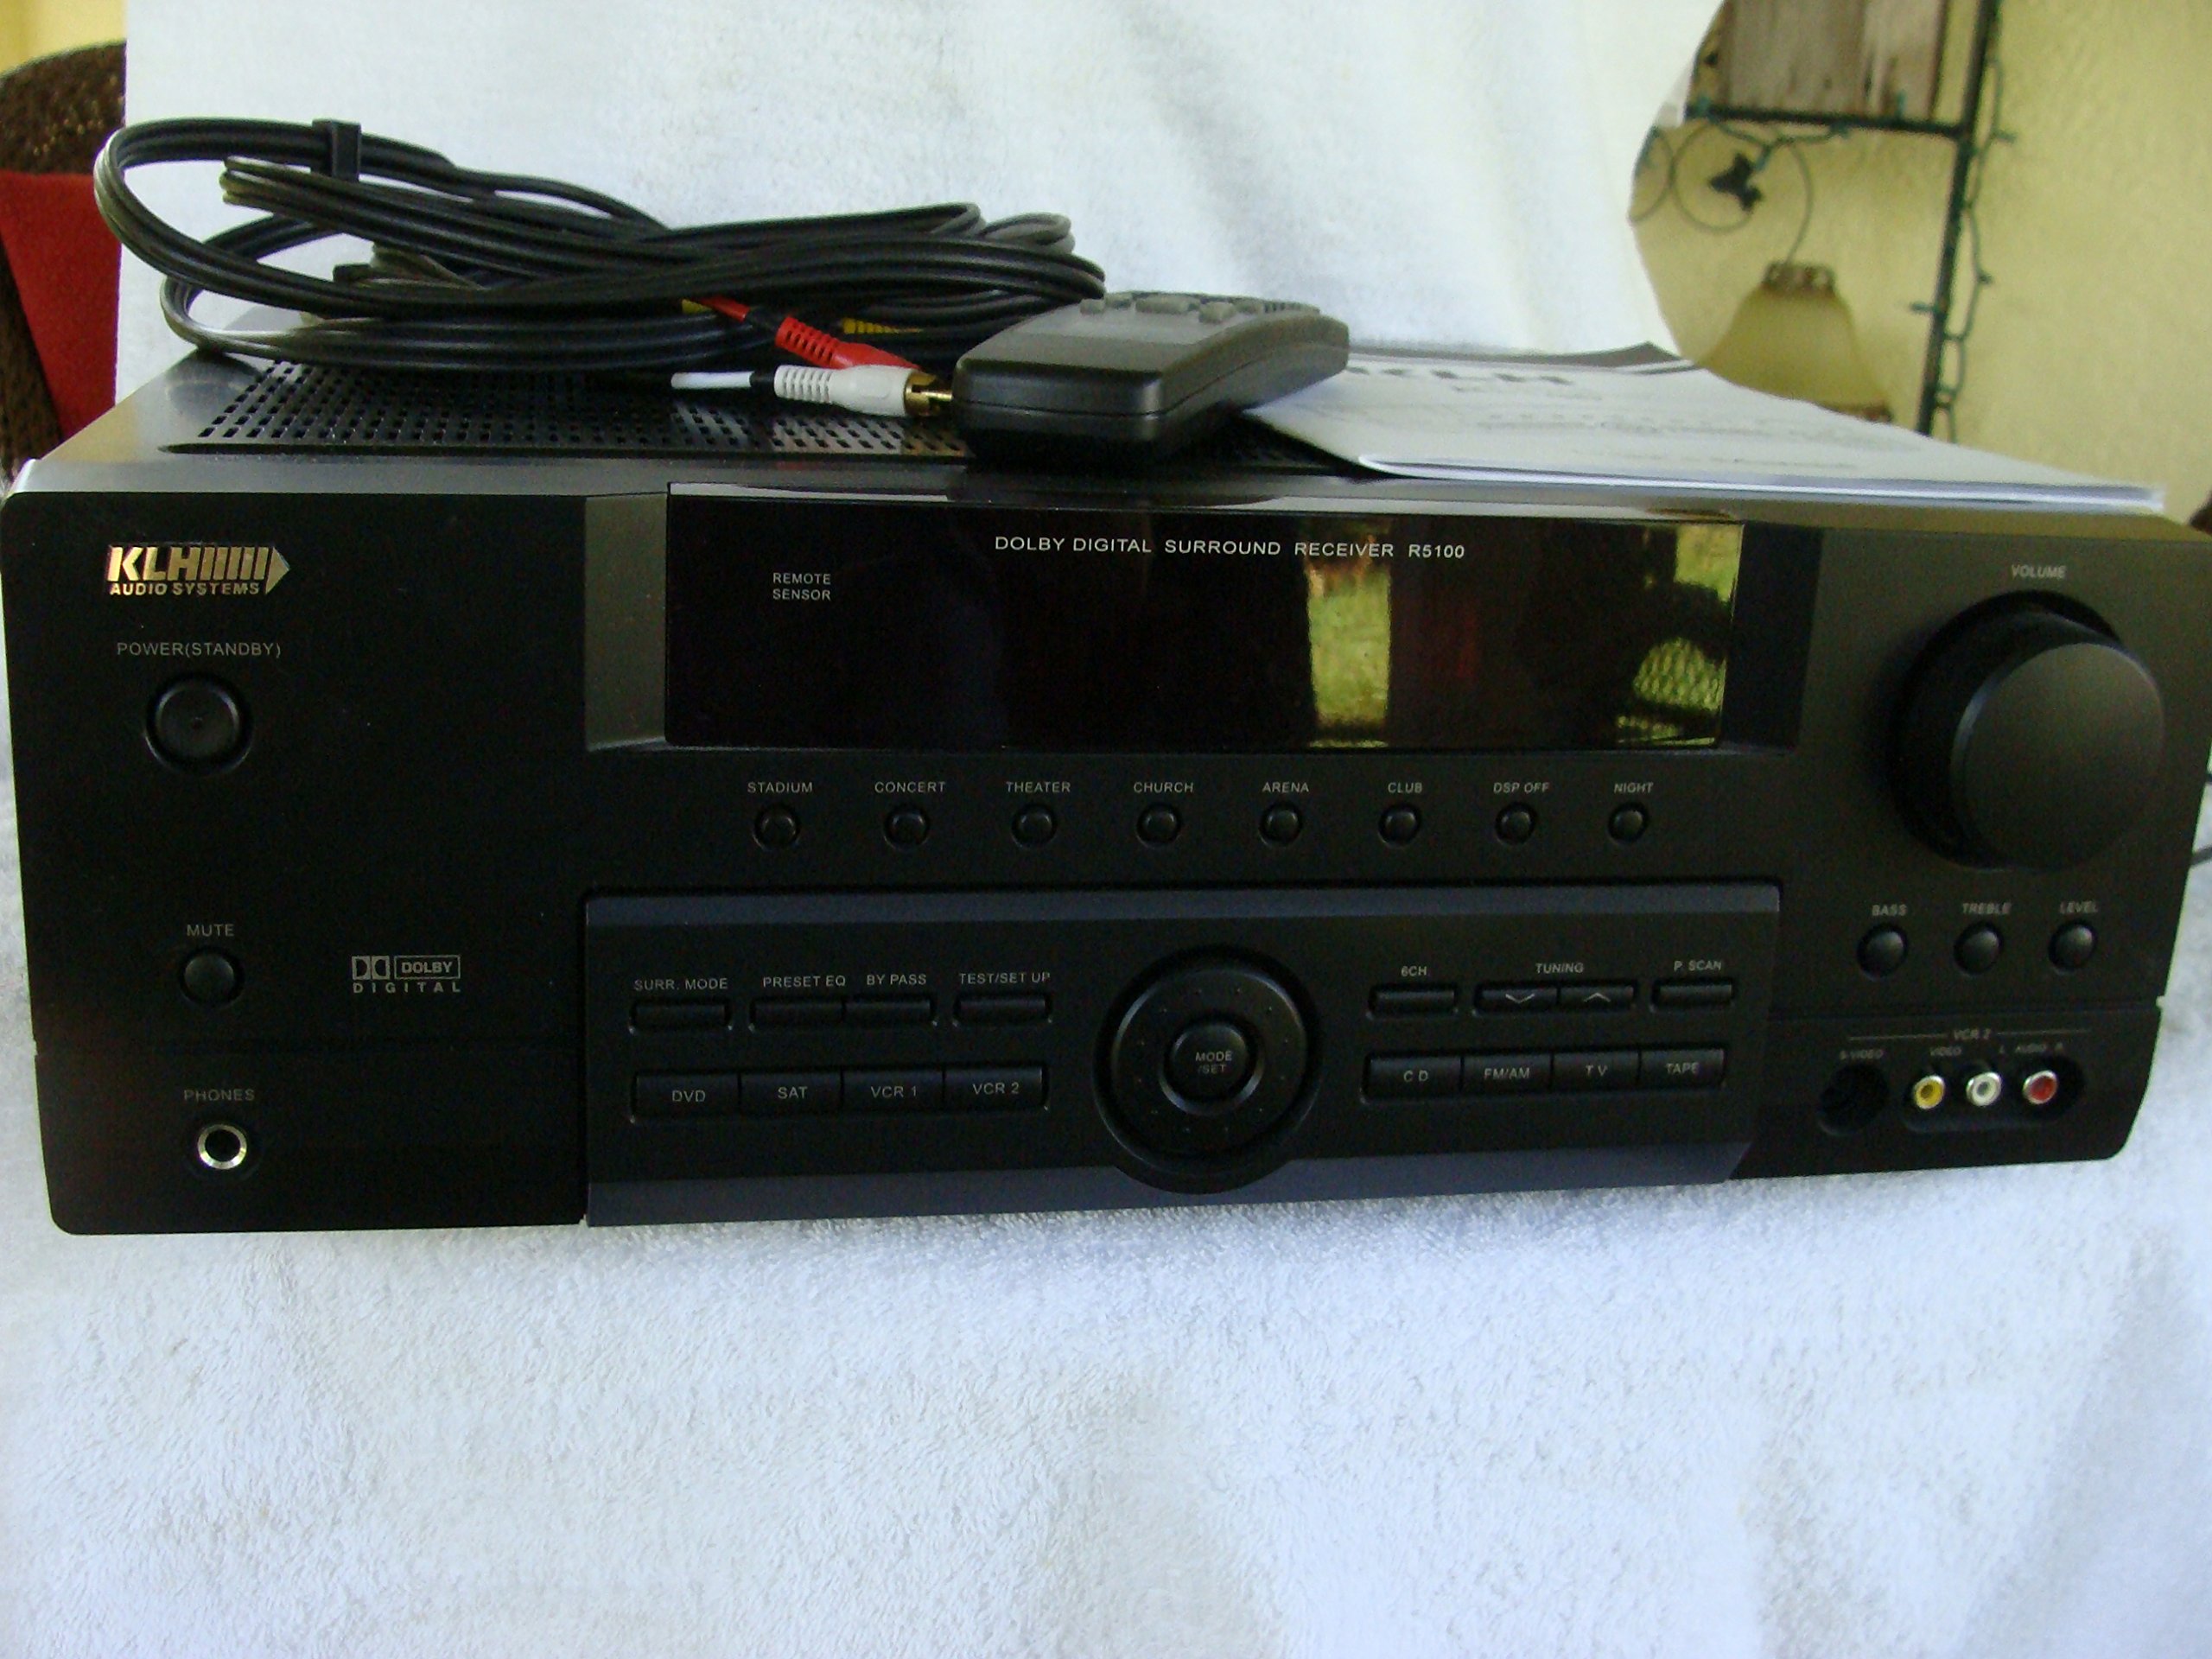
Image: The KLH R5100 receiver, its remote control, user manual, and included audio/video cables.
4. Product Overview
4.1 Front Panel Controls
The front panel provides access to essential controls and indicators for daily operation.

Image: A detailed view of the receiver's front panel, highlighting the display, volume control, and input selection buttons.
- Power Button: Turns the receiver on or off.
- Input Selectors: Buttons for DVD, SAT, VCR 1, VCR 2, CD, FM/AM, TV, TAPE to choose your audio/video source.
- Volume Knob: Adjusts the overall output volume.
- Surround Mode Buttons: Select various sound fields like Stadium, Concert, Theater, Church, Arena, Club, DSP Off, Night.
- Bass/Treble/Level: Controls for adjusting audio tone and individual channel levels.
- Headphone Jack: For private listening.
4.2 Rear Panel Connections
The rear panel houses all input and output terminals for connecting your audio and video components, as well as speakers.

Image: The full rear panel of the receiver, displaying all connection ports for audio, video, and speakers.
- Speaker Terminals: Connections for Main (Front Left/Right), Center, and Rear (Surround Left/Right) speakers.
- Audio Inputs (RCA): For connecting CD players, tape decks, VCRs, TVs, and other stereo audio sources.
- Video Inputs/Outputs (RCA/S-Video): For connecting video sources like DVD players, VCRs, and TVs.
- Digital Audio Inputs (Optical/Coaxial): For connecting digital audio sources like DVD players or set-top boxes.
- 6CH Direct Input: For connecting external multi-channel decoders or players with 5.1 analog outputs.
- Subwoofer Out: RCA output for connecting an active subwoofer.
- Antenna Terminals: For FM and AM antennas.
4.3 Remote Control Unit
The remote control provides convenient access to all receiver functions from your listening position.

Image: A close-up view of the remote control unit, detailing its buttons for various functions.
- Power On/Off: Turns the receiver on or off.
- Input Selectors: Dedicated buttons for each input source (DVD, CD, TV, etc.).
- Volume Up/Down: Adjusts the master volume.
- Mute: Temporarily silences the audio output.
- Surround Mode: Cycles through available surround sound modes.
- Level/Test: For adjusting individual speaker levels and running a test tone.
- Tuner Controls: For FM/AM station tuning and memory functions.
5. Setup
5.1 Connecting Your Speakers
Ensure the receiver is unplugged from the power outlet before making any connections.
- Front Speakers: Connect your main left and right speakers to the 'MAIN SPEAKERS (8Ω)' terminals. Ensure correct polarity (+ to + and - to -).
- Center Speaker: Connect your center channel speaker to the 'CENTER SPEAKER (8Ω)' terminals.
- Rear Speakers: Connect your surround left and right speakers to the 'REAR SPEAKERS (8Ω)' terminals.
- Subwoofer: Connect an active subwoofer to the 'SUBWOOFER OUT' RCA jack using a single RCA cable.

Image: Detailed view of the speaker connection terminals on the rear panel.
5.2 Connecting Audio/Video Sources
Use appropriate cables (RCA, Optical, Coaxial) to connect your source components to the receiver.
- DVD Player: Connect the audio output of your DVD player to the 'DVD' audio input jacks (RCA) on the receiver. For digital audio, use either the 'DIGITAL IN OPTICAL' or 'DIGITAL IN COAXIAL' input. Connect the video output to the 'DVD' video input.
- CD Player: Connect the audio output of your CD player to the 'CD' audio input jacks (RCA).
- TV/Cable Box: Connect the audio output of your TV or cable box to the 'TV' audio input jacks (RCA). Connect video output to the 'TV' video input.
- Other Devices: Use 'SAT', 'VCR 1', 'VCR 2', or 'TAPE' inputs for other audio/video components as needed.

Image: A close-up of the digital audio inputs (Coaxial, Optical) and the 6-channel direct input section on the rear panel.
5.3 Antenna Connection
Connect the supplied FM and AM antennas to their respective terminals on the rear panel for radio reception.
6. Operating Instructions
6.1 Basic Operation
- Power On: Press the Power button on the front panel or remote control.
- Select Input: Press the desired input selector button (e.g., 'DVD', 'CD') on the front panel or remote control to choose your source.
- Adjust Volume: Turn the Volume knob on the front panel or use the Volume Up/Down buttons on the remote control.
6.2 Surround Sound Modes
The R5100 offers various sound modes to enhance your listening experience:
- Stadium: Simulates the acoustics of a large stadium.
- Concert: Creates a concert hall ambiance.
- Theater: Optimized for movie playback, enhancing dialogue and effects.
- Church: Replicates the spaciousness of a church.
- Arena: Provides a wide, open sound field.
- Club: Simulates a lively club environment.
- DSP Off: Disables digital sound processing for a direct stereo signal.
- Night: Reduces dynamic range for late-night listening without disturbing others.
Press the 'SURR. MODE' button on the remote or front panel to cycle through these modes.
6.3 Tone Control
Use the BASS and TREBLE controls on the front panel or remote to adjust the low and high frequency response. The LEVEL controls allow for fine-tuning of individual speaker output levels.
6.4 Tuner Operation
To listen to radio:
- Press the 'FM/AM' input selector.
- Use the 'TUNING' buttons on the front panel or remote to find stations.
- Press 'MEMORY' to store favorite stations, and 'P.SCAN' to scan through presets.
7. Maintenance
To ensure the longevity and optimal performance of your KLH R5100 receiver, follow these maintenance guidelines:
- Cleaning: Wipe the exterior surfaces with a soft, dry cloth. Do not use abrasive cleaners, waxes, or solvents as they may damage the finish.
- Ventilation: Regularly check that the ventilation openings are not obstructed by dust or debris. Use a soft brush or vacuum cleaner to gently remove any build-up.
- Power Cord: Inspect the power cord periodically for any signs of damage. If damaged, discontinue use and contact qualified service personnel.
- Storage: If storing the unit for an extended period, unplug it from the power outlet and cover it to protect against dust.
8. Troubleshooting
If you encounter problems with your receiver, refer to the following common issues and solutions before seeking professional service.
| Problem | Possible Cause | Solution |
|---|---|---|
| No power | Power cord unplugged; Power outlet not active | Ensure power cord is securely plugged in; Check power outlet with another device |
| No sound | Incorrect input selected; Speakers not connected properly; Volume too low; Mute function active | Select correct input source; Check speaker connections and polarity; Increase volume; Deactivate Mute |
| Remote control not working | Batteries depleted; Obstruction between remote and receiver; Remote sensor blocked | Replace batteries; Remove any obstructions; Ensure remote sensor on receiver is clear |
| Poor radio reception | Antenna not connected or poorly positioned | Connect antennas securely; Adjust antenna position for better reception |
| Distorted sound | Input signal too high; Speaker impedance mismatch; Damaged cables | Reduce source volume; Ensure speakers match 8Ω impedance; Check and replace damaged cables |
9. Specifications
The following are the technical specifications for the KLH R5100 Surround Sound Receiver:
- Model Number: R5100
- Product Dimensions: 16.88 x 6.88 x 15.75 inches
- Item Weight: 24.2 pounds
- Power Source: AC 120V, 60Hz
- Power Consumption: 320W
- Audio Output Mode: Surround
- Surround Sound Channel Configuration: 5.1
- Connectivity Technology: RCA, 3.5mm Jack, Optical, Coaxial
- Compatible Devices: Speakers
- Controller Type: Remote
- Special Feature: Advanced Room Calibration (as per product listing, though specific details may vary)
- Color: Black
10. Warranty and Support
For warranty information and customer support, please refer to the documentation included with your purchase or contact KLH customer service directly. Keep your proof of purchase for any warranty claims.