
1. Introduction
This manual provides detailed instructions for the installation, operation, maintenance, and troubleshooting of the LG Electronics 6501EA1001R Washing Machine Sensor Switch Assembly. This component is a crucial part of your washing machine's water level sensing system, ensuring proper water filling and cycle progression.
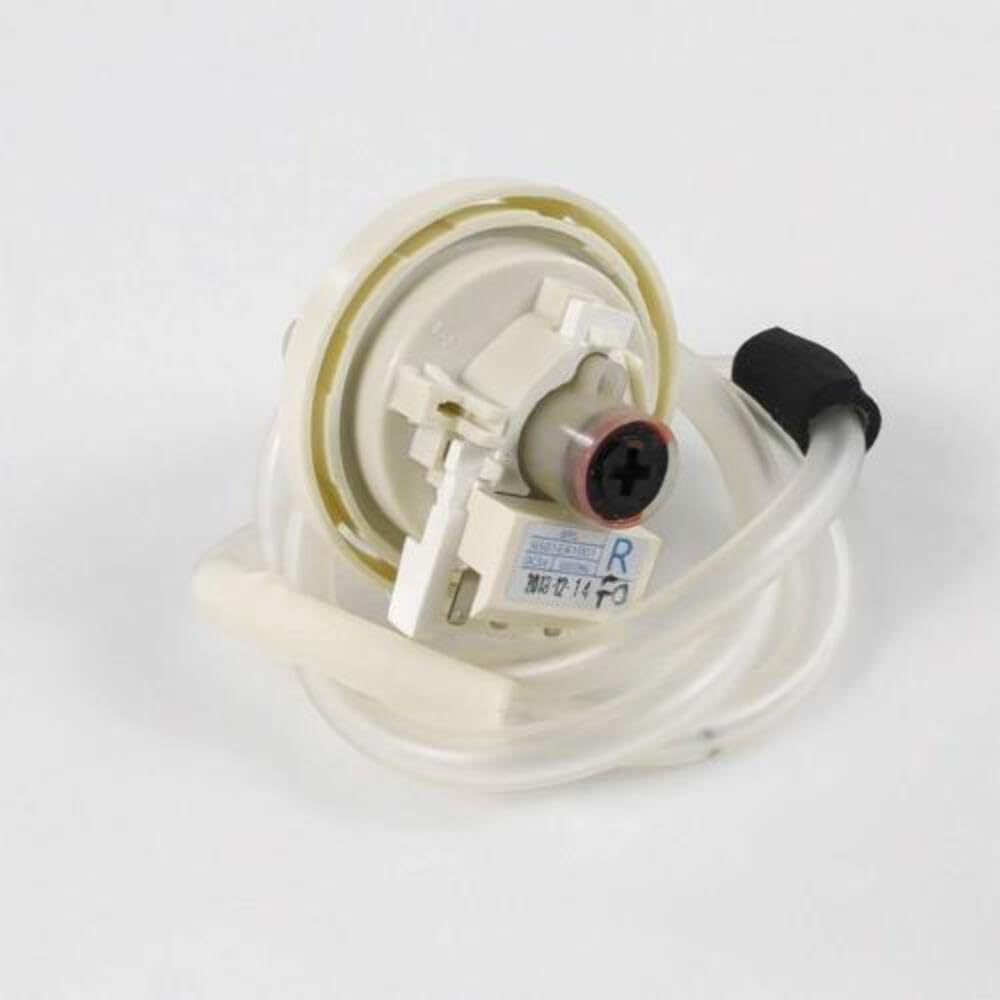
Image 1.1: LG Electronics 6501EA1001R Washing Machine Sensor Switch Assembly. This image shows the compact sensor switch assembly, typically including a pressure sensor and a clear hose connection.
2. Compatibility
The 6501EA1001R Washing Machine Sensor Switch Assembly is designed for use with specific LG Electronics washing machine models. Always refer to your appliance's manual to confirm compatibility before installation.
Compatible LG Electronics Models:
- T1309ADFH
- T1309ADFN
- WT5101HV
- WT5101HW
- T1309ADFH6
- WT5001CW
- WT1501CW (as reported by users)
- WT1101CW (as reported by users)
- WT7200CW (as reported by users)
3. Setup and Installation
Safety First: Before beginning any installation or repair work, always ensure the washing machine is unplugged from the power outlet and water supply faucets are closed. Failure to do so can result in electric shock or water damage.
Installation of the sensor switch assembly typically involves accessing the top rear compartment of the washing machine. The process may vary slightly depending on your specific model, but the general steps are as follows:
- Prepare the Washer: Unplug the washing machine's power cord from the wall outlet. Close the water supply valves.
- Access the Top Cover:
- Locate and remove the screws securing the top rear cover of the washing machine. This often involves two screws at the back.
- For some models, you may need to remove additional screws: two long screws hidden under small plastic cover plates at the ends of the main control panel, and two shorter, fatter screws on the vertical slats at the back of the washer.
- Gently pry and separate the cover using a flat tool (like a paint scraper) at the gaps once the screws are removed.
- Locate the Sensor Switch: Once the top cover is removed, identify the existing water level sensor switch assembly. It is typically located in the top, back end of the washer, often near a clear hose.
- Disconnect the Old Sensor:
- Carefully unplug the electrical wiring harness connected to the sensor switch.
- Unhook the clear hose from the old sensor. This hose connects to the pressure chamber at the bottom of the tub.
- Snap or unclip the old sensor switch assembly from its mounting bracket.
- Install the New Sensor:
- Snap the new 6501EA1001R sensor switch assembly into the mounting bracket.
- Reconnect the clear hose to the new sensor. Ensure a secure connection, using the original metal clip if applicable.
- Plug the electrical wiring harness back into the new sensor. Ensure it clicks into place.
- Reassemble the Washer:
- Carefully replace the top cover, aligning it properly and securing it with all previously removed screws.
- Ensure all wires and hoses are clear of moving parts and not pinched.
- Test the Washer: Plug the washing machine back into the power outlet and open the water supply valves. Run a test cycle to ensure proper operation and that any previous error codes are resolved.
Note: If you encounter damaged wires or hoses during inspection, these should be repaired or replaced before reassembly. Refer to a qualified technician if you are unsure about any steps.
4. Operating Principle
The 6501EA1001R Sensor Switch Assembly functions as a water level sensor. It uses air pressure to detect the amount of water in the washing machine tub. As water fills the tub, it compresses air in a pressure dome and hose connected to the sensor. The sensor then translates this pressure into an electrical signal, which is sent to the washing machine's control board. The control board uses this information to determine when the correct water level has been reached for a specific wash cycle, preventing overfilling or underfilling.
5. Maintenance
The sensor switch assembly itself typically requires no routine maintenance. However, to ensure its longevity and proper function, consider the following:
- Inspect Hoses: Periodically check the clear pressure hose connected to the sensor for kinks, cracks, or blockages. A damaged hose can lead to inaccurate water level readings.
- Keep Area Clean: Ensure the area around the sensor and its connections is free from debris, dust, or pests that could interfere with its operation or damage wiring.
- Avoid Harsh Chemicals: Do not use harsh cleaning agents directly on the sensor or its components.
6. Troubleshooting
A common indicator of a faulty water level sensor switch assembly is the "PE" error code on LG washing machines. This code typically signifies a problem with the water level sensor. If your washing machine displays a "PE" error or exhibits incorrect water filling behavior (e.g., overfilling, underfilling, or not filling at all), the sensor switch assembly may need replacement.
Troubleshooting Steps for "PE" Error:
- Power Cycle: Unplug the washer for at least one minute, then plug it back in. This can sometimes reset the control board and clear temporary errors.
- Inspect Connections: If the error persists, unplug the washer again and inspect the wiring harness and pressure hose connected to the sensor switch. Ensure they are securely attached and free from damage.
- Check for Obstructions: Verify that the pressure hose is not kinked or blocked.
- Replace Sensor: If the above steps do not resolve the "PE" error, replacing the 6501EA1001R Sensor Switch Assembly is often the solution, as detailed in the "Setup and Installation" section.
Warning: If you are not comfortable performing electrical or plumbing work, consult a qualified appliance repair technician.
7. Specifications
| Feature | Specification |
|---|---|
| Model Number | 6501EA1001R |
| Manufacturer | LG Electronics |
| Part Type | Washing Machine Sensor Switch Assembly |
| Operation Mode | Manual |
| Contact Type | Normally Open |
| Connector Type | Screw |
| Switch Type | Toggle |
| Terminal | Screw |
| Material | Stainless Steel |
| Item Dimensions (L x W x H) | 3 x 2.5 x 2 inches |
| Circuit Type | 1-way |
| Mounting Type | Snap In Mount |
| Actuator Type | Push Button |
| Connectivity Protocol | X-10 |
| Unit Count | 1.0 Count |
| International Protection Rating | IP00 |
| UPC | 797167696312 |
| ASIN | B00AYBM0DK |
8. Warranty and Support
Specific warranty information for the LG Electronics 6501EA1001R Washing Machine Sensor Switch Assembly should be obtained from the original point of purchase or directly from LG Electronics. Please retain your purchase receipt for warranty claims.
For technical support or further assistance, please contact LG Electronics customer service or refer to their official website for service contact information.