
1. Product Overview
The Lock'er Down Console Safe is designed to provide secure storage for personal items within your vehicle's console. Constructed from durable 12-gauge cold-rolled steel, this safe offers enhanced security and peace of mind for your valuables.
Key features include a 4-digit combination lock for secure access, a robust black powder coat finish, and a spring-assisted door hinge for smooth operation.

Figure 1.1: Front view of the Lock'er Down Console Safe, displaying the combination lock and the manufacturer's label.
2. Compatibility and Pre-Installation Check
This console safe is specifically designed for the following vehicle models:
- 2009 - 2014 Dodge Ram Pickups with bucket seats and a full floor console.
Important Note: This model will not fit if your vehicle's console contains a factory-installed CD player.

Figure 2.1: The console safe securely fitted into a vehicle's center console, demonstrating its integrated appearance.
3. Installation Guide
Follow these steps to install your Lock'er Down Console Safe:
- Prepare the Console: Ensure the vehicle's center console is clean and free of obstructions.
- Initial Placement: Carefully place the console safe into the console opening. It is recommended to first place the safe on top of any existing rubber mat at the bottom of the console to assess its fit and alignment.
- Marking and Trimming (if necessary): Observe how the safe sits in relation to the console's rubber mat. If the mat obstructs the safe's proper seating, remove the safe and the rubber mat. You may need to trim the mat to fit around the safe's footprint. The front part of the mat can often be reinserted into the console, and a trimmed portion of the back of the mat can be placed at the bottom of the safe itself.
- Secure the Safe: Once properly positioned, secure the safe using the provided self-tapping screws. Typically, four screws are used to firmly attach the safe to the console's interior. Ensure the safe is stable and does not shift.
- Test Operation: After installation, test the safe's door and combination lock to ensure smooth operation.
For visual assistance, it is often helpful to search for installation videos specific to your vehicle model and the Lock'er Down console safe on online video platforms. While not official, many users provide detailed walkthroughs.
4. Operating the Combination Lock
Your Lock'er Down Console Safe is equipped with a 4-digit combination lock. The factory default combination is typically 0-0-0-0, but it is highly recommended to set a personal combination immediately after installation.
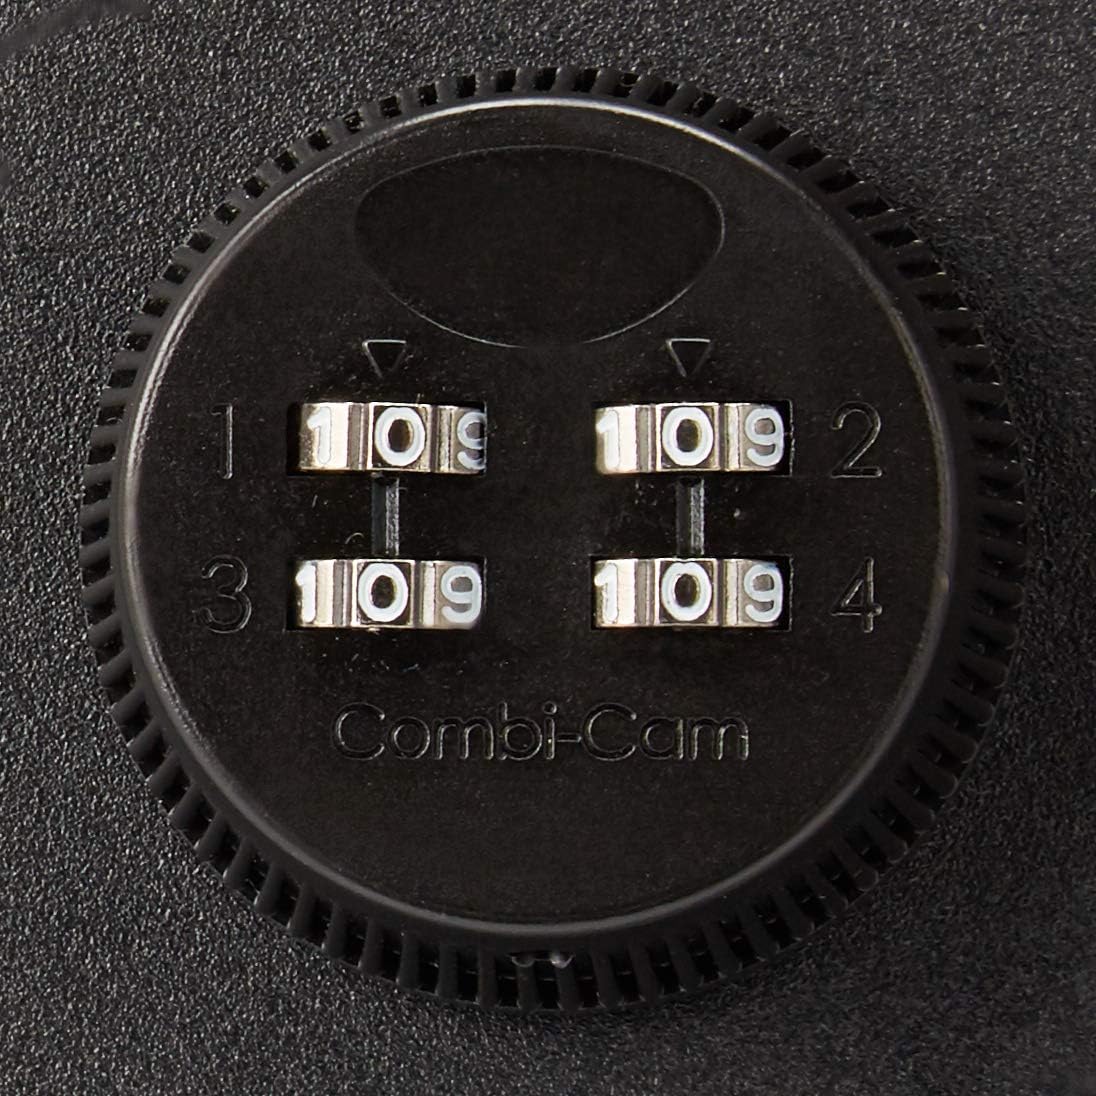
Figure 4.1: Detailed view of the Combi-Cam 4-digit combination lock.
4.1. Setting Your Personal Combination
The specific procedure for setting the combination may vary slightly depending on the lock mechanism. Generally, the steps involve:
- Open the safe using the current combination (factory default or previous setting).
- Locate a small reset button or lever on the inside of the lock mechanism. This is often a small pinhole or a lever that needs to be moved from position A to B.
- While the reset mechanism is engaged, dial in your new 4-digit combination.
- Return the reset mechanism to its original position.
- Scramble the dials and test your new combination to ensure it works correctly before closing the safe.
Always remember your combination. There is no master key or override for combination locks.
4.2. Opening the Safe
- Align the four digits of your personal combination with the indicator marks on the lock.
- Turn the lock knob or handle to the open position. The spring-assisted hinge will help lift the door.
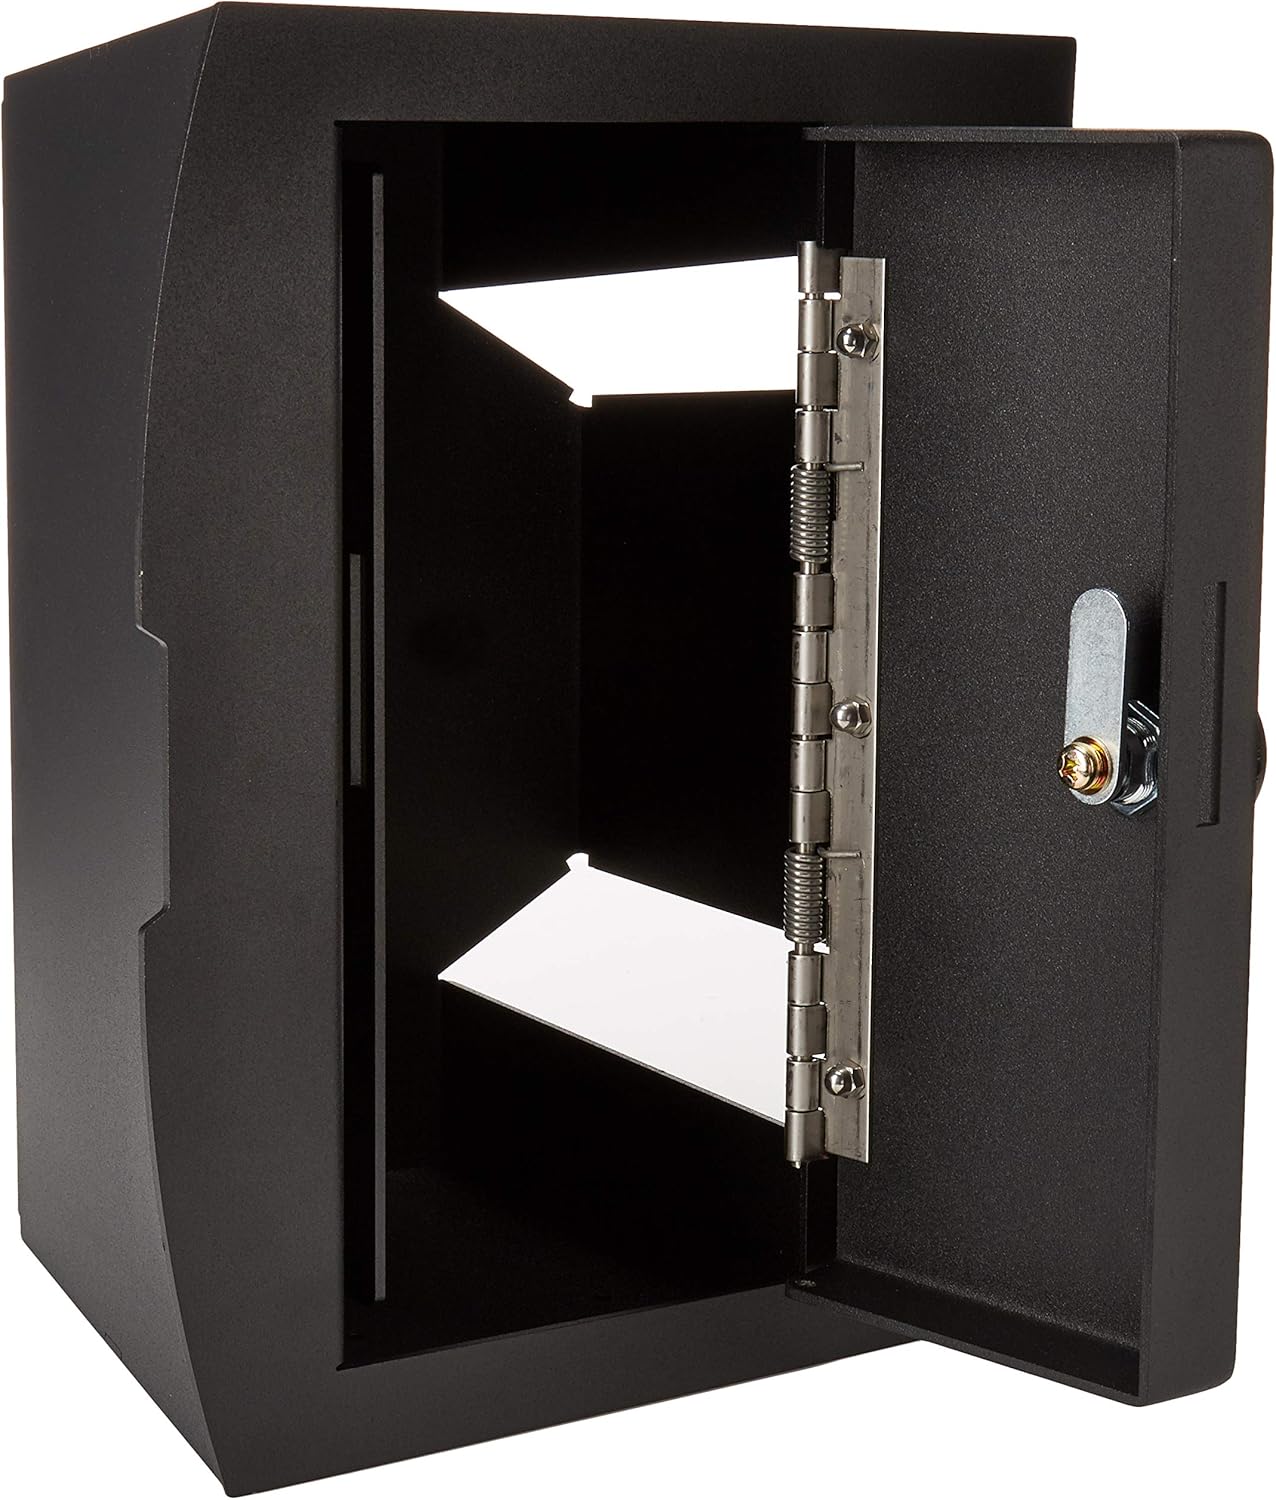
Figure 4.2: The console safe with its door open, revealing the interior compartment for storing items.
5. Maintenance
The Lock'er Down Console Safe is built for durability and requires minimal maintenance. However, periodic checks can ensure its longevity and smooth operation:
- Cleaning: Wipe the exterior with a soft, damp cloth to remove dust and grime. Avoid abrasive cleaners that could damage the powder coat finish.
- Lock Lubrication: If the combination dials become stiff or difficult to turn, a small amount of silicone-based lubricant can be applied to the moving parts of the lock mechanism. Avoid oil-based lubricants as they can attract dust.
- Hinge Check: Periodically inspect the spring-assisted door hinge for any signs of wear or damage.
6. Troubleshooting
- Safe Does Not Fit:
- Verify your vehicle's year and model against the compatibility information in Section 2.
- Check if your console has a factory-installed CD player, as this model is not compatible with such configurations.
- Ensure all console inserts or liners are removed or properly trimmed as per installation instructions.
- Combination Dials Are Stiff/Hard to Turn:
- Apply a small amount of silicone lubricant to the dials and work them back and forth to distribute the lubricant.
- Ensure no debris is lodged in the dial mechanism.
- Cannot Open Safe with Combination:
- Double-check that you are entering the correct 4-digit combination.
- Ensure each digit is precisely aligned with the indicator mark.
- If you recently changed the combination, ensure the reset mechanism was fully disengaged after setting the new code.
7. Product Specifications
| Attribute | Detail |
|---|---|
| Brand | Lock'er Down |
| Model Number | LD2028-A |
| Material | Alloy Steel (12-gauge cold-rolled steel) |
| Color | Black |
| Lock Type | 4-Digit Combination |
| Mounting Type | Floor Mount (within console) |
| Item Weight | 6.12 kg (approx. 13.5 lbs) |
| Parcel Dimensions | 36.83 x 36.32 x 26.67 cm (approx. 14.5 x 14.3 x 10.5 inches) |
| Manufacturer | Locker Down |
8. Warranty and Support
All Lock'er Down Safe products are proudly manufactured in the United States of America.
8.1. Lifetime Warranty
This product comes with a Lifetime Warranty. For any warranty claims or detailed information regarding the terms and conditions of the warranty, please contact Lock'er Down directly.
8.2. Customer Support
For technical assistance, installation queries, or any other support needs, please reach out to the manufacturer. Contact information can typically be found on the official Lock'er Down website or through the retailer where the product was purchased.
Note: While online communities and videos can offer helpful tips, direct manufacturer support is recommended for official guidance and troubleshooting.