
1. Introduction
This manual provides detailed instructions for the installation, operation, maintenance, and troubleshooting of your Cornat SEN5 Senso countertop faucet. Please read this manual thoroughly before installation and use to ensure proper function and longevity of the product. Keep this manual for future reference.
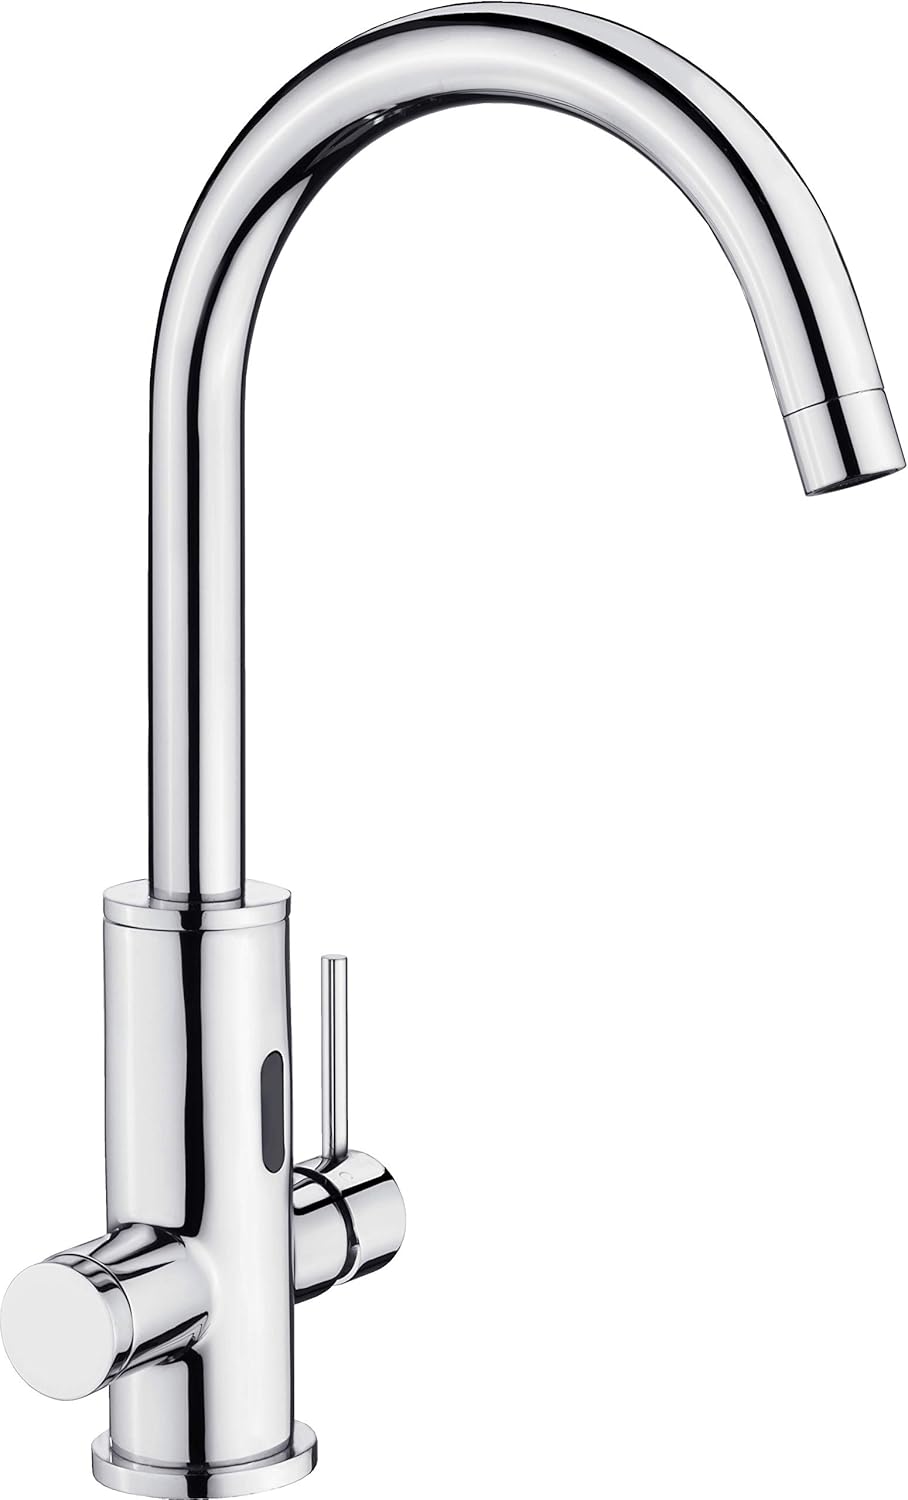
Image 1.1: The Cornat SEN5 Senso countertop faucet, featuring a chrome finish and integrated sensor for touchless operation.
2. Safety Information
- Ensure the main water supply is turned off before beginning any installation or maintenance work.
- If you are unsure about any part of the installation process, consult a qualified plumber.
- Do not use abrasive cleaners or harsh chemicals on the faucet's chrome finish, as this may cause damage.
- Protect the faucet from freezing temperatures, which can cause internal damage.
3. Package Contents
Verify that all components are present and undamaged before installation. The package should typically include:
- Cornat SEN5 Senso Faucet body
- Mounting hardware (gaskets, nuts, washers)
- Flexible connection hoses
- Control box for sensor (if applicable)
- Instruction manual
4. Installation
This section outlines the general steps for installing the Cornat SEN5 Senso faucet. Specific details may vary based on your sink and plumbing setup.
4.1. Required Tools (Not Included)
- Adjustable wrench
- Screwdriver
- Plumber's tape
- Flashlight
4.2. Installation Steps
- Prepare the Sink: Ensure the mounting hole on your countertop or sink is clean and free of debris. Refer to the product dimensions for appropriate hole size.
- Mount the Faucet: Insert the faucet body through the mounting hole. From underneath the sink, secure the faucet using the provided rubber gasket, metal washer, and mounting nut. Tighten securely but do not overtighten.
- Connect Water Hoses: Attach the hot and cold water supply lines to the corresponding inlets on the faucet body. Use plumber's tape on threaded connections to prevent leaks. Connect the other ends of the hoses to your hot and cold water supply valves.
- Install Sensor Control Box: If your model includes a separate control box for the sensor, mount it in an accessible location under the sink. Connect the sensor cable from the faucet to the control box and ensure any power connections (e.g., battery pack or AC adapter) are made according to the specific instructions for the control box.
- Check for Leaks: Slowly turn on the main water supply. Check all connections for leaks. Tighten any leaking connections as necessary.
- Test Operation: Test both the manual lever and the sensor function to ensure proper water flow and temperature control.
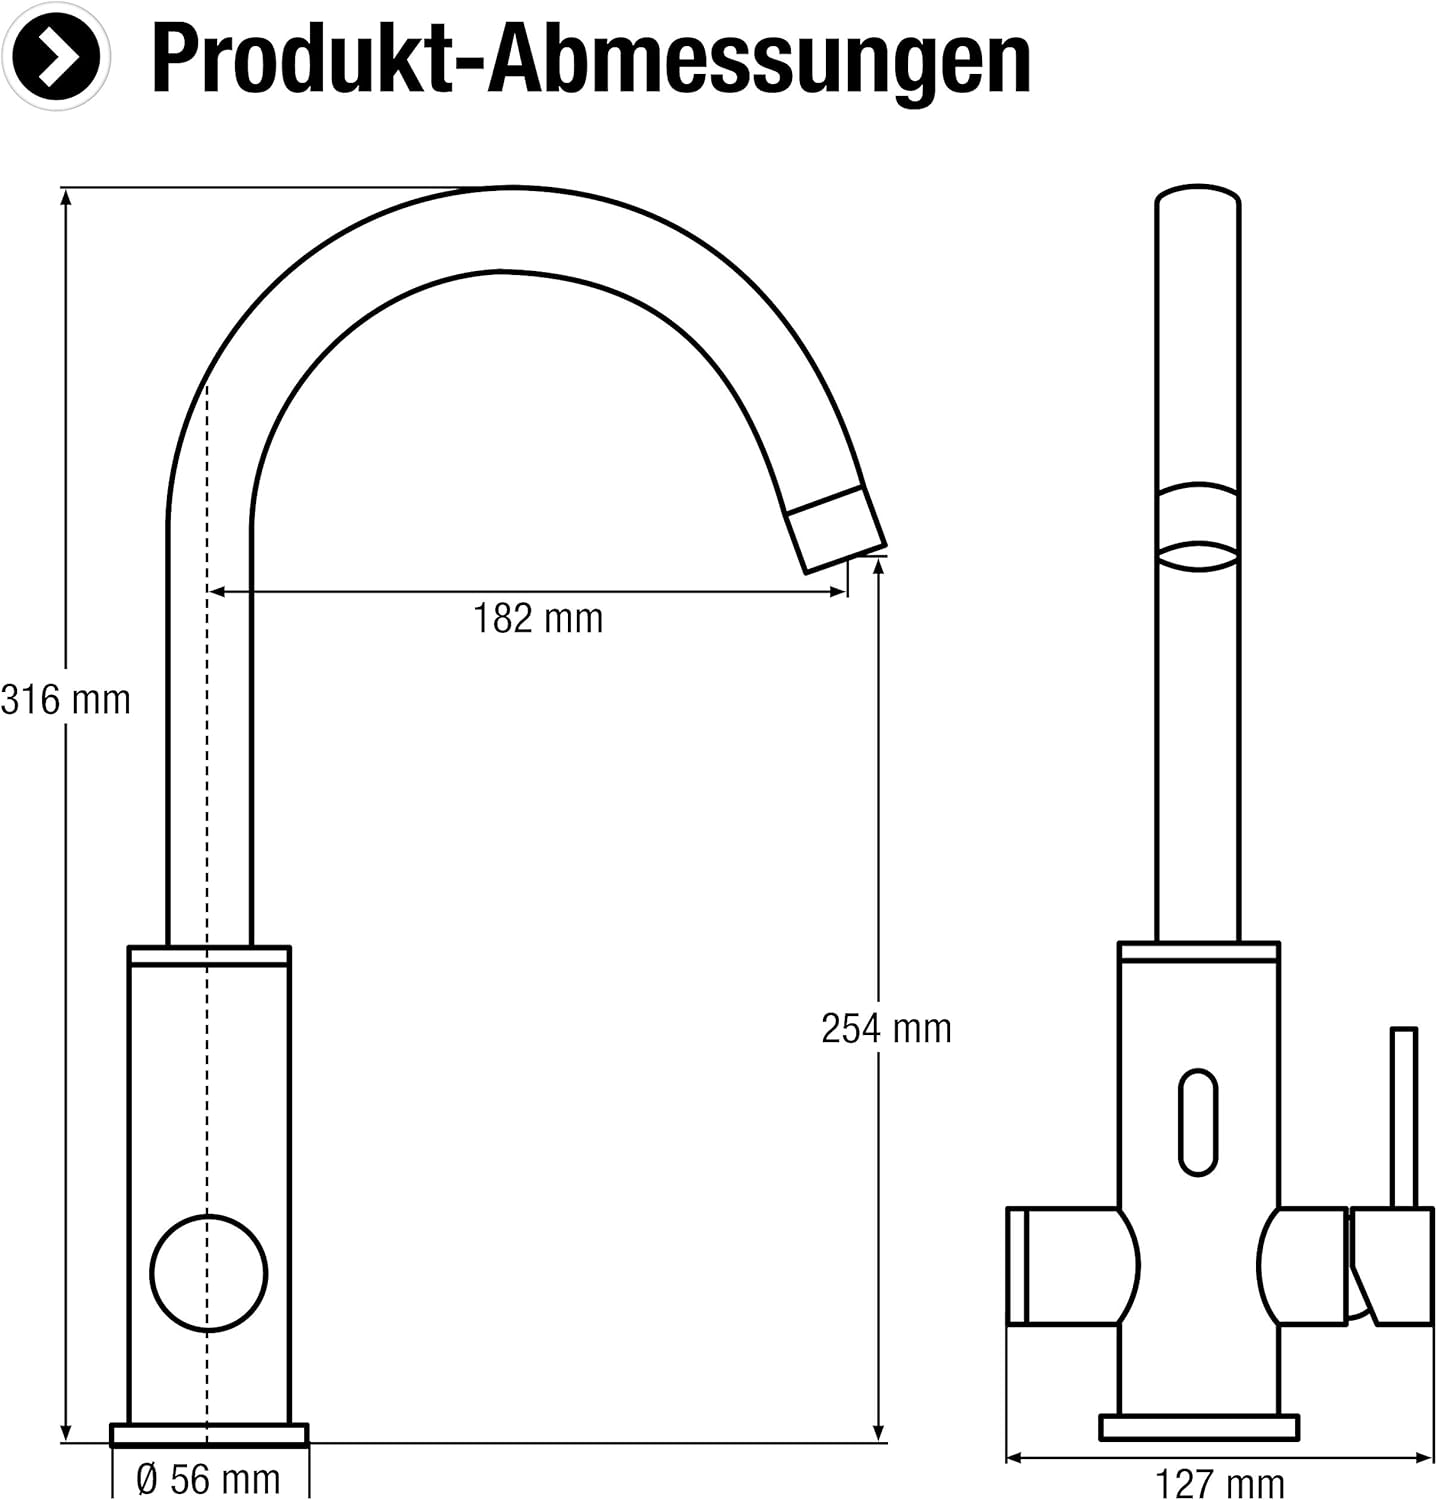
Image 4.1: Detailed dimensions of the Cornat SEN5 faucet, showing height, reach, and base diameter for installation planning.
5. Operating Instructions
The Cornat SEN5 Senso faucet offers both manual and touchless operation.
5.1. Manual Operation
Use the side lever to manually control water flow and temperature:
- Water Flow: Lift the lever upwards to increase water flow. Push it downwards to decrease or stop flow.
- Temperature Control: Move the lever to the left for hot water and to the right for cold water. Adjust the position to achieve the desired temperature.
5.2. Touchless (Sensor) Operation
The integrated sensor allows for hygienic, touchless water activation:
- Activate Water: Place your hands or an object within the sensor's detection range (typically a few inches in front of the sensor eye). Water will begin to flow.
- Stop Water: Remove your hands or the object from the sensor's range. The water flow will automatically stop after a short delay.
- Temperature for Sensor: The water temperature for sensor operation is typically set by the position of the manual lever when the sensor is not active. Ensure the lever is set to your desired temperature blend for touchless use.
6. Maintenance and Care
Proper care will help maintain the appearance and function of your faucet.
- Cleaning the Finish: Clean the chrome finish regularly with a soft cloth and mild soap and water. Rinse thoroughly and dry immediately to prevent water spots. Do not use abrasive cleaners, scouring pads, or chemical solvents.
- Cleaning the Aerator: Periodically unscrew the aerator at the tip of the spout and clean any mineral deposits or debris. This helps maintain optimal water flow.
- Sensor Care: Keep the sensor eye clean and free of obstructions. Wipe gently with a soft, damp cloth if needed. Avoid spraying cleaners directly onto the sensor.
7. Troubleshooting
If you encounter issues with your faucet, refer to the following common problems and solutions:
| Problem | Possible Cause | Solution |
|---|---|---|
| No water flow (manual or sensor) | Water supply turned off; clogged aerator; kinked supply hose. | Check water supply valves; clean aerator; inspect hoses. |
| Sensor not working | Sensor eye obstructed; power issue to control box; sensor malfunction. | Clean sensor eye; check power connection/batteries; consult support. |
| Low water pressure | Clogged aerator; partially closed supply valve; mineral buildup in hoses. | Clean aerator; fully open supply valves; flush supply lines. |
| Leaks from connections | Loose connections; worn gaskets; improper plumber's tape application. | Tighten connections; replace gaskets; reapply plumber's tape. |
8. Specifications
| Feature | Detail |
|---|---|
| Brand | Cornat |
| Model | SEN5 |
| Manufacturer | Conmetall |
| Finish | Chrome Plated |
| Material | Ceramic (internal cartridge) |
| Mounting Type | Countertop Mount |
| Package Dimensions | 46.6 x 30 x 9.4 cm |
| Item Weight | 2.36 Kilograms |
| Sensor Power | Requires external power (e.g., batteries or AC adapter, not included) |
9. Warranty and Support
For information regarding warranty coverage, technical support, or replacement parts, please contact Cornat customer service or refer to the official Cornat website. Keep your proof of purchase for warranty claims.