
1. Introduction
This manual provides essential information for the proper installation and care of your Briggs & Stratton 590454 Magneto Armature Coil. This genuine OEM part is designed for select 12 cubic inch L-Head vertical engines, ensuring optimal fit and performance to maintain the longevity and efficiency of your Briggs & Stratton engine. Using genuine parts helps ensure compatibility and reliability.

Image 1.1: Briggs & Stratton Genuine OEM Parts banner, emphasizing the authenticity of the product.
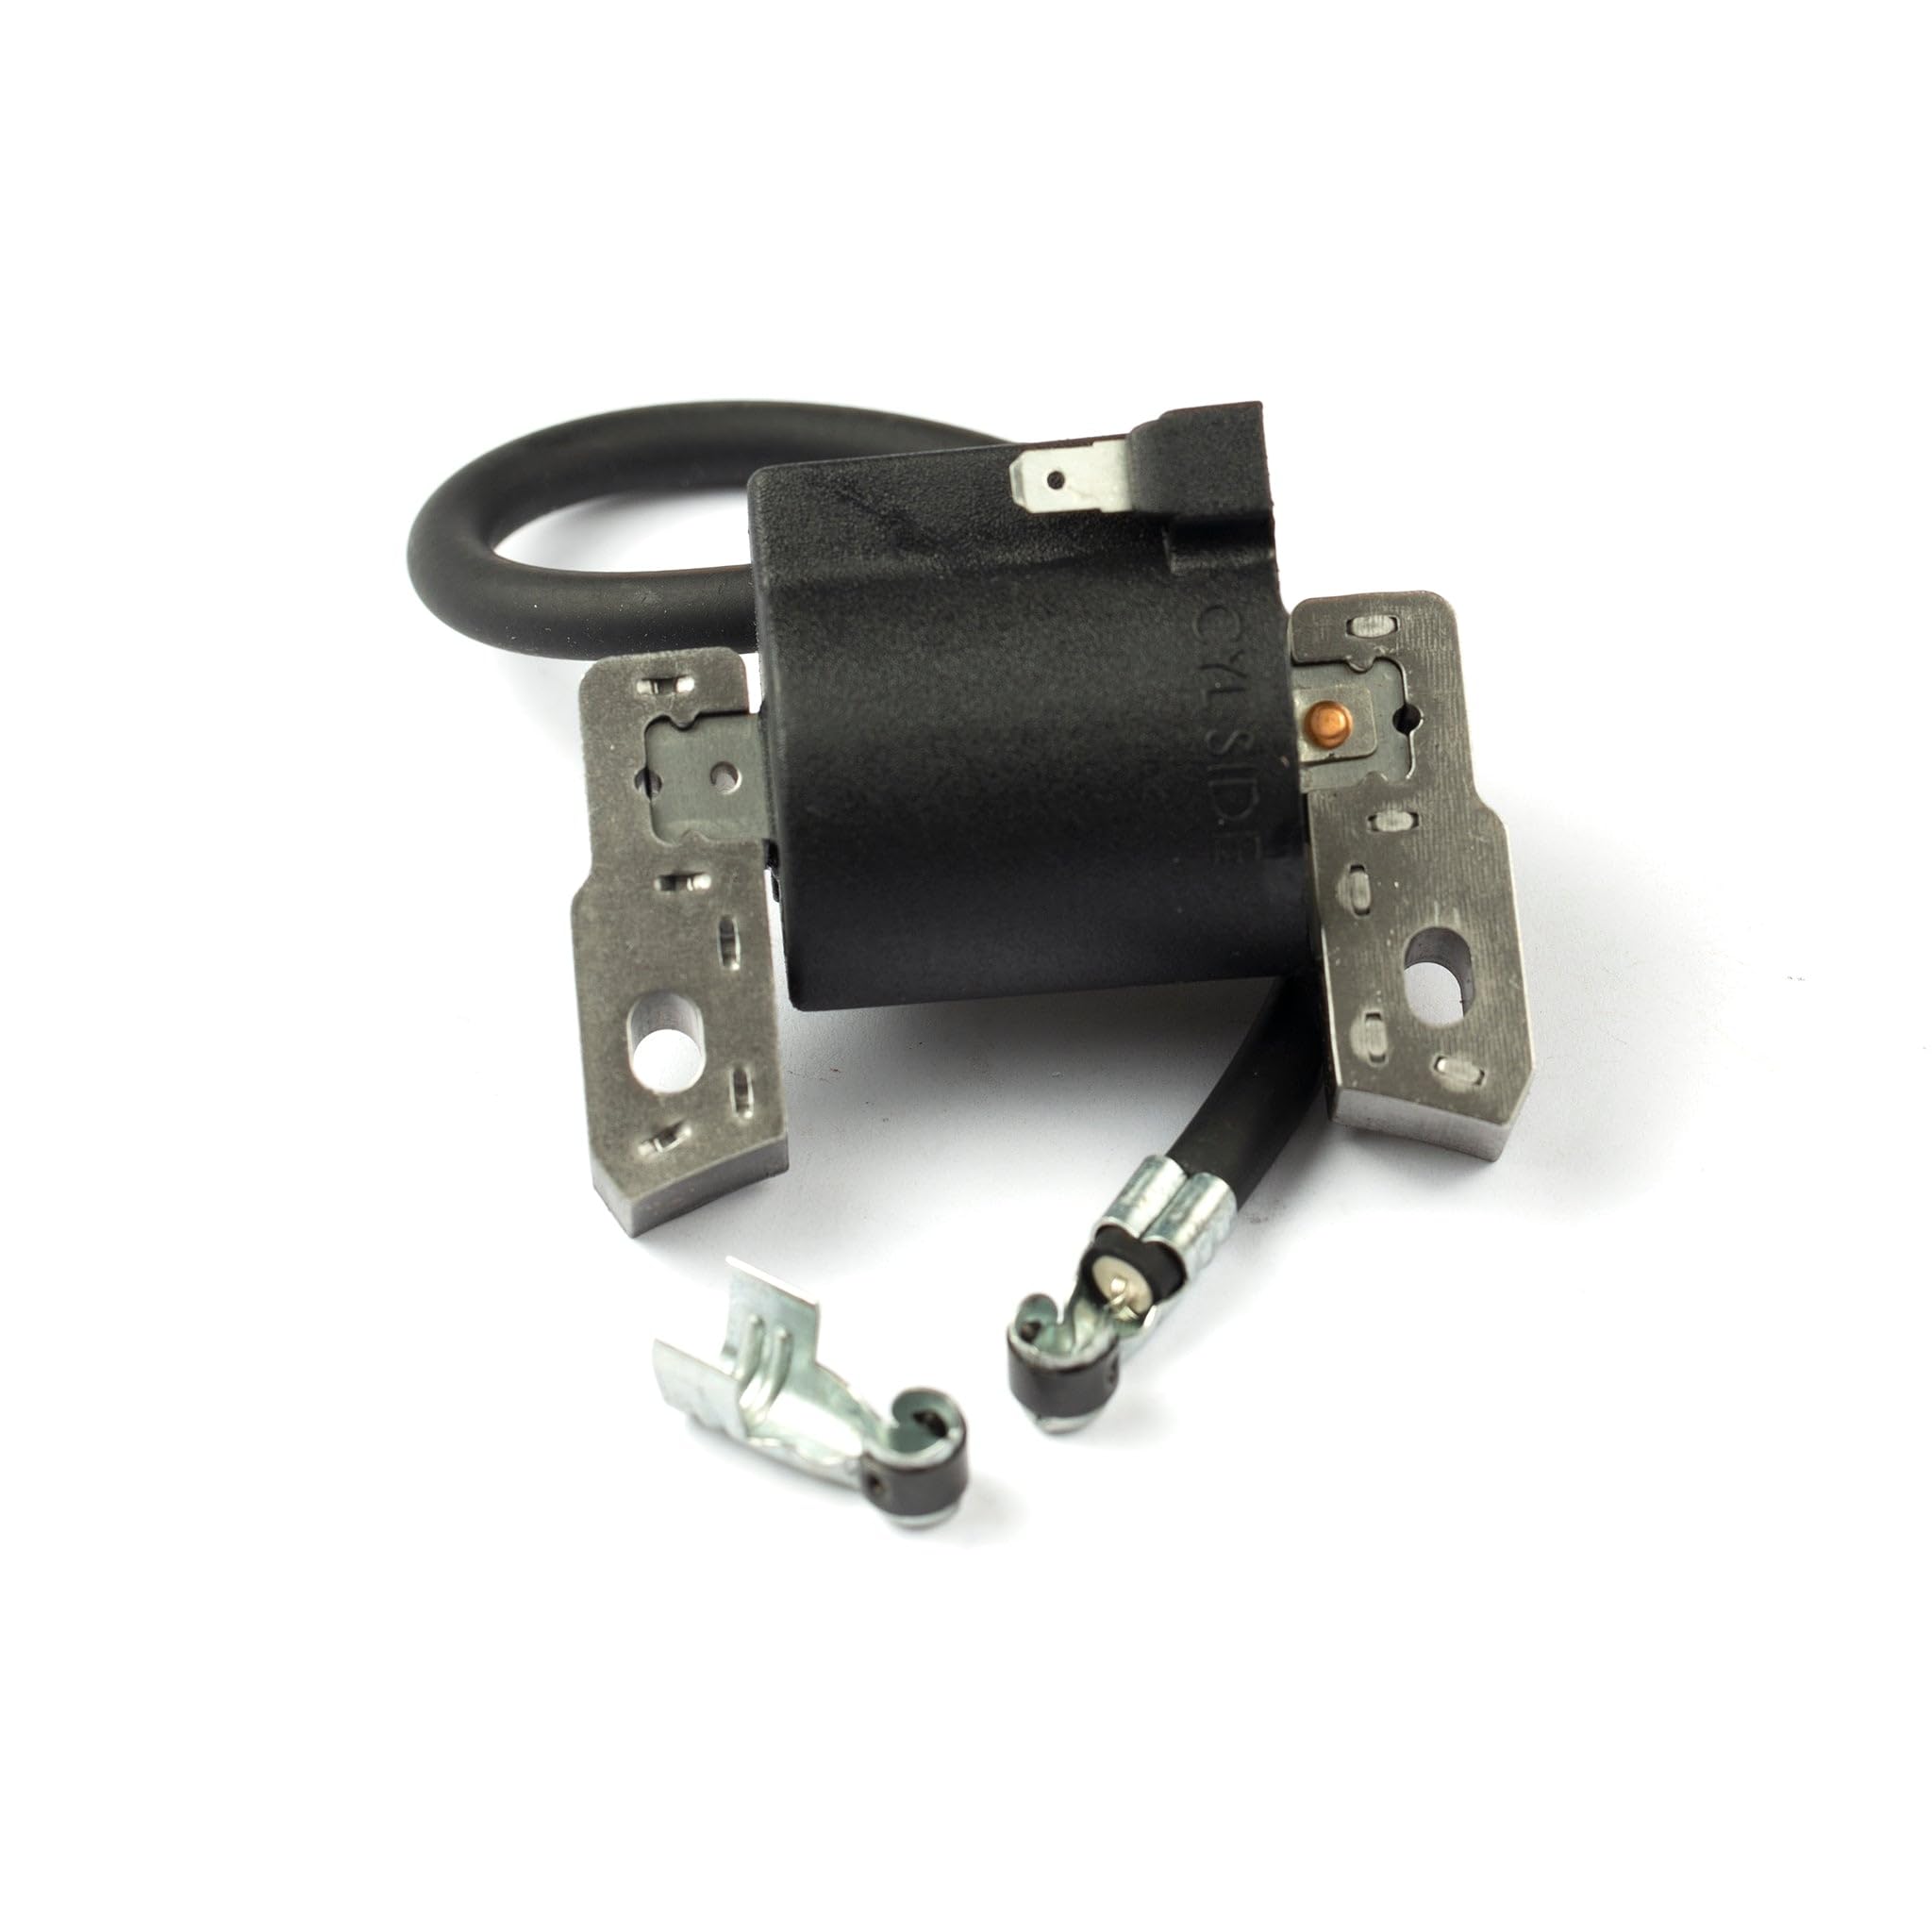
Image 1.2: The Briggs & Stratton 590454 Magneto Armature Coil, showing its overall design and components.
2. Safety Precautions
Always prioritize safety when working with engine components. Failure to follow these precautions can result in serious injury or damage to equipment.
- Disconnect Spark Plug: Before performing any service or maintenance, always disconnect the spark plug lead to prevent accidental engine starting.
- Read Engine Manual: Refer to your engine's specific owner's manual for detailed safety instructions and procedures.
- Wear Protective Gear: Use appropriate personal protective equipment, including safety glasses and gloves.
- Work in a Well-Ventilated Area: Ensure adequate ventilation if working with fuel or cleaning agents.
- Allow Engine to Cool: Never work on a hot engine. Allow sufficient time for the engine to cool down before beginning any work.
- Use Correct Tools: Ensure you have the proper tools for the job to avoid damage to parts or injury.
3. Package Contents
Upon opening your package, verify that all components are present and undamaged. The Briggs & Stratton 590454 Magneto Armature Coil typically includes the coil assembly with attached wires and connectors.

Image 3.1: The Briggs & Stratton 590454 Magneto Armature Coil packaging, indicating it is a genuine part.
4. Installation Guide
This section outlines the general steps for replacing a magneto armature coil. Specific procedures may vary slightly depending on your engine model. Always consult your engine's service manual for precise instructions.
4.1. Tools Required
- Wrench set (appropriate sizes for engine bolts)
- Feeler gauge (typically 0.006 - 0.010 inches, refer to engine manual)
- Screwdriver
- Wire brush (for cleaning)
4.2. Preparation
- Ensure the engine is cool and the spark plug lead is disconnected.
- Clean the area around the magneto armature coil to prevent debris from entering the engine.
4.3. Removal of Old Coil
- Locate the existing magneto armature coil, typically mounted near the flywheel.
- Carefully disconnect any wires attached to the coil, noting their original positions for reassembly.
- Unscrew the mounting bolts that secure the coil to the engine block.
- Remove the old coil. Inspect the mounting surface for any corrosion or damage and clean as necessary.
4.4. Installation of New Coil
- Position the new Briggs & Stratton 590454 Magneto Armature Coil onto the mounting studs. Do not fully tighten the bolts yet.
- Rotate the engine flywheel until the magnet is directly under the coil.
- Insert a non-magnetic feeler gauge (e.g., 0.006 - 0.010 inches, consult your engine manual for the exact gap) between the coil's laminations and the flywheel magnet.
- Push the coil firmly against the feeler gauge and tighten the mounting bolts securely.
- Remove the feeler gauge. The coil should now be properly gapped.
- Reconnect all wires to their original positions. Ensure connections are secure.

Image 4.1: An installed magneto armature coil on an engine, showing its typical placement.

Image 4.2: A technician demonstrating the correct method for setting the air gap between the magneto coil and the flywheel using a feeler gauge.
4.5. Reassembly and Test
- Reattach the spark plug lead.
- Attempt to start the engine. If the engine starts and runs smoothly, the installation is complete.
5. Operation (Post-Installation)
After successful installation of the magneto armature coil, the engine should start reliably and run consistently. The magneto coil is a critical component of the ignition system, responsible for generating the high voltage required for the spark plug to ignite the fuel-air mixture. Proper installation ensures efficient engine operation.
If the engine exhibits difficulty starting, misfires, or runs rough after installation, refer to the troubleshooting section or consult a qualified service technician.
6. Maintenance Tips
While the magneto armature coil itself requires minimal maintenance, ensuring the overall health of your engine's ignition system and related components will prolong its life and ensure reliable performance.
- Spark Plug Inspection: Regularly inspect and replace the spark plug according to your engine's maintenance schedule. A fouled or worn spark plug can put undue stress on the ignition coil.
- Wire Connections: Periodically check all electrical connections to the coil and spark plug for corrosion or looseness. Clean and secure as needed.
- Flywheel Cleaning: Keep the flywheel and the area around the coil free of debris, grass clippings, and dirt, which can interfere with the magnetic field.
- Engine Tune-up: Follow your engine manufacturer's recommended maintenance schedule for oil changes, air filter replacement, and fuel system checks.

Image 6.1: Various Briggs & Stratton maintenance components, highlighting the importance of regular engine care.
7. Troubleshooting Common Issues
If you encounter problems after installing the new magneto armature coil, consider the following common issues and solutions:
| Problem | Possible Cause | Solution |
|---|---|---|
| Engine will not start (no spark) | Incorrect coil gap Loose or corroded wire connections Faulty spark plug | Re-check and adjust coil gap (refer to Section 4.4) Inspect and secure all electrical connections Test or replace spark plug |
| Engine misfires or runs rough | Incorrect coil gap Fouled spark plug Carburetor issues (unrelated to coil) | Verify coil gap is correct Clean or replace spark plug Consult engine manual for carburetor adjustment/cleaning |
| Engine starts but dies quickly | Intermittent spark Fuel delivery issues (unrelated to coil) | Check coil connections and ensure proper grounding Inspect fuel filter and fuel lines |
If these steps do not resolve the issue, it is recommended to consult a certified Briggs & Stratton service technician.
8. Specifications
- Part Number: 590454
- Replaces Part Numbers: 591932, 799381, 790817
- Brand: Briggs & Stratton
- Item Type Name: Magneto Armature
- Vehicle Service Type: Lawn Mower
- Compatible with Vehicle Type: Lawn Mower
- Installation Type: Bolt-On
- Item Dimensions (L x W x H): 3.38 x 4 x 2.78 inches
- Item Weight: 9.04 ounces
- UPC: 024847186338
9. Warranty Information
Genuine Briggs & Stratton parts are manufactured to high standards and are typically covered by a limited warranty against defects in material and workmanship. For specific warranty terms and conditions applicable to your region and product, please refer to the official Briggs & Stratton website or contact their customer service. Always retain your proof of purchase.
10. Customer Support
For further assistance, technical questions, or to locate a certified service dealer, please visit the official Briggs & Stratton website or contact their customer support:
- Briggs & Stratton Official Website: www.briggsandstratton.com
- Find a Dealer: Use the dealer locator tool on their website for local service and parts.


