
1. Introduction
This user manual provides detailed instructions for the proper setup, operation, calibration, maintenance, and troubleshooting of your Oakton WD-35613-82 Ion 6+ Handheld Meter Kit. To ensure accurate measurements and extend the lifespan of your device, please read this manual thoroughly before use and retain it for future reference.
2. Product Overview
The Oakton Ion 6+ is a versatile handheld meter designed for precise pH and ion measurements. This kit includes essential components for immediate use in various applications.
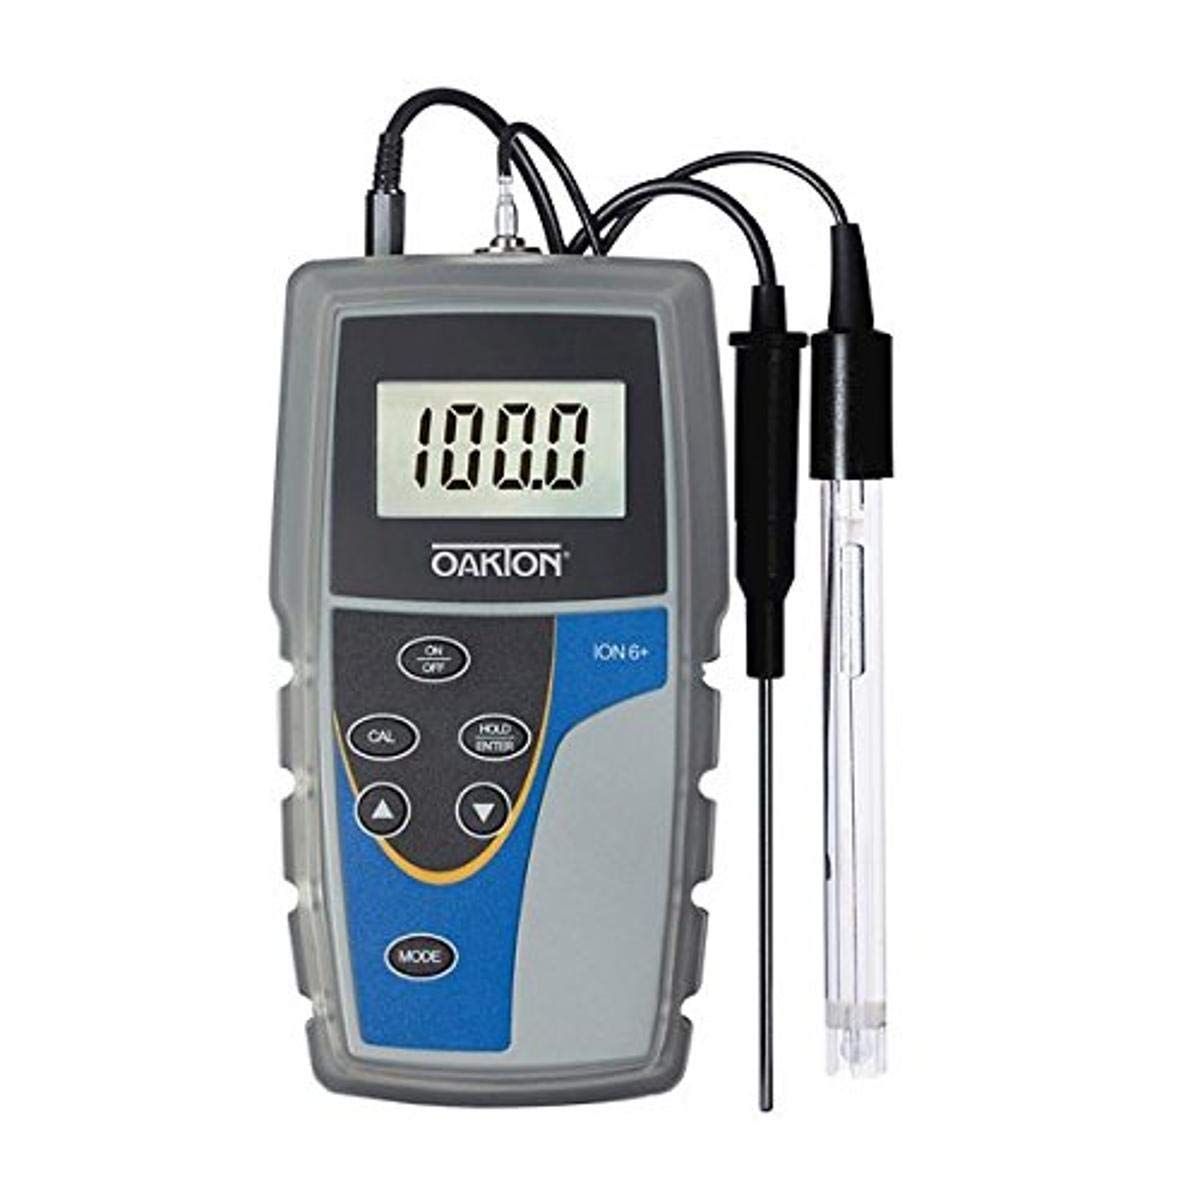
This image displays the Oakton Ion 6+ handheld meter, a gray and blue device with a digital display showing '100.0'. It has control buttons for ON/OFF, CAL, HOLD/ENTER, MODE, and arrow keys. Two probes are connected to the top: a black temperature probe and a clear pH/ATC probe.
3. Kit Contents
Your Oakton WD-35613-82 Ion 6+ Handheld Meter Kit typically includes the following items:
- Oakton Ion 6+ Handheld Meter
- pH electrode
- ATC (Automatic Temperature Compensation) probe
- Protective rubber boot
- pH buffer solutions
- Solution bottles
- Rinse bottle
- Batteries
- Carrying case
4. Setup
Follow these steps for initial setup of your meter:
- Install Batteries: Open the battery compartment on the back of the meter and insert the specified batteries, observing correct polarity.
- Connect Probes: Carefully connect the pH electrode and the ATC probe to their respective ports at the top of the meter. Ensure connections are secure.
- Prepare Electrodes: If the pH electrode is dry, condition it according to the electrode's specific instructions (usually by soaking in storage solution or buffer for a period).
5. Operation
To take a measurement with your Ion 6+ meter:
- Power On: Press the ON/OFF button to turn on the meter.
- Select Mode: Press the MODE button to cycle through available measurement modes (e.g., pH, mV, Ion). Select the desired mode.
- Calibrate: Perform a calibration as described in Section 6 before taking critical measurements.
- Immerse Probe: Rinse the electrode with distilled water and immerse it into the sample solution. Ensure the electrode tip is fully submerged.
- Read Measurement: Allow the reading on the display to stabilize. The meter will typically indicate stability.
- Hold Reading: Press the HOLD/ENTER button to freeze the current reading on the display. Press again to release.
- Power Off: Press the ON/OFF button to turn off the meter after use.
6. Calibration
Regular calibration is crucial for accurate measurements. Refer to the specific instructions for your pH electrode and buffer solutions for the exact calibration procedure. Generally, calibration involves:
- Prepare Buffers: Use fresh, appropriate pH buffer solutions (e.g., pH 4.01, 7.00, 10.00).
- Enter Calibration Mode: With the meter on and in pH mode, press the CAL button.
- Calibrate Points: Immerse the electrode in the first buffer solution. The meter will automatically recognize the buffer and calibrate. Repeat for subsequent buffer solutions as prompted by the meter.
- Confirm Calibration: Once all points are calibrated, the meter will typically confirm successful calibration.
7. Maintenance
Proper maintenance ensures optimal performance and longevity of your meter and probes:
- Electrode Cleaning: Regularly clean the pH electrode according to its specific instructions, especially if readings become sluggish or inaccurate.
- Electrode Storage: Store the pH electrode in its designated storage solution or a suitable buffer when not in use. Never store it dry.
- Meter Cleaning: Wipe the meter body with a damp cloth. Do not use abrasive cleaners or solvents.
- Battery Replacement: Replace batteries promptly when the low battery indicator appears to prevent data loss or meter malfunction.
8. Troubleshooting
If you encounter issues with your Oakton Ion 6+ meter, consider the following:
- No Power: Check battery installation and ensure batteries are fresh.
- Unstable Readings: Ensure the electrode is properly conditioned and clean. Recalibrate the meter. Check for air bubbles around the electrode.
- Inaccurate Readings: Calibrate the meter with fresh, accurate buffer solutions. Check the condition of the pH electrode; it may need cleaning or replacement. Ensure the ATC probe is connected and functioning correctly.
- Error Messages: Refer to the specific error codes in the full product manual (if available) or contact technical support.
9. Specifications
| Feature | Detail |
|---|---|
| Model Number | WD-35613-82 |
| Manufacturer | OAKTON Instruments |
| Package Dimensions | 7 x 4 x 3 inches |
| Package Weight | 5 Pounds |
| Country of Origin | United States |
| ASIN | B00AM2302G |
10. Warranty and Support
For warranty information, technical support, or service inquiries, please contact OAKTON Instruments directly or refer to their official website. Keep your purchase receipt and model number handy when contacting support.


