Vulcan 00-412787-00002
Vulcan Hart Pilot, Oven, Burner Instruction Manual
Model: 00-412787-00002
Introduction
This manual provides essential information for the proper installation, operation, and maintenance of your Vulcan Hart Pilot, Oven, Burner replacement part (Model: 00-412787-00002). This genuine OEM part is designed for use in Vulcan commercial ovens and ranges to ensure optimal performance and safety. Please read these instructions thoroughly before attempting any installation or service.
Important Safety Information
WARNING: Improper installation, adjustment, alteration, service, or maintenance can cause property damage, injury, or death. Read the installation, operating, and maintenance instructions thoroughly before installing or servicing this equipment.
- Always disconnect power and gas supply before servicing.
- Installation and service must be performed by a qualified installer, service agency, or the gas supplier.
- Ensure all gas connections are leak-tested after installation.
- Keep the area around the appliance clear and free from combustible materials.
- Wear appropriate personal protective equipment (PPE) during installation and maintenance.
Installation Instructions
This pilot, oven, burner part is intended for replacement in compatible Vulcan commercial cooking equipment. Due to the nature of gas appliances, installation should only be performed by a certified technician or qualified service personnel.
- Preparation: Ensure the appliance is completely shut off and disconnected from all power and gas sources. Allow the appliance to cool down if it has been in operation.
- Access: Carefully open the appliance to gain access to the existing pilot, oven, burner assembly. Refer to your specific appliance's service manual for detailed access procedures.
- Removal of Old Part: Disconnect any gas lines, electrical connections, and mounting hardware securing the old pilot, oven, burner. Carefully remove the old component.
- Installation of New Part: Position the new Vulcan Hart Pilot, Oven, Burner (Model: 00-412787-00002) in the correct location. Secure it using the appropriate mounting hardware.
- Connections: Reconnect all gas lines and electrical wiring according to the appliance's wiring diagram. Ensure all connections are tight and secure.
- Leak Testing: After all connections are made, perform a thorough leak test on all gas connections using a suitable leak detection solution. Do not use an open flame for leak testing.
- Functionality Check: Restore gas and power supply. Test the new pilot, oven, burner for proper ignition and flame characteristics as per the appliance's operating instructions.
- Reassembly: Close and secure all access panels on the appliance.
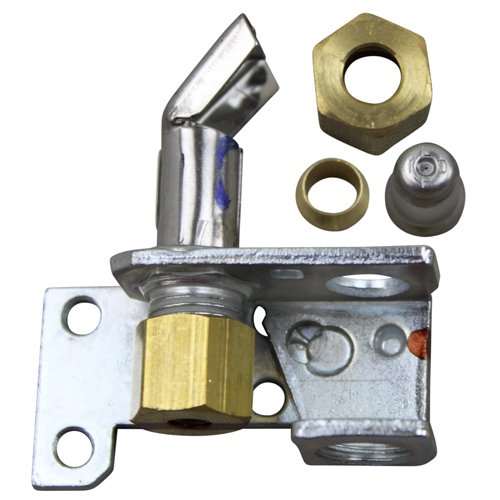
Image: Vulcan Hart Pilot, Oven, Burner replacement part. This image shows the component that replaces the existing pilot, oven, burner in compatible Vulcan commercial cooking equipment.
Operating Instructions
This component is a replacement part and does not have independent operating instructions. Its function is integrated into the overall operation of the Vulcan commercial oven or range it is installed in. Refer to the specific operating manual for your Vulcan appliance for instructions on how to ignite, operate, and shut down your equipment.
Once properly installed, the pilot, oven, burner will function as part of the appliance's heating system, providing the necessary flame for cooking operations.
Maintenance
Regular maintenance of your Vulcan commercial cooking equipment, including the pilot, oven, burner, is crucial for longevity and efficient operation. Always ensure the appliance is disconnected from power and gas before performing any maintenance.
- Inspection: Periodically inspect the pilot, oven, burner for signs of wear, corrosion, or blockages. Check for proper flame appearance (a steady blue flame is ideal).
- Cleaning: Keep the burner and pilot assembly clean from food debris, grease, and carbon buildup. Use a soft brush or compressed air to clear any obstructions. Do not use abrasive cleaners.
- Gas Line Check: Ensure gas lines leading to the burner are free from kinks or damage.
- Professional Service: It is recommended to have your commercial cooking equipment, including burner components, inspected and serviced annually by a qualified technician.
Troubleshooting
If you experience issues with your appliance after installing the new pilot, oven, burner, consider the following common troubleshooting steps. For complex issues, contact a qualified service technician.
| Problem | Possible Cause | Solution |
|---|---|---|
| Burner does not ignite | No gas supply; blocked pilot or burner orifice; faulty igniter/spark module; loose electrical connection. | Check gas valve; clean pilot/burner; inspect igniter; verify electrical connections. |
| Weak or yellow flame | Insufficient air supply; partially blocked burner orifice; incorrect gas pressure. | Ensure proper ventilation; clean burner; consult technician for gas pressure adjustment. |
| Gas odor detected | Gas leak. | Immediately shut off gas supply, ventilate area, and contact a qualified technician. Do not operate the appliance. |
| Burner cycles on and off frequently | Faulty thermostat or sensor; pilot light issues. | Inspect thermostat/sensor; ensure pilot light is stable. Contact service. |
Specifications
| Model Number | 00-412787-00002 |
| Brand | Vulcan Hart |
| Product Dimensions | 5 x 6 x 9 inches |
| Item Weight | 4.8 ounces |
| Part Type | Pilot, Oven, Burner (Genuine OEM) |
Warranty and Support
As a genuine OEM (Original Equipment Manufacturer) part, this Vulcan Hart Pilot, Oven, Burner is typically covered by the manufacturer's standard warranty for replacement parts. Specific warranty terms and duration may vary. Please retain your proof of purchase.
For warranty claims, technical support, or to locate a qualified service technician, please contact Vulcan Hart customer service or refer to their official website. Always provide the model number of your appliance and the part number (00-412787-00002) when seeking support.
Manufacturer: Vulcan Hart
Ask a question about this manual
Ask about setup, troubleshooting, compatibility, parts, safety, or missing instructions. Manuals+ will review the question and use this page’s manual context to help answer it.