
1. Safety Information
Read and understand all instructions and safety warnings before using this telescoping ladder. Failure to follow these instructions may result in serious injury or death.
- Weight Capacity: Do not exceed the maximum load capacity of 300 lbs (136 kg). This includes the user and any tools or materials.
- Surface Stability: Always place the ladder on a firm, level, and non-slip surface. Ensure all feet are securely planted before ascending.
- Angle of Use: Position the ladder at an angle of approximately 75 degrees from the horizontal. The base of the ladder should be placed one foot away from the wall for every four feet of ladder height.
- Locking Mechanisms: Before each use, verify that all rungs are fully extended and their spring-loaded locking mechanisms are securely engaged. Do not use the ladder if any rung is not properly locked.
- Extension and Retraction: Always extend the ladder from the top rung downwards. When retracting, start from the top and work downwards, ensuring hands and fingers are clear of the collapsing sections to prevent pinching.
- Overreaching: Never overreach. Keep your body centered between the side rails. Move the ladder closer to your work area as needed.
- Electrical Hazards: Avoid using the ladder near electrical wires or equipment. Aluminum conducts electricity.
- Weather Conditions: Do not use the ladder in strong winds, rain, or on icy surfaces.
- Inspection: Regularly inspect the ladder for damage, wear, or loose components. Do not use a damaged ladder.

Image 1.1: The Yesker 12.5ft Telescoping Ladder, illustrating its compact collapsed form and full extension. Note the safety warning labels on each rung.

Image 1.2: Detailed view of key safety and design features, including the self-locking mechanism for rungs, anti-slip components, and the convenient storage strap.
2. Setup and Extension
The Yesker 12.5ft Telescoping Ladder is designed for easy setup and adjustment to various heights.
- Positioning: Place the ladder on a stable, level surface. Ensure the non-slip end caps are firmly on the ground.
- Extending Rungs: Starting from the bottom rung, pull each section upwards until the spring-loaded locking pins on both sides audibly click into place.
- Partial Extension: The ladder can be extended rung by rung to achieve the desired working height. Only extend the necessary number of rungs, ensuring all extended rungs are fully locked.
- Full Extension: To reach the maximum height of 12.5 feet, extend all sections until each rung is securely locked.
- Verification: Before climbing, visually inspect all extended rungs to confirm that the locking mechanisms are fully engaged on both sides of each rung.

Image 2.1: The ladder's dimensions in both collapsed (2.83ft) and fully extended (12.5ft) configurations, highlighting its compact storage and extended reach.
3. Operating Instructions
Proper operation ensures both efficiency and safety when using the Yesker Telescoping Ladder.
3.1 Ascending and Descending
- Always face the ladder when ascending or descending.
- Maintain three points of contact (two hands and one foot, or two feet and one hand) with the ladder at all times.
- Wear appropriate footwear with good grip.
3.2 Retracting the Ladder
To retract the ladder safely and prevent finger pinching, follow these steps:
- Ensure the ladder is on a stable surface and no one is on it.
- Start from the top rung. Place your thumbs on the two lock buttons located on each side of the rung.
- Simultaneously press both lock buttons to release the rung.
- Gently lower the rung. It will retract into the section below.
- Repeat this process for each subsequent rung, working your way down to the base of the ladder. Always ensure your fingers are clear of the collapsing sections.
- Once fully collapsed, secure the ladder with the convenient storage strap.

Image 3.1: Visual guide for the safe retraction process, emphasizing the simultaneous pressing of lock buttons to prevent finger pinching.
4. Maintenance
Regular maintenance ensures the longevity and safe operation of your Yesker Telescoping Ladder.
- Cleaning: Keep the ladder clean from dirt, grease, paint, and other foreign materials. Use a damp cloth to wipe down the aluminum surfaces. Avoid abrasive cleaners.
- Lubrication: Periodically apply a silicone-based lubricant to the sliding mechanisms and locking pins to ensure smooth operation. Do not over-lubricate.
- Inspection: Before each use, inspect all components for damage, cracks, bends, or excessive wear. Pay close attention to the rungs, locking mechanisms, end caps, and the storage strap.
- Storage: Store the ladder in a dry, cool place, away from direct sunlight and extreme temperatures. Ensure it is secured to prevent accidental falls. The compact design allows for storage in car trunks, under beds, or in closets.
- Repairs: Do not attempt to repair damaged parts yourself. Contact the manufacturer or a qualified service center for repairs or replacement parts.
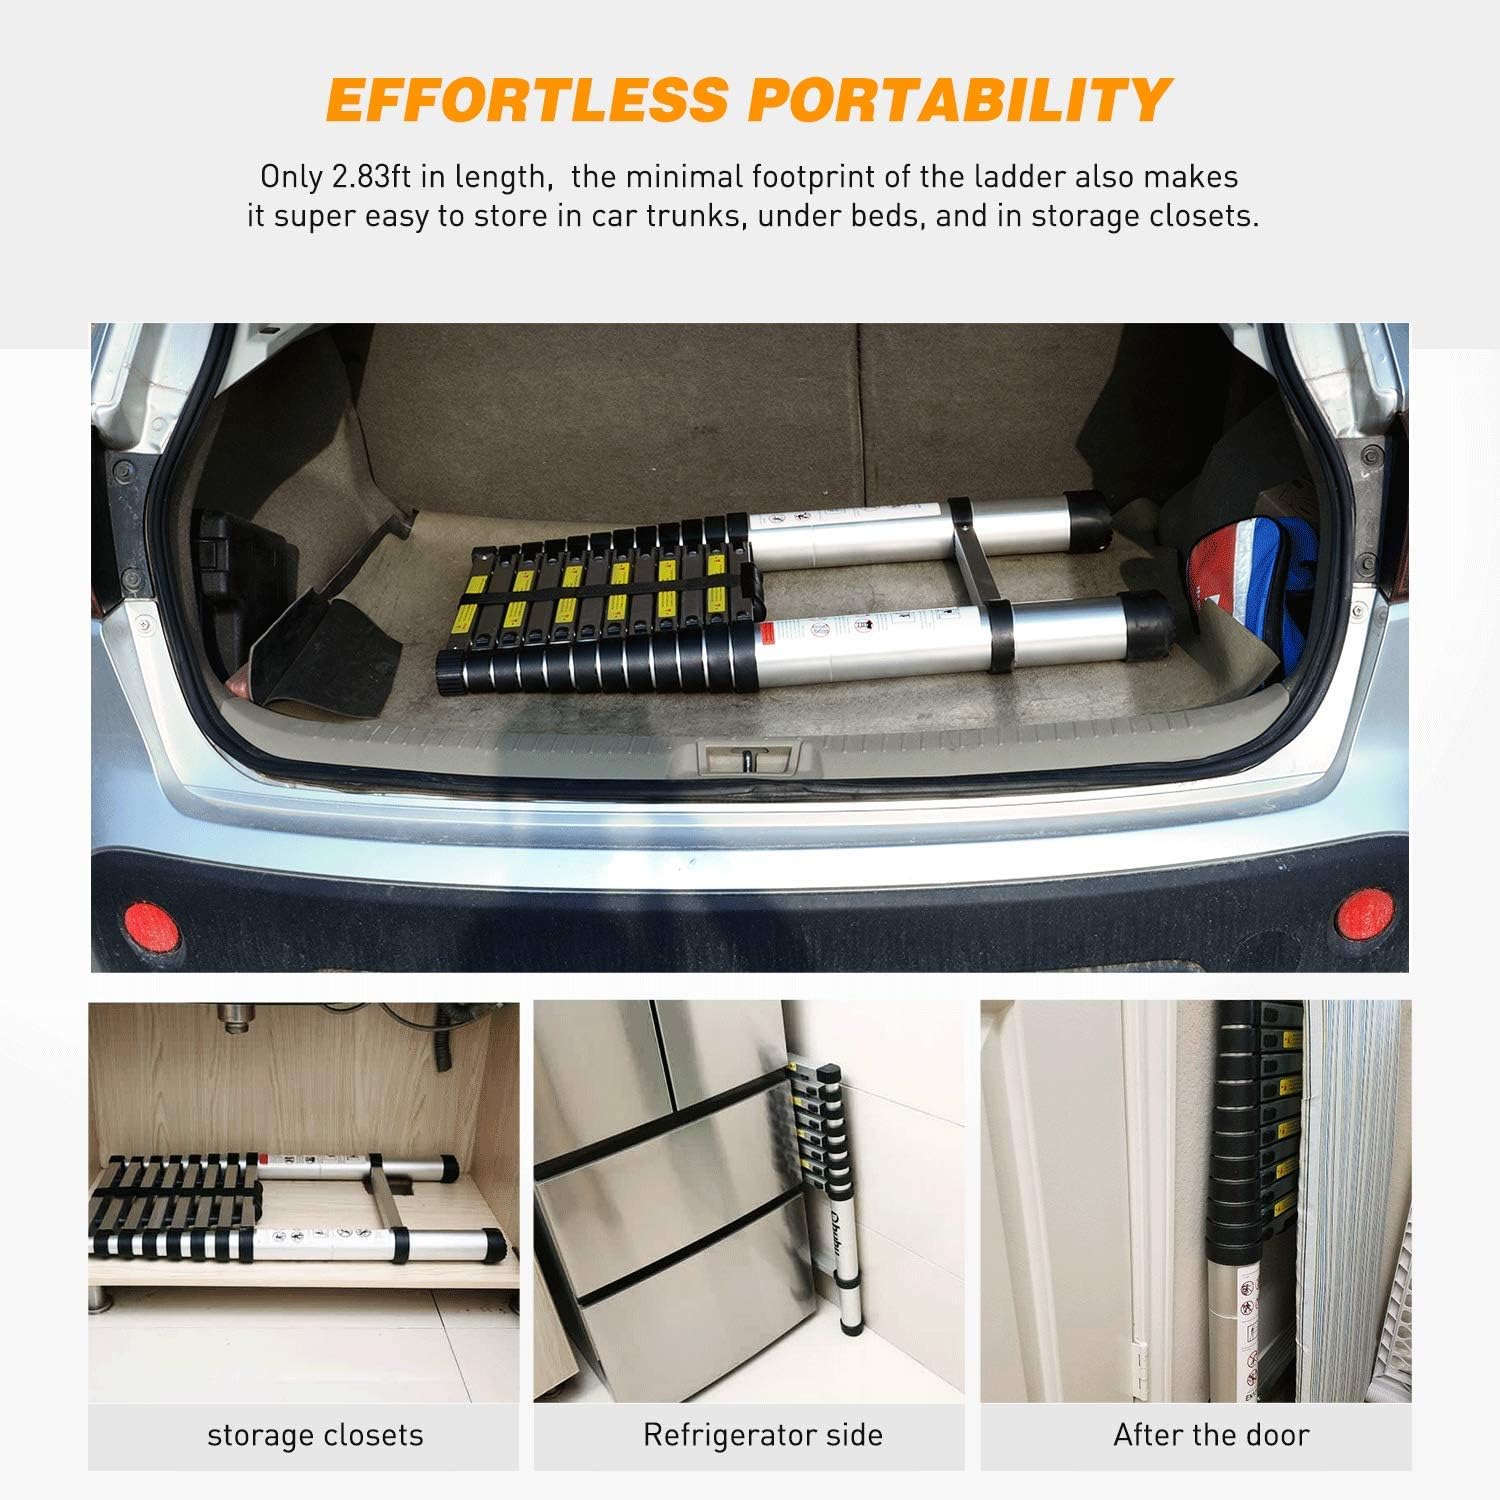
Image 4.1: Examples of compact storage options for the ladder, including a car trunk, under a bed, and behind a door, highlighting its portability.
5. Troubleshooting
This section addresses common issues you might encounter with your telescoping ladder.
| Problem | Possible Cause | Solution |
|---|---|---|
| Rungs not locking securely | Dirt or debris in locking mechanism; bent or damaged pins; rung not fully extended. | Clean the locking mechanisms. Ensure each rung is pulled up until it clicks. If pins are damaged, discontinue use and contact support. |
| Difficulty retracting rungs | Lack of lubrication; dirt/debris; improper retraction technique. | Apply silicone lubricant to sliding parts. Clean mechanisms. Ensure both lock buttons are pressed simultaneously and firmly. |
| Ladder feels unstable | Uneven ground; rungs not fully locked; incorrect angle. | Ensure ladder is on a firm, level surface. Verify all extended rungs are locked. Adjust ladder angle to approximately 75 degrees. |
6. Specifications
- Model: 12.5ft Telescoping Ladder (EN1)
- Material: Aluminum
- Maximum Height: 12.5 feet (150 inches)
- Collapsed Height: Approximately 2.83 feet (34 inches)
- Load Capacity: 300 pounds (136 kg)
- Item Weight: Approximately 24.9 pounds (11.3 kg)
- Certifications: EN131 Certified
- Color: Silver/Black
7. Warranty and Support
For warranty information, technical support, or to inquire about replacement parts, please contact Yesker customer service. Refer to your purchase documentation for specific contact details or visit the official Yesker website.
Brand: Yesker
ASIN: B0099V3HYC