
1. Introduction
This manual provides essential information for the proper setup, operation, and maintenance of your Dual DAB 2 A DAB/DAB+ Radio Adapter. Please read these instructions carefully before using the device to ensure optimal performance and safety. The Dual DAB 2 A allows you to upgrade your existing stereo system with digital radio reception (DAB/DAB+) and traditional FM radio.
2. Safety Information
- Power Source: Use only the specified power adapter. Ensure the voltage matches the requirements of the device.
- Water and Moisture: Do not expose the device to rain, moisture, or dripping/splashing liquids. Do not place objects filled with liquids, such as vases, on the device.
- Ventilation: Ensure adequate ventilation. Do not block ventilation openings.
- Heat: Keep the device away from heat sources such as radiators, heat registers, stoves, or other apparatus (including amplifiers) that produce heat.
- Cleaning: Unplug the device from the power outlet before cleaning. Use a soft, dry cloth. Do not use liquid cleaners or aerosol cleaners.
- Servicing: Do not attempt to service this product yourself. Refer all servicing to qualified service personnel.
3. Package Contents
Please check that all items listed below are included in your package:
- Dual DAB 2 A Radio Adapter
- Power Adapter
- External Antenna (wire with connector)
- Remote Control
- User Manual (this document)
4. Product Overview
4.1 Front Panel
The front panel features the main display and controls for operating the device.

Image 4.1: Front view of the Dual DAB 2 A radio adapter. The display shows the current time (14:28) and the selected station ("Senderliste #Galaxy"). The "DAB+" logo is visible at the top left, and "Dual" is printed at the bottom center.

Image 4.2: Angled front view of the Dual DAB 2 A, providing a clearer look at the illuminated multi-line LCD display and the device's compact design.
4.2 Rear Panel and Connections
The rear panel contains all necessary connection ports for power, antenna, and audio output.

Image 4.3: Rear view of the Dual DAB 2 A. From left to right, the ports are: LINE OUT (3.5mm audio jack), DC 6.0V=0.5A (power input), ANTENNA (coaxial connector for external antenna), and POWER button.

Image 4.4: Side view of the Dual DAB 2 A, illustrating its compact and slightly curved profile.

Image 4.5: Angled side view showing the rear connections, including the Line Out, DC power input, and antenna port.
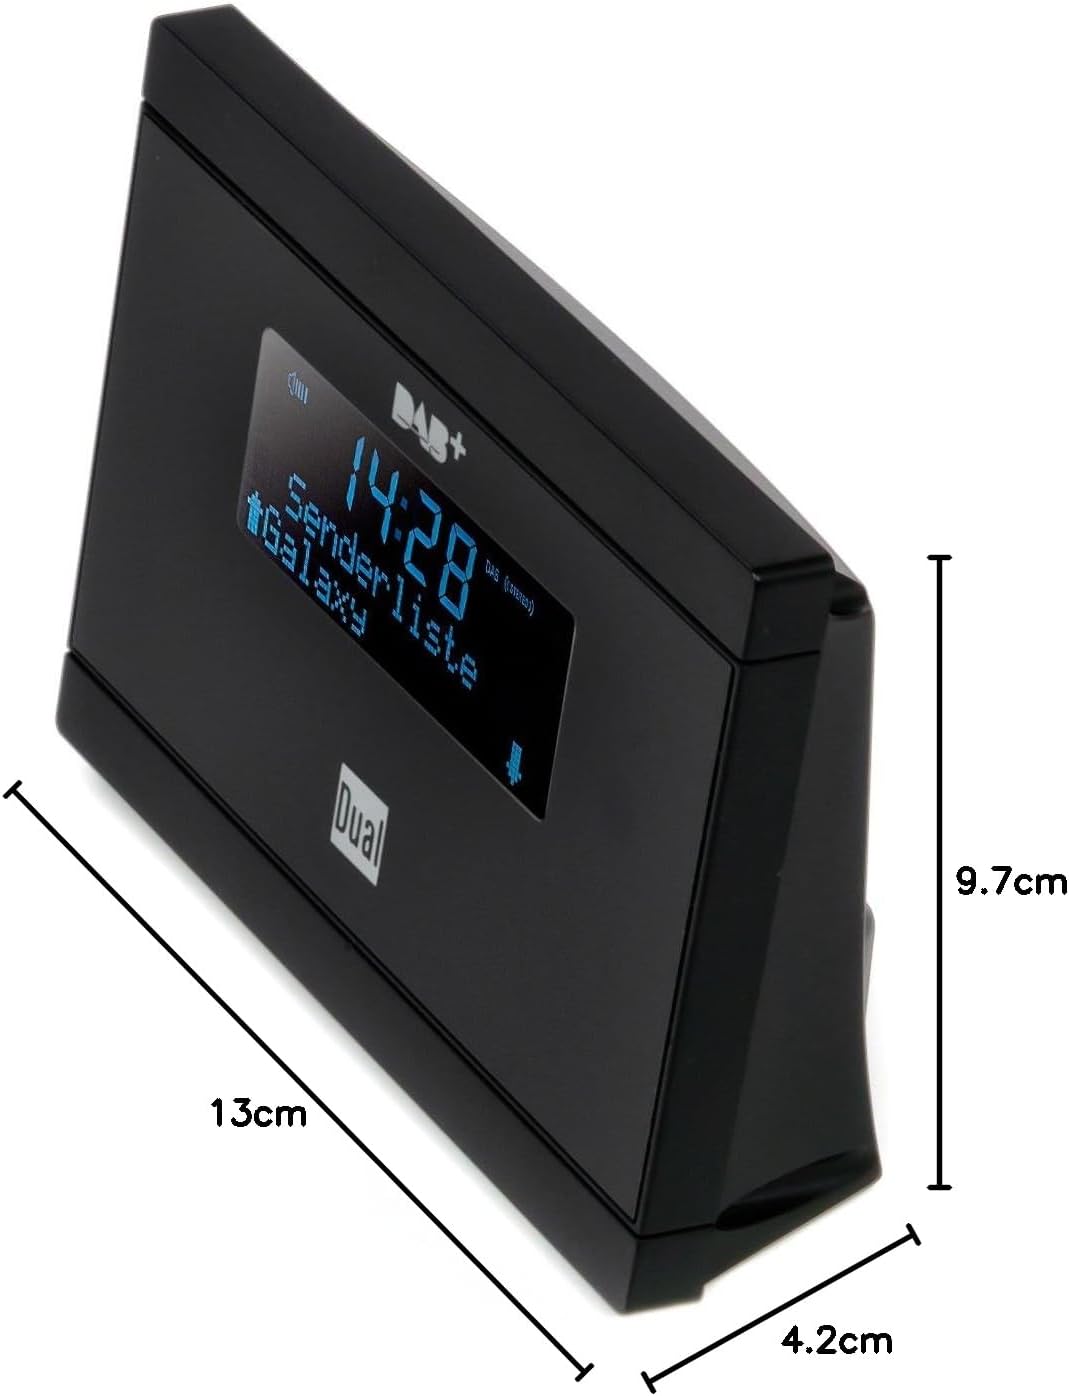
Image 4.6: Dimensions of the Dual DAB 2 A: 13 cm (length), 4.2 cm (width), and 9.7 cm (height).
5. Setup
5.1 Connecting the Antenna
- Locate the ANTENNA port on the rear of the DAB 2 A.
- Connect the supplied external wire antenna to this port.
- For optimal reception, position the antenna away from other electronic devices and metallic objects. You may also connect a commercially available external antenna for improved signal quality.
5.2 Connecting to your Stereo System
- Locate the LINE OUT (3.5mm jack) on the rear of the DAB 2 A.
- Connect an audio cable (not supplied) from the LINE OUT of the DAB 2 A to an available audio input (e.g., AUX IN, LINE IN) on your existing stereo system or audio device.
5.3 Power Connection
- Connect the supplied power adapter to the DC 6.0V=0.5A port on the rear of the DAB 2 A.
- Plug the power adapter into a suitable wall outlet.
6. Operating Instructions
6.1 Powering On/Off
Press the POWER button on the rear of the device or on the remote control to turn the unit on or off.
6.2 Initial Scan (DAB/DAB+)
Upon first power-on, the device will automatically perform a scan for available DAB/DAB+ stations. This process may take a few minutes. Once complete, the first available station will begin playing.
6.3 Switching Between DAB/DAB+ and FM
Use the MODE button on the remote control or the device (if available) to switch between DAB/DAB+ and FM radio modes.
6.4 Tuning and Station Selection
- DAB/DAB+: Use the UP/DOWN arrow buttons on the remote control or device to navigate through the list of available digital stations.
- FM: In FM mode, use the UP/DOWN arrow buttons to manually tune frequencies or initiate an automatic scan for the next available station.
6.5 Storing and Recalling Presets
The DAB 2 A allows you to store up to 20 favorite stations (DAB/DAB+ and FM combined).
- To Store: Tune to the desired station. Press and hold the PRESET button (or similar, refer to remote control layout) until the display shows a preset number. Use the arrow buttons to select a preset number (1-20) and confirm.
- To Recall: Press the PRESET button briefly, then use the arrow buttons to select the desired preset station.
6.6 Clock, Alarm, and Sleep Functions
The device features a clock, alarm, and sleep timer. Refer to the detailed instructions in the full manual for setting these functions. The alarm can be set to wake you with DAB, FM, or a buzzer sound.
7. Maintenance
- Cleaning: Always unplug the device before cleaning. Use a soft, dry, lint-free cloth to wipe the surfaces. Do not use abrasive cleaners, waxes, or solvents.
- Storage: If not in use for an extended period, unplug the device and store it in a cool, dry place.
8. Troubleshooting
| Problem | Possible Cause | Solution |
|---|---|---|
| No power | Power adapter not connected or faulty outlet. | Ensure the power adapter is securely connected to the device and a working power outlet. |
| No sound | Audio cable not connected, incorrect input selected on stereo, or volume too low. | Check audio cable connection. Select the correct input on your stereo system. Increase volume on both the DAB 2 A and your stereo. |
| Poor DAB/DAB+ reception or no stations found | Weak signal, antenna not properly connected or positioned. | Ensure the antenna is securely connected and positioned for optimal reception. Try repositioning the antenna. Consider using a higher-gain external antenna. Perform a full scan for stations. |
| Poor FM reception | Weak signal, antenna not properly connected or positioned. | Extend and reposition the wire antenna. Try a different antenna if available. |
| Remote control not working | Batteries are dead or incorrectly inserted, or line of sight is blocked. | Replace batteries with new ones, ensuring correct polarity. Remove any obstructions between the remote and the device. |
9. Specifications
| Feature | Detail |
|---|---|
| Brand | Dual |
| Model Number | DAB 2 A |
| Color | Black |
| Connectivity Technology | Auxiliary (3.5mm Line Out) |
| Special Features | DAB/DAB+ Radio, FM Tuner, Clock, Alarm, Sleep Function |
| Compatible Devices | Devices with 3.5 mm audio connector |
| Product Dimensions (L x W x H) | 13 cm x 4.2 cm x 9.7 cm |
| Tuning Technology | FM, DAB, DAB+ |
| Power Source | Electric Cable (DC 6.0V=0.5A) |
| Supported Radio Bands | FM, DAB, DAB+ |
| Item Weight | 200 Grams |
10. Warranty and Support
For warranty information and technical support, please refer to the documentation provided with your purchase or contact Dual customer service. Keep your proof of purchase for any warranty claims.


