Introduction
Welcome to the user manual for your ALFA AIP-W525H Wireless Router. This guide provides detailed instructions for setting up, operating, maintaining, and troubleshooting your device to ensure optimal performance and connectivity.
Safety Information
- Use only the power adapter provided with the device.
- Do not expose the device to water, fire, or high temperatures.
- Keep the device away from direct sunlight and heat sources.
- Ensure proper ventilation to prevent overheating.
- Do not attempt to disassemble or repair the device yourself.
Package Contents
Please verify that all items are present in your package:
- ALFA AIP-W525H Wireless Router
- Power Adapter
- Ethernet Cable
- Quick Installation Guide (This manual serves as the comprehensive guide)
Product Overview
Familiarize yourself with the components of your ALFA AIP-W525H Wireless Router.
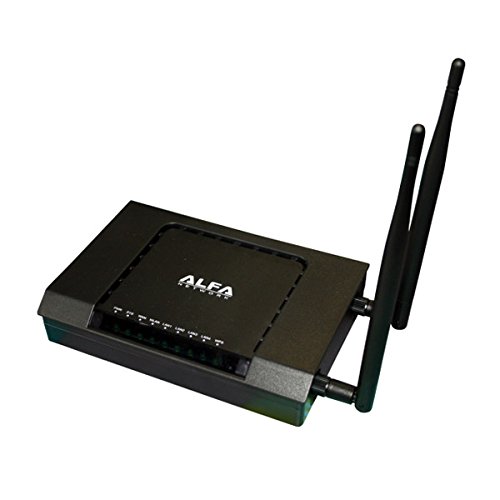
Image: Front view of the ALFA AIP-W525H Wireless Router, showing the main unit with the ALFA Network logo, indicator lights, and two external antennas connected on the right side.
Front Panel Indicators
- Power LED: Indicates the power status of the device.
- WLAN LED: Indicates wireless activity (blinks when data is transmitted).
- LAN LEDs: Indicate activity on the respective LAN ports (blinks when data is transmitted).
- WAN LED: Indicates internet connection status (blinks when data is transmitted to/from the internet).
Rear Panel Ports
- Power Port: Connects to the included power adapter.
- WAN Port: Connects to your modem or internet service provider's (ISP) line for internet access.
- LAN Ports (x4): Connects to wired devices such as computers, gaming consoles, or smart TVs.
- Reset Button: Used to restore the router to its factory default settings.
Setup
Hardware Installation
- Positioning: Place the router in a central location within your home or office, away from obstructions, large metal objects, and sources of interference (e.g., microwaves, cordless phones).
- Connect Antennas: Screw the two external antennas firmly onto the connectors at the back of the router. Adjust them vertically for optimal signal coverage.
- Connect to Modem: Connect one end of the provided Ethernet cable to the WAN port (usually distinctively colored) on the router and the other end to the LAN/Ethernet port on your modem.
- Connect Power: Connect the power adapter to the router's power port and then plug it into an electrical outlet.
- Power On: Wait for the Power LED to become solid, indicating the router is powered on and ready. Other indicator lights may flash as the router initializes.
Initial Configuration (via Web Interface)
- Connect a Device: Connect your computer to one of the router's LAN ports using an Ethernet cable, or connect wirelessly to the default Wi-Fi network. The default SSID (network name) and password are typically found on a sticker on the bottom or back of the router.
- Access Web Interface: Open a web browser (e.g., Chrome, Firefox, Edge) and enter the router's default IP address in the address bar (e.g., 192.168.1.1 or 192.168.0.1). Refer to the sticker on your router for the exact address.
- Login: Enter the default username and password when prompted (common defaults are admin/admin or admin/password). It is highly recommended to change these credentials immediately for security.
- Run Setup Wizard: Most routers have a quick setup wizard that guides you through configuring your internet connection type (e.g., DHCP, PPPoE, Static IP) and wireless network settings (SSID, password, security type). Follow the on-screen instructions.
- Save Settings: Apply and save your configurations. The router may restart after applying changes.
Operating Your Router
Connecting Devices
You can connect devices to your router both wirelessly and via Ethernet cables.
- Wireless Connection: On your Wi-Fi enabled device (smartphone, laptop, tablet), search for available Wi-Fi networks, select your configured SSID, and enter the password.
- Wired Connection: Connect an Ethernet cable from your device to any of the available LAN ports on the router. This provides a stable and often faster connection.
Network Settings
Access the web interface to manage advanced network settings:
- Wireless Settings: Modify your Wi-Fi network name (SSID), password, security type (WPA2-PSK is recommended for strong security), and wireless channel to optimize performance.
- LAN Settings: Adjust the router's internal IP address and configure the DHCP server settings, which assigns IP addresses to devices on your local network.
- WAN Settings: If your Internet Service Provider (ISP) requires specific configurations for your internet connection, you can adjust these parameters here.
- Port Forwarding/DMZ: Configure these features for specific applications, online gaming, or to allow external access to devices on your local network.
- Firewall: Manage security rules to protect your network from unauthorized access and threats.
Maintenance
Firmware Updates
Regularly check for and install firmware updates from the ALFA Network official website. Firmware updates can improve performance, add new features, and fix security vulnerabilities.
- Download the latest firmware file specifically for your ALFA AIP-W525H model from the ALFA Network support page.
- Access the router's web interface using a wired connection for stability.
- Navigate to the "System Tools" or "Firmware Upgrade" section.
- Upload the downloaded firmware file and follow the on-screen instructions. It is crucial not to power off or disconnect the router during the update process, as this can damage the device.
Resetting to Factory Defaults
If you encounter persistent issues, forget your login credentials, or wish to reconfigure the router from scratch, you can reset it to its factory default settings.
- Hardware Reset: With the router powered on, use a paperclip or a thin, pointed object to press and hold the Reset button (usually a small recessed button on the rear panel) for 5-10 seconds until the indicator lights flash. Release the button and wait for the router to restart.
- Software Reset: Access the web interface, navigate to "System Tools" or "Backup & Restore," and select the "Factory Reset" option. Confirm your choice when prompted.
Troubleshooting
| Problem | Possible Cause | Solution |
|---|---|---|
| No Power | Power adapter not connected or faulty; power outlet issue. | Check all power connections. Ensure the power adapter is securely plugged into the router and a working electrical outlet. Try a different outlet. |
| No Internet Access | Modem issue; incorrect WAN settings; Ethernet cable disconnected; ISP outage. | Check your modem's status lights. Verify WAN settings in the router's web interface. Ensure the Ethernet cable from the modem to the router's WAN port is securely connected. Contact your ISP if necessary. |
| Cannot Access Web Interface | Incorrect IP address; device not connected to router; IP conflict. | Verify the router's default IP address (check sticker). Ensure your device is connected to the router (wired or wireless). Try restarting both your computer and the router. |
| Slow Wireless Speed | Wireless interference; outdated firmware; too many connected devices; poor router placement. | Change the Wi-Fi channel in the router settings. Update the router's firmware. Reduce the number of active devices. Optimize router placement for better signal. |
| Forgot Login Password | Password lost or forgotten. | Perform a factory reset of the router to restore default login credentials. You will then need to reconfigure your network settings. |
Specifications
| Feature | Detail |
|---|---|
| Brand | ALFA Network |
| Model Number | AIP-W525H |
| Wireless Standard | 802.11n, 802.11b |
| Data Transfer Rate | 300 Megabits Per Second |
| LAN Port Bandwidth | 10/100 megabits per second |
| Connectivity Technology | Wireless |
| Product Dimensions | 22 x 19 x 7 cm |
| Product Weight | 439.99 g |
| Recommended Use | Home |
Warranty and Support
The ALFA AIP-W525H Wireless Router comes with a standard manufacturer's warranty. Please refer to the warranty card included in your package for specific terms and conditions, as warranty terms may vary by region.
For technical support, firmware downloads, or further assistance, please visit the official ALFA Network website or contact their customer support channels. Keep your purchase receipt as proof of purchase for any warranty claims.


