Introduction
The Laney AH40 is a versatile 40-watt multi-input combo amplifier designed to accommodate a wide range of instruments and audio sources. Featuring three independent channels, a 5-band graphic master EQ, and digital delay, it offers optimum performance and flexibility for musicians. Its compact design makes it suitable for small stages, personal monitoring, and easy transport. The AH40 is engineered to handle keyboards, electronic drums, microphones, acoustic/electric instruments, and playback devices, embodying the principle: ALL INSTRUMENTS WELCOME!

Image: Angled view of the Laney AH40 Multi-Input Combo Amplifier, showcasing its compact design and front grille.
Setup
Unpacking and Placement
- Carefully remove the amplifier from its packaging. Retain all packaging materials for future transport or service.
- Place the AH40 on a stable, level surface. Ensure adequate ventilation around the unit to prevent overheating. Do not obstruct the rear vent.
- The amplifier can be used in an upright position or tilted back as a monitor wedge for personal monitoring.
Power Connection
- Ensure the amplifier's power switch is in the OFF position.
- Connect the supplied AC power cord to the power inlet on the rear panel of the amplifier.
- Plug the other end of the power cord into a suitable grounded AC power outlet.
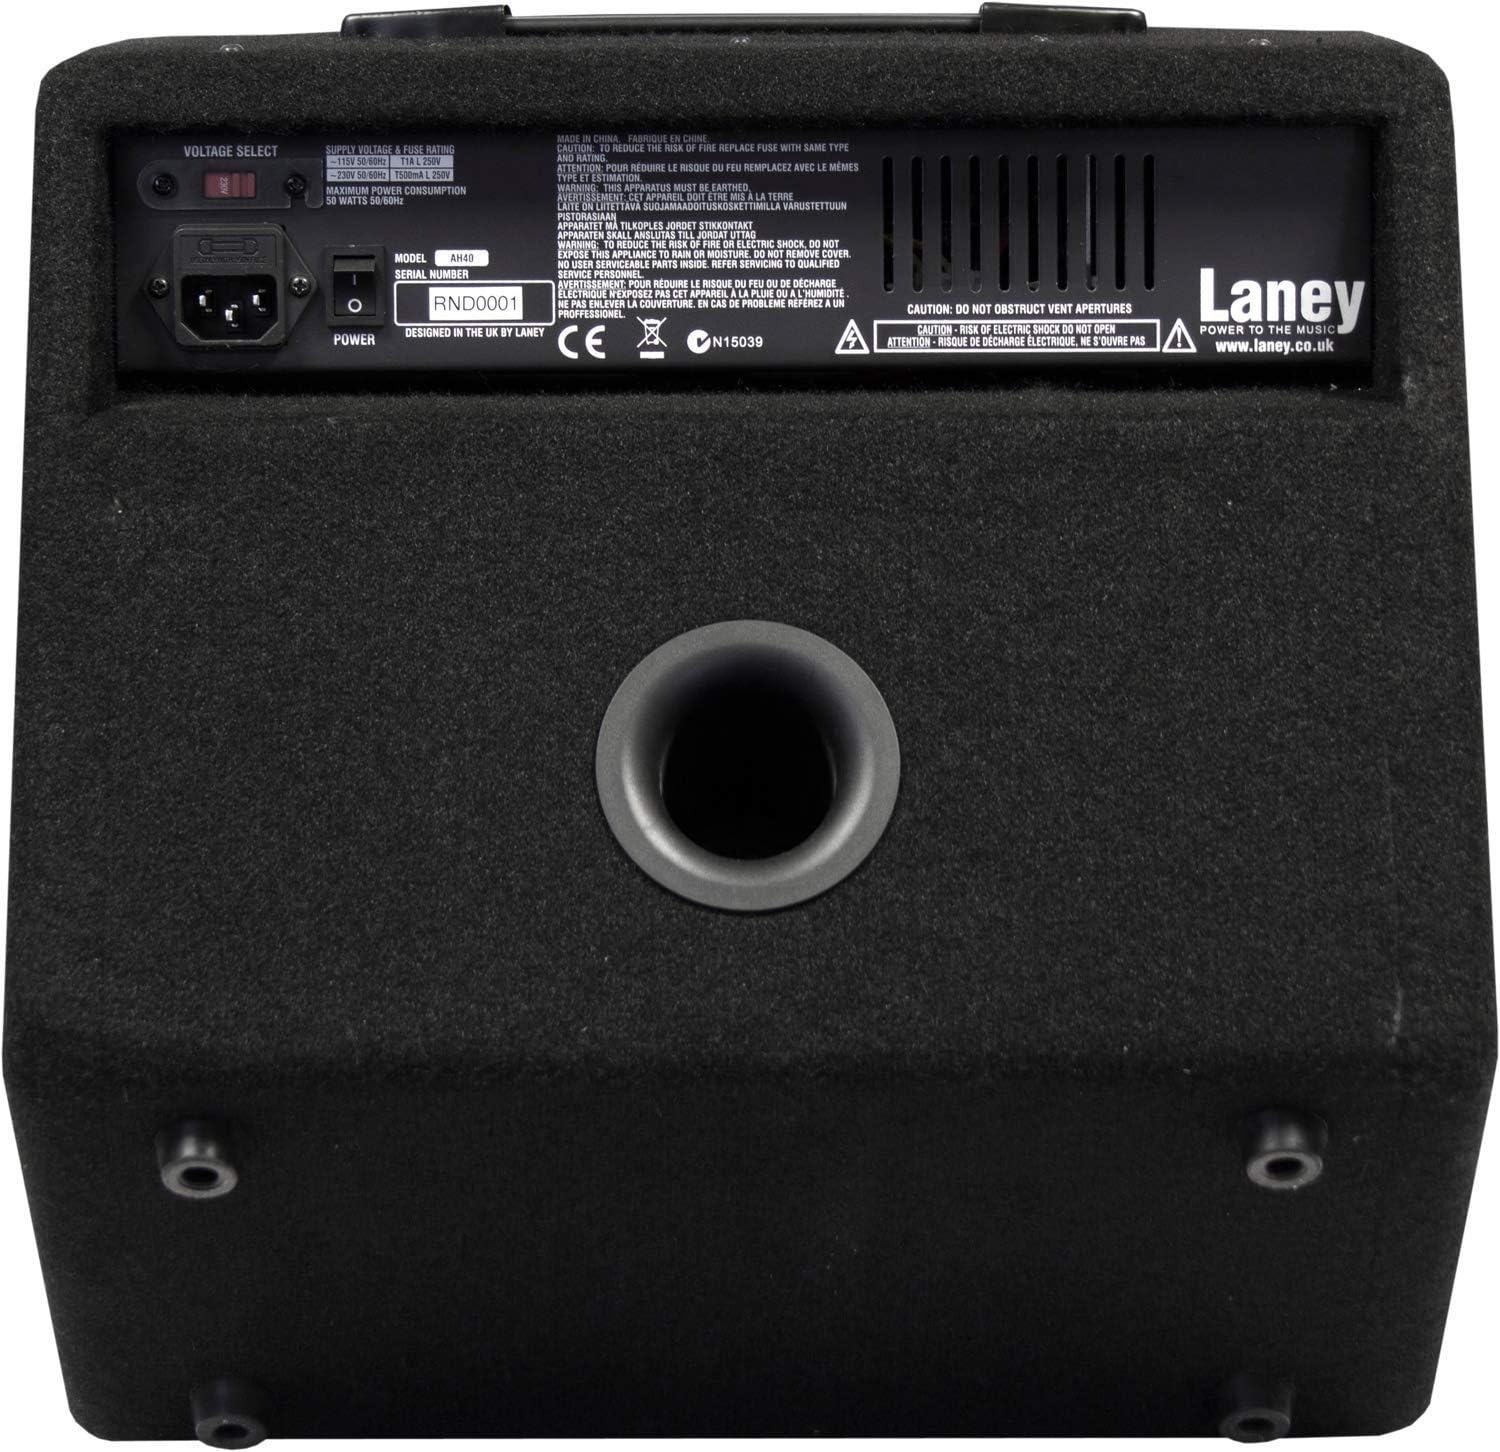
Image: Rear panel of the AH40 amplifier, highlighting the power input, fuse holder, and ventilation port. Note the warning about not obstructing the vent.
Instrument and Microphone Connections
The AH40 features three input channels, each designed for different types of audio sources:
- Channel 1 (CH1): Features an XLR input for microphones and a 1/4-inch jack input for line-level instruments.
- Channel 2 (CH2): Provides two 1/4-inch jack inputs (L/R) for stereo line-level instruments like keyboards or electronic drums.
- Channel 3 (CH3): Offers a 1/4-inch jack input switchable between line-level and instrument-level (e.g., guitar).
Connect your instruments or microphones to the appropriate channels before powering on the amplifier.
Operating Instructions
Familiarize yourself with the control panel of your AH40 amplifier. The controls are logically laid out for ease of use.

Image: Detailed view of the AH40 amplifier's control panel, showing inputs, level controls, equalization sliders, and master section.
Control Panel Overview
- CH1 (Mic/Line): XLR and 1/4-inch inputs with a dedicated LEVEL control.
- CH2 (Stereo Line): Left and Right 1/4-inch inputs with a shared LEVEL control.
- CH3 (Line/Inst): 1/4-inch input with a switch to select between Line and Instrument level, and a dedicated LEVEL control.
- Equalisation: A 5-band graphic EQ section with sliders for 100Hz, 250Hz, 1KHz, 3KHz, and 10KHz frequencies. Adjust these to shape your overall tone.
- Master Section: Includes MASTER VOLUME, AUX IN (3.5mm jack for external audio players), LINE OUT (1/4-inch jack for connecting to other amplifiers or PA systems), and PHONES (3.5mm headphone output).
- Power Indicator: LED light indicating when the unit is powered on.
Basic Operation Steps
- Ensure all LEVEL controls and the MASTER VOLUME are set to their minimum positions.
- Connect your instruments/microphones to the appropriate channels.
- Turn on the amplifier using the power switch on the rear panel. The power indicator LED on the front panel will illuminate.
- Slowly increase the LEVEL control for the channel(s) you are using until you hear your signal.
- Gradually increase the MASTER VOLUME to achieve your desired overall output level.
- Adjust the 5-band graphic EQ sliders to fine-tune your sound.
- For silent practice, connect headphones to the PHONES output. This will mute the main speaker.
- To play along with external audio, connect your device to the AUX IN jack. The AUX IN level is controlled by your external device.
Maintenance
Cleaning
- Always disconnect the amplifier from the power supply before cleaning.
- Use a soft, dry cloth to wipe down the exterior surfaces.
- For stubborn dirt, a slightly damp cloth can be used, followed by a dry cloth. Avoid using abrasive cleaners, solvents, or waxes.
- Do not allow any liquids to enter the amplifier's vents or control panel.
Storage
- Store the amplifier in a cool, dry place, away from direct sunlight and extreme temperatures.
- Protect the unit from dust and moisture. If storing for extended periods, consider covering it with a dust cover.
Safety Precautions
- Do not operate the amplifier with damaged power cords or plugs.
- Ensure proper ventilation; never block the air vents.
- Do not expose the amplifier to rain or moisture.
- Refer all servicing to qualified service personnel. Do not attempt to open the amplifier chassis.
Troubleshooting
If you encounter issues with your AH40 amplifier, consult the following common troubleshooting steps before seeking professional service.
| Problem | Possible Cause | Solution |
|---|---|---|
| No power | Power cord disconnected; Power outlet faulty; Blown fuse | Check power cord connection; Try a different outlet; Replace fuse with the correct type (refer to rear panel for specifications). |
| No sound output | Volume controls too low; Instrument cable faulty; Incorrect input selected; Headphones connected | Increase channel LEVEL and MASTER VOLUME; Test with a different cable; Ensure instrument is connected to the correct channel; Disconnect headphones. |
| Distorted sound | Input signal too high; Amplifier overloaded; EQ settings extreme | Reduce instrument output or channel LEVEL; Lower MASTER VOLUME; Adjust EQ sliders to a more neutral position. |
| Hum or noise | Ground loop; Faulty cables; Nearby electronic interference | Ensure all equipment is properly grounded; Try different cables; Move amplifier away from other electronic devices. |
Specifications
| Model | AH40 |
| Brand | Laney |
| Output Wattage | 40 Watts |
| Speaker | 1 x 8” Custom woofer |
| Channels | 3 |
| Equalization | 5-Band Graphic EQ (100Hz, 250Hz, 1KHz, 3KHz, 10KHz) |
| Compatible Devices | Keyboards, E-drums, Microphones, Acoustic/Electric Instruments, Playback Devices |
| Connector Types | XLR, 1/4-inch Jack, 3.5mm Jack |
| Hardware Interface | 1/4-inch Audio, 3.5mm Audio |
| Power Source | Electric |
| Color | Black |
| Material | Wood |
| Item Weight | 25.7 pounds (11.66 kg) |
| Product Dimensions | 4.3 x 12.9 x 15.4 inches (10.9 x 32.8 x 39.1 cm) |
Warranty Information
Laney products are manufactured to high standards and come with a limited warranty. For specific details regarding the warranty period, coverage, and terms and conditions applicable to your AH40 amplifier, please refer to the warranty card included with your product or visit the official Laney website. Please retain your proof of purchase for any warranty claims.
Customer Support
Should you require further assistance, technical support, or have questions not covered in this manual, please contact Laney customer support. You can find contact information, FAQs, and additional resources on the official Laney website: www.laney.co.uk.


