
1. Product Overview
The Central Pneumatic Automatic Compressor Tank Drain Kit is designed to automatically remove condensation from your air compressor tank. This process helps prevent rust formation, thereby extending the operational life of the compressor tank. The kit features a durable brass construction and is engineered for clog-free discharge.
- Extends Compressor Tank Life: Automatically removes moisture to prevent internal corrosion.
- Automatic Clog-Free Discharge: Designed for reliable, maintenance-free operation.
- High-Quality Brass Construction: Ensures durability and resistance to corrosion.
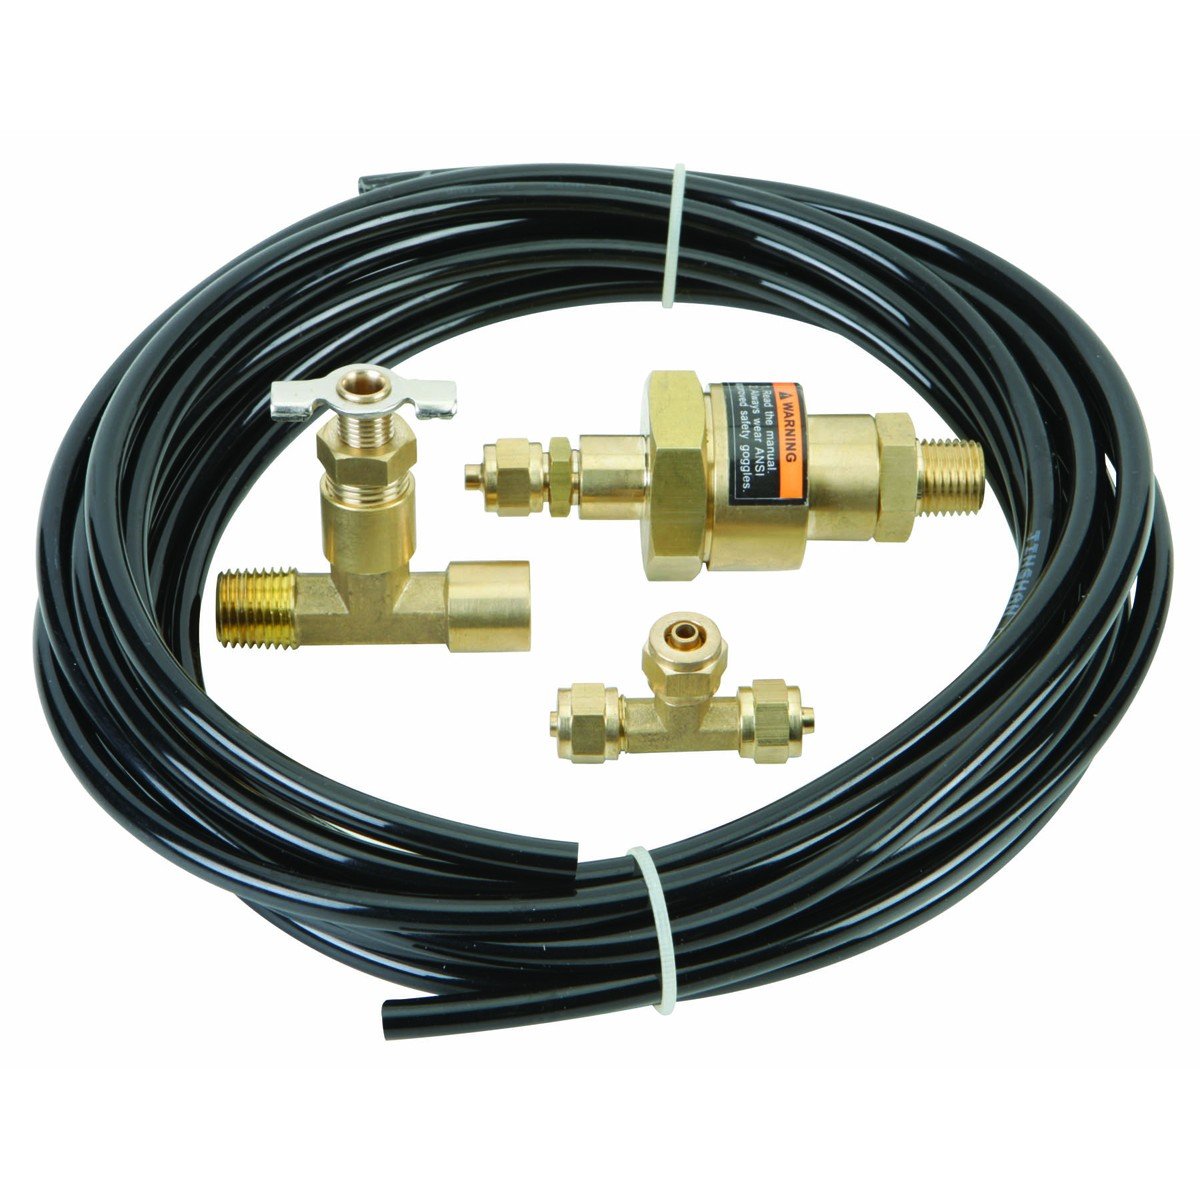
Figure 1: Components of the Automatic Compressor Tank Drain Kit, including the brass fittings and polyurethane tubing.
2. Safety Information
Read and understand all safety warnings and instructions before installing or operating this product. Failure to follow these instructions may result in property damage, serious injury, or death.
- Depressurize System: Always ensure the air compressor tank is fully depressurized before attempting any installation, maintenance, or repair.
- Eye Protection: Wear ANSI-approved safety goggles during installation and when working near compressed air systems.
- Proper Tools: Use appropriate tools for installation to prevent damage to components or injury.
- Thread Sealant: Use thread sealant (e.g., PTFE tape or pipe dope) on all threaded connections to ensure an airtight seal and prevent leaks.
- Pressure Rating: Do not exceed the maximum pressure rating of 145 PSI for the included polyurethane tubing.
- Ventilation: Ensure adequate ventilation when working with air compressors.
3. Package Contents
Verify that all components are present and undamaged before proceeding with installation. If any parts are missing or damaged, contact customer support.
- 1/4'' NPT Street Tee
- 1/4'' Petcock Valve
- 1/4'' Tube Fitting x 1/8'' Male NPT Fitting
- 8 ft. of 1/4'' 145 PSI Polyurethane Tubing
4. Setup and Installation
Follow these steps to properly install the automatic compressor tank drain kit:
- Depressurize Compressor: Turn off the air compressor and disconnect it from the power source. Open the manual drain valve on the bottom of the tank to completely drain all air and moisture.
- Remove Existing Drain: Once the tank is fully depressurized and empty, remove the existing manual drain valve from the bottom of the compressor tank.
- Prepare Connections: Apply thread sealant (e.g., PTFE tape) to the male threads of the 1/4'' NPT Street Tee.
- Install Street Tee: Thread the 1/4'' NPT Street Tee into the drain port at the bottom of the compressor tank. Tighten securely with a wrench, ensuring not to overtighten.
- Install Petcock Valve: Apply thread sealant to the male threads of the 1/4'' Petcock Valve. Thread the petcock valve into one of the open ports of the Street Tee. This valve will serve as the automatic drain.
- Install Tubing Fitting: Apply thread sealant to the male threads of the 1/4'' Tube Fitting x 1/8'' Male NPT Fitting. Thread this fitting into the remaining open port of the Street Tee.
- Connect Tubing: Insert one end of the 8 ft. polyurethane tubing firmly into the 1/4'' tube fitting. Ensure a secure connection. Route the other end of the tubing to a suitable drainage area, ensuring it is free from kinks and obstructions.
- Test for Leaks: Reconnect the compressor to power and allow it to build pressure. Once the compressor reaches its cut-off pressure, turn it off. Carefully check all connections for air leaks using a soapy water solution. Bubbles indicate a leak that needs to be tightened.
5. Operating Instructions
The Automatic Compressor Tank Drain Kit operates automatically once installed correctly.
- When the air compressor cycles off and the pressure in the tank drops, the petcock valve will automatically open to discharge accumulated condensation.
- The valve will then close as the pressure stabilizes or the compressor restarts.
- No manual intervention is required for daily draining.
6. Maintenance
Regular inspection and minimal maintenance will ensure the longevity and proper function of your drain kit.
- Monthly Inspection: Visually inspect all connections for leaks and the polyurethane tubing for signs of wear, cracks, or kinks.
- Valve Function Check: Periodically observe the petcock valve during a compressor cycle to ensure it is opening and closing correctly.
- Cleaning: If the valve appears to be sticking or not draining properly, depressurize the tank and carefully remove the petcock valve. Clean any debris or mineral buildup from the valve mechanism.
- Tubing Replacement: Replace the polyurethane tubing if it shows signs of damage or degradation.
7. Troubleshooting
Refer to the following table for common issues and their solutions:
| Problem | Possible Cause | Solution |
|---|---|---|
| Kit not draining water | Petcock valve clogged or stuck closed. | Depressurize tank, remove and clean petcock valve. |
| Air leaks from connections | Insufficient thread sealant or loose connections. | Depressurize tank, reapply thread sealant, and tighten connections. |
| Tubing is damaged or kinked | Physical damage or improper routing. | Replace damaged tubing. Reroute tubing to avoid kinks. |
| Water not fully draining | Drainage tubing outlet is higher than the valve or obstructed. | Ensure tubing has a continuous downward slope to the drainage point. Clear any obstructions. |
8. Specifications
| Feature | Specification |
|---|---|
| Brand | Central Pneumatic |
| Model Number | 5569A |
| Material Type | Brass |
| Maximum Pressure | 145 PSI (for included tubing) |
| Hose Length | 8 feet |
| Included Components | 1/4'' NPT Street T, 1/4'' Petcock, 1/4'' Tube Fitting x 1/8'' Male NPT Fitting, 8 ft. of 1/4'' 145 PSI Polyurethane Tubing |
9. Warranty and Support
For warranty information or technical support regarding your Central Pneumatic Automatic Compressor Tank Drain Kit, please refer to the original product packaging or contact Central Pneumatic customer service directly. Keep your purchase receipt for warranty claims.
Contact Information: Please visit the official Central Pneumatic website for the most current contact details and support resources.