
Ferm WSM1009
FERM WSM1009 Wall Slotter Instruction Manual
Model: WSM1009
1. Introduction
The FERM WSM1009 Wall Slotter is a powerful tool designed for making precise cuts and grooves in walls and floors. This allows for the efficient concealment of cables and electrical pipes. Equipped with two 125mm diamond discs, a 1700W motor, and laser guidance, it is capable of cutting through various hard and dense materials, including stone and concrete.
This manual provides essential information for the safe and effective operation, maintenance, and troubleshooting of your FERM WSM1009 Wall Slotter. Please read it thoroughly before initial use and keep it for future reference.
2. Safety Instructions
Always adhere to general power tool safety warnings and local regulations. Failure to follow these instructions may result in electric shock, fire, and/or serious injury.
2.1 General Safety Warnings
- Work Area Safety: Keep the work area clean and well-lit. Cluttered or dark areas invite accidents. Do not operate power tools in explosive atmospheres, such as in the presence of flammable liquids, gases, or dust.
- Electrical Safety: Power tool plugs must match the outlet. Never modify the plug in any way. Do not expose power tools to rain or wet conditions.
- Personal Safety: Always wear appropriate personal protective equipment (PPE), including safety glasses, hearing protection, dust mask, and heavy-duty gloves. Dress properly; avoid loose clothing or jewelry.
- Tool Use and Care: Do not force the power tool. Use the correct power tool for your application. Disconnect the plug from the power source before making any adjustments, changing accessories, or storing power tools.
2.2 Specific Wall Slotter Safety
- Ensure the work piece is securely fastened.
- Before cutting, always check for hidden electrical wires, gas pipes, or water pipes using a suitable detector.
- The laser guidance system is for alignment only. Do not stare directly into the laser beam.
- Connect a vacuum cleaner to the dust extraction adapter to minimize dust exposure.
- Allow the machine to reach full speed before engaging the cutting surface.
- Maintain a firm grip on the tool with both hands during operation.
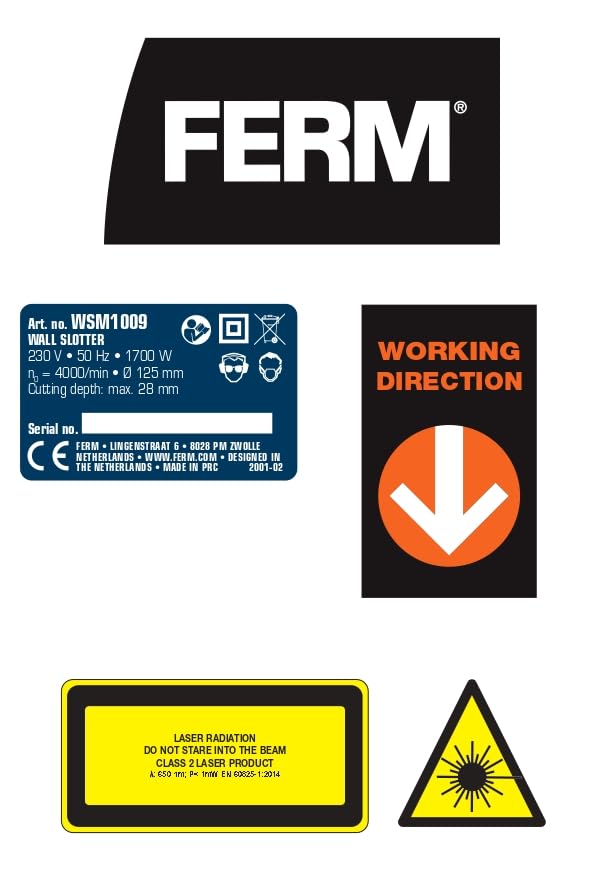
Image: Warning labels for laser radiation, indicating Class 2 laser product and caution against staring into the beam. Always observe safety warnings.
3. Product Components and Parts List
The FERM WSM1009 Wall Slotter comes with the following components:
- FERM WSM1009 Wall Slotter Unit
- 2 Diamond Discs (125mm)
- Vacuum Adapter
- Heavy Duty Storage Case
- Spanner for disc changes
- Hex key
- Batteries (2 AAA for laser)

Image: The FERM WSM1009 Wall Slotter, showing the main unit, diamond discs, vacuum adapter, spanner, hex key, and the heavy-duty storage case.

Image: A close-up view of the FERM WSM1009 Wall Slotter, highlighting the laser guidance system projecting a red line.
4. Setup
4.1 Installing Diamond Discs
- Ensure the tool is unplugged from the power source.
- Open the blade guard.
- Use the provided spanner to loosen the arbor nut.
- Place the two 125mm diamond discs onto the arbor, ensuring they are correctly oriented for cutting.
- Tighten the arbor nut securely with the spanner.
- Close the blade guard.
4.2 Connecting Vacuum Adapter
For dust-free operation, connect a suitable vacuum cleaner to the integrated vacuum adapter port on the tool. This will significantly reduce airborne dust during cutting.

Image: Detail of the FERM WSM1009 Wall Slotter showing the dust extraction port where a vacuum cleaner hose can be attached.
4.3 Adjusting Cutting Depth and Width
The cutting depth can be adjusted up to 28mm, and groove widths can be set to 14mm, 19mm, or 29mm. Refer to the markings on the tool for precise adjustments. Always perform a test cut on a scrap piece of material to verify settings before cutting the main workpiece.
4.4 Laser Guidance Activation
The laser guidance system assists in maintaining a straight cutting line. Insert the 2 AAA batteries into the laser compartment. Activate the laser using its dedicated switch. The laser projects a red line indicating the cutting path.

Image: A detailed view of the laser module on the FERM WSM1009 Wall Slotter, showing the laser emitter and warning symbols.
5. Operating Instructions
5.1 Preparing the Workpiece
Mark the desired cutting path clearly on the wall or floor. Ensure the area is free from obstructions and hidden utilities. Secure any loose material that might interfere with the cut.
5.2 Making a Cut
- Hold the wall slotter firmly with both hands.
- Align the laser line with your marked cutting path.
- Press the safety switch and then the power trigger to start the motor. Allow the discs to reach full operating speed (Max RPM 4000).
- Slowly and steadily guide the tool along the marked line, applying consistent pressure. Let the machine do the work; do not force it.
- Once the cut is complete, release the power trigger and allow the discs to stop rotating before lifting the tool from the workpiece.

Image: A user demonstrating the FERM WSM1009 Wall Slotter in action on a brick wall, with a vacuum hose connected for dust extraction and safety gear worn.

Image: A user operating the FERM WSM1009 Wall Slotter on a plastered wall, showing the laser guide in use for precise cutting.
6. Maintenance
Regular maintenance ensures the longevity and optimal performance of your wall slotter.
6.1 Cleaning
- After each use, disconnect the tool from power and clean off any dust and debris from the housing, air vents, and blade area using a brush or compressed air.
- Ensure the dust extraction port is clear of blockages.
6.2 Disc Inspection and Replacement
- Regularly inspect the diamond discs for wear, cracks, or damage.
- Replace worn or damaged discs immediately to ensure safe and efficient cutting. Refer to section 4.1 for disc installation.
6.3 Storage
Store the wall slotter in its heavy-duty storage case in a dry, secure location, out of reach of children.
7. Troubleshooting
| Problem | Possible Cause | Solution |
|---|---|---|
| Tool does not start | No power supply; Safety switch not engaged; Damaged power cord. | Check power connection; Ensure both safety switch and trigger are pressed; Inspect power cord for damage. |
| Reduced cutting performance | Worn or dull diamond discs; Incorrect cutting depth setting; Overloading the tool. | Replace discs; Adjust cutting depth; Reduce pressure and allow the tool to work at its own pace. |
| Excessive dust during operation | Vacuum cleaner not connected or full; Dust extraction port blocked. | Connect vacuum cleaner and empty if full; Clear any blockages from the dust port. |
| Laser not working | Dead batteries; Laser switch off. | Replace AAA batteries; Turn on laser switch. |
8. Specifications
| Attribute | Value |
|---|---|
| Brand | Ferm |
| Model Number | WSM1009 |
| Power Input | 1700 Watts |
| Voltage | 230 Volts, 50 Hz |
| Disc Diameter | 125mm |
| Max RPM | 4000 RPM |
| Max Cutting Depth | 28mm |
| Groove Widths | 14mm, 19mm, 29mm |
| Item Weight | 7.23 kg |
| Product Dimensions (LxWxH) | 35 x 23 x 36 cm |
| Batteries Required | 2 AAA (included for laser) |

Image: Product label displaying technical specifications for the FERM WSM1009 Wall Slotter, including voltage, frequency, power, disc diameter, and cutting depth.
9. Warranty and Support
For warranty information and customer support, please refer to the documentation included with your purchase or contact FERM International directly. Contact details for FERM International are typically found on the product packaging or their official website.
Manufacturer: FERM, Ferm International, Lingenstraat 6, 8028 PM Zwolle, Netherlands
Contact: +31 38 385 2525
Related documentsWSM1009


Ask a question about this manual
Ask about setup, troubleshooting, compatibility, parts, safety, or missing instructions. Manuals+ will review the question and use this page’s manual context to help answer it.