
Introduction
This manual provides essential information for the proper installation, operation, and maintenance of your Zodiac SOL100 Solenoid Valve. Please read these instructions thoroughly before proceeding with installation or use to ensure safe and efficient performance. Retain this manual for future reference.
Product Overview
The Zodiac SOL100 is a 1-inch, 24-volt plastic solenoid valve designed as a replacement component for Zodiac Levolor water leveling systems. It features integrated flow control, allowing for adjustment of water flow. This valve is constructed from durable plastic and is black in color.
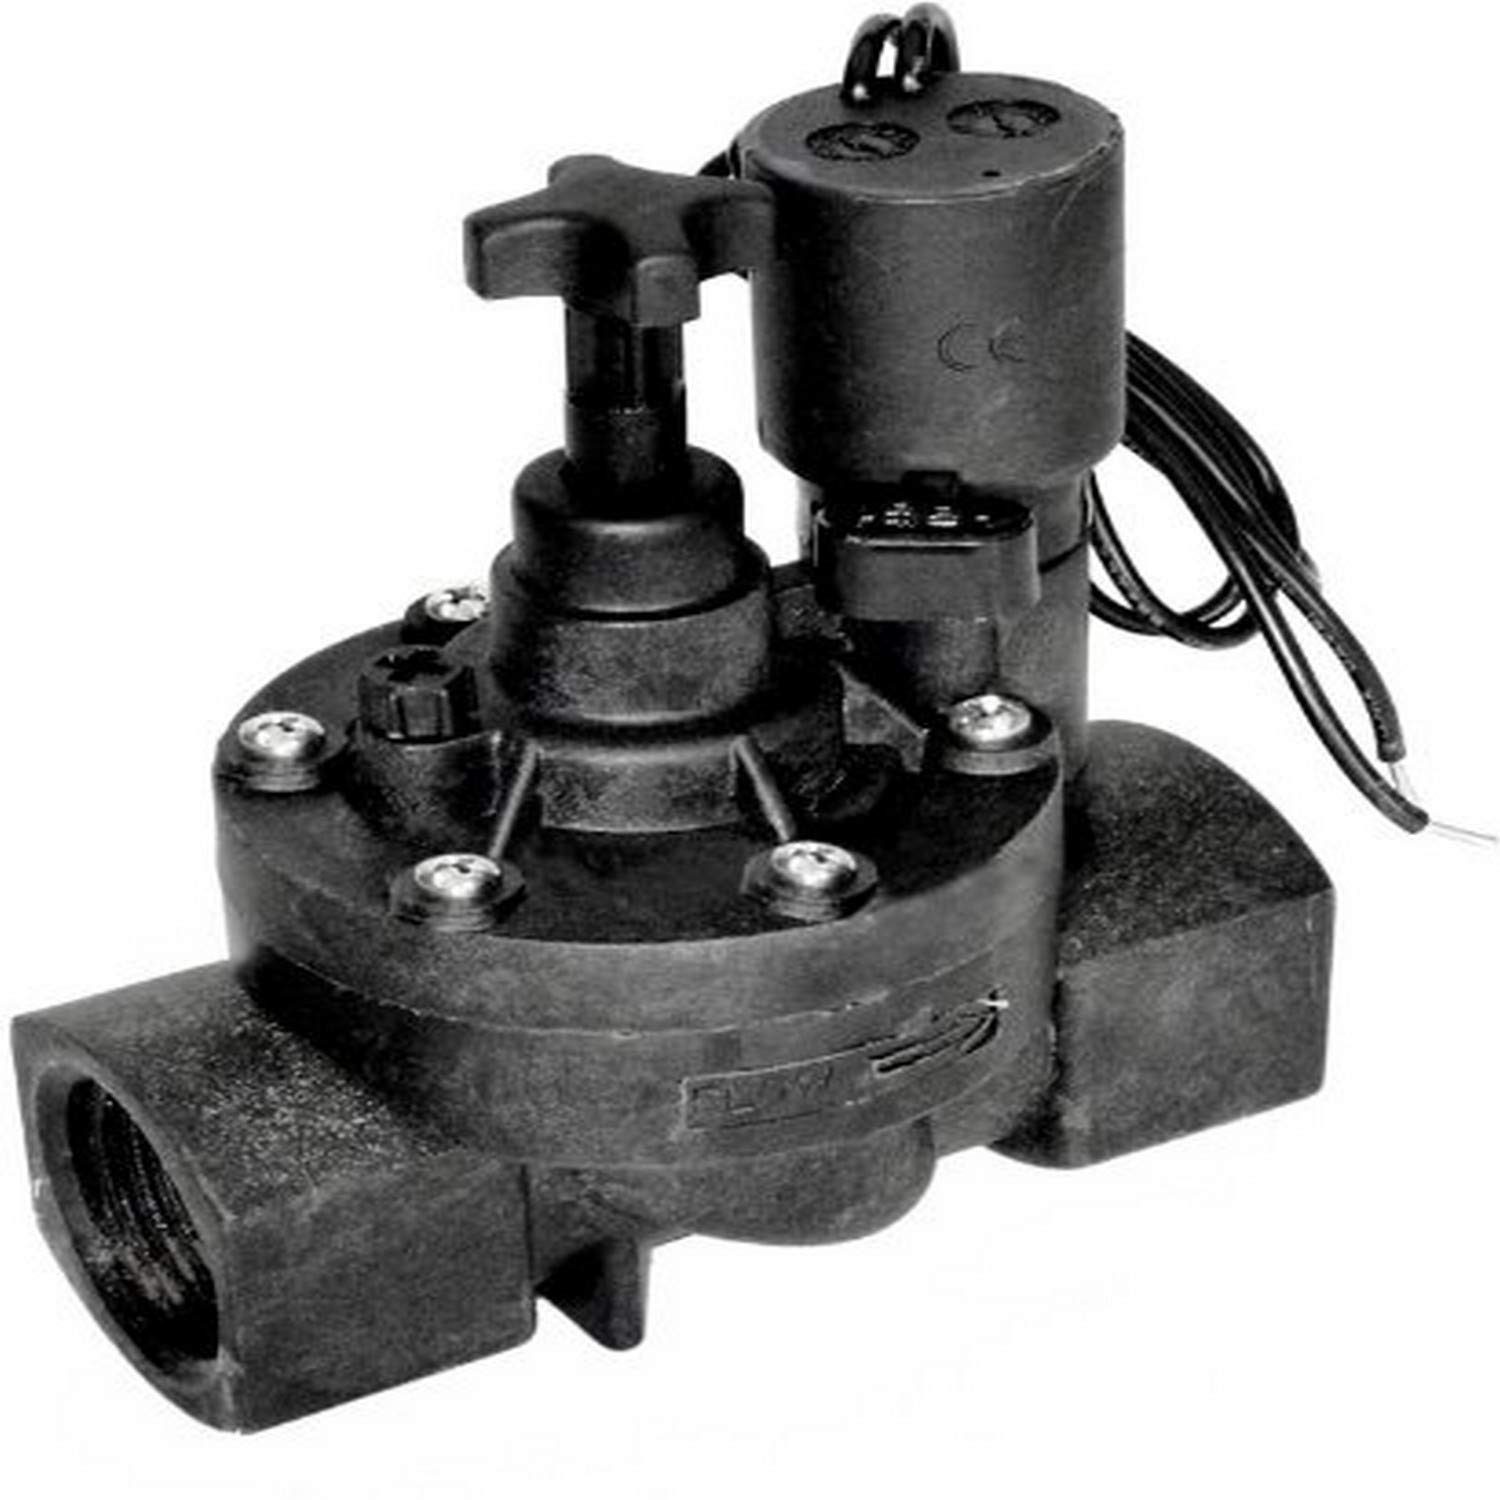
Image: The Zodiac SOL100 solenoid valve, a black plastic unit with a 1-inch threaded inlet/outlet, a solenoid coil on top, and a manual flow control knob. Wires extend from the solenoid for electrical connection.
Safety Information
- Always disconnect power to the water leveling system before attempting any installation, maintenance, or repair.
- Turn off the main water supply to the system before working on the valve.
- Ensure all electrical connections are made by a qualified professional and comply with local codes.
- Do not operate the valve if it appears damaged.
- Wear appropriate personal protective equipment (PPE) during installation and maintenance.
Package Contents
- 1 x Zodiac SOL100 1-Inch Black Plastic Solenoid Valve with Flow Control
Setup and Installation
- Preparation: Turn off the power supply to the Zodiac Levolor water leveling system and shut off the main water supply.
- Remove Old Valve: Carefully disconnect the electrical wiring from the existing solenoid valve. Use appropriate tools to unscrew and remove the old valve from the plumbing lines. Be prepared for residual water in the lines.
- Inspect Connections: Clean the threaded connections on the plumbing lines to ensure a proper seal with the new valve.
- Install New Valve: Apply thread sealant (e.g., PTFE tape) to the threaded ends of the Zodiac SOL100 valve. Screw the new valve into the plumbing lines, ensuring the flow arrow on the valve body points in the direction of water flow. Tighten securely but do not overtighten.
- Wire Connections: Connect the 24-volt electrical wires from the water leveling system to the solenoid coil terminals. Ensure a secure and correct electrical connection.
- Test System: Slowly turn on the main water supply and check for leaks. Restore power to the water leveling system and test the valve's operation.
Note: Professional installation is recommended if you are unfamiliar with plumbing or electrical work.
Operating Instructions
The Zodiac SOL100 solenoid valve is designed to open and close automatically in response to a 24-volt electrical signal from your Zodiac Levolor water leveling system. When the system detects a low water level, it sends a signal to the solenoid, causing the valve to open and allow water to flow. When the desired water level is reached, the signal is removed, and the valve closes.
Flow Control Adjustment:
The valve includes a manual flow control knob, typically located on the top or side of the valve body. This knob allows you to adjust the rate of water flow through the valve when it is open. Turning the knob clockwise will decrease the flow, and turning it counter-clockwise will increase the flow. Adjust this setting to achieve the desired fill rate for your water leveling system.
Maintenance
- Regular Inspection: Periodically inspect the valve for any signs of leaks, cracks, or damage. Check electrical connections for corrosion or looseness.
- Cleaning: If the valve's performance degrades, it may be due to debris accumulation. Turn off power and water, then carefully disassemble the valve (refer to specific Zodiac Levolor system diagrams if available) to clean any internal components. Reassemble carefully, ensuring all seals are properly seated.
- Winterization: In regions subject to freezing temperatures, ensure the water leveling system and valve are properly drained and winterized according to your system's instructions to prevent freeze damage.
Troubleshooting
Valve Not Opening:
- No Power: Check if the water leveling system is receiving power and if the 24-volt signal is being sent to the solenoid. Verify electrical connections.
- Debris: Internal debris can prevent the valve from opening. Follow maintenance steps to clean the valve.
- Solenoid Failure: The solenoid coil may be faulty. A humming sound when power is applied indicates the solenoid is attempting to operate. If no sound, check for continuity.
Valve Not Closing / Constant Flow:
- Debris: Debris lodged in the valve mechanism can prevent it from fully closing. Clean the valve.
- Diaphragm Damage: The internal diaphragm may be damaged or worn. Inspection and replacement may be necessary.
- System Signal Issue: The water leveling system may be continuously sending a signal to open the valve. Check the system's sensor and controller.
Leaks:
- Loose Connections: Ensure all threaded connections are properly tightened with thread sealant.
- Damaged Seals: Internal O-rings or gaskets may be worn or damaged. Inspect and replace as needed.
- Cracked Housing: Inspect the plastic body for any cracks, especially if exposed to freezing temperatures without proper winterization.
Specifications
| Model | SOL100 |
| Brand | Zodiac |
| Material | Plastic |
| Color | Black |
| Voltage | 24-volt |
| Inlet Connection Size | 1 Inch |
| Inlet Connection Type | Threaded |
| Outlet Connection Type | Threaded |
| Number of Ports | 2 |
| Item Dimensions (L x W x H) | 6 x 4 x 6 inches |
| Item Weight | 1.5 pounds |
| Features | Flow Control |
| Compatibility | Zodiac Levolor Water Leveling System |
Warranty and Support
For warranty information or technical support regarding your Zodiac SOL100 Solenoid Valve, please contact Zodiac customer service. Keep your purchase receipt as proof of purchase. Contact details can typically be found on the Zodiac official website or product packaging.
For further assistance, visit the official Zodiac website: www.zodiac.com

