Introduction
The Arduino Leonardo is a microcontroller board based on the ATmega32U4. It features 20 digital input/output pins (7 of which can be used as PWM outputs and 12 as analog inputs), a 16 MHz crystal oscillator, a micro USB connection, a power jack, an ICSP header, and a reset button. It contains everything needed to support the microcontroller; simply connect it to a computer with a USB cable or power it with an AC-to-DC adapter or battery to get started.
A key distinction of the Leonardo is that its ATmega32U4 has built-in USB communication, eliminating the need for a secondary processor. This allows the Leonardo to appear to a connected computer as a mouse and keyboard, in addition to a virtual (CDC) serial / COM port.
Features
- Microcontroller: ATmega32U4
- Operating Voltage: 5V
- Input Voltage (recommended): 7-12V
- Digital I/O Pins: 20 (7 PWM, 12 Analog Input)
- PWM Digital I/O Pins: 7
- Analog Input Pins: 12
- DC Current per I/O Pin: 40 mA
- DC Current for 3.3V Pin: 50 mA
- Flash Memory: 32 KB (ATmega32U4) of which 4 KB used by bootloader
- SRAM: 2.5 KB (ATmega32U4)
- EEPROM: 1 KB (ATmega32U4)
- Clock Speed: 16 MHz
- USB HID Support: Acts as a generic keyboard and mouse.
Product Overview

Figure 1: Top view of the Arduino Leonardo board, showing the microcontroller, USB port, power jack, and various digital and analog pins.
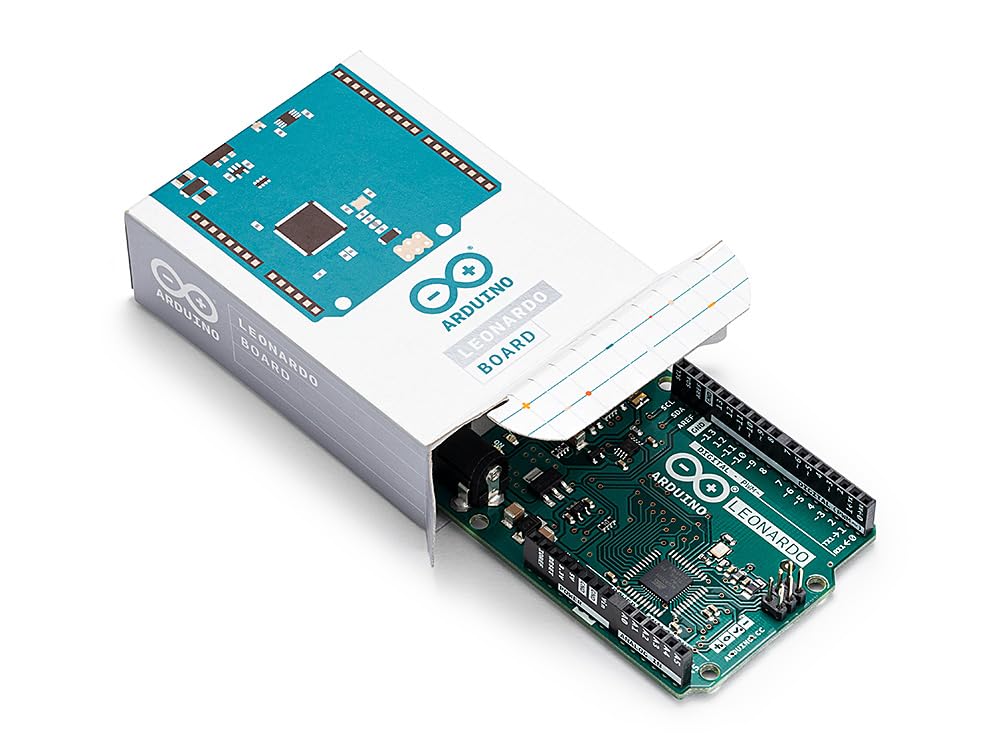
Figure 2: The Arduino Leonardo board partially removed from its retail packaging, illustrating the product presentation.

Figure 3: Bottom view of the Arduino Leonardo board, highlighting the "Open-Source Electronics Platform" and "Designed and Assembled in Italy" markings.
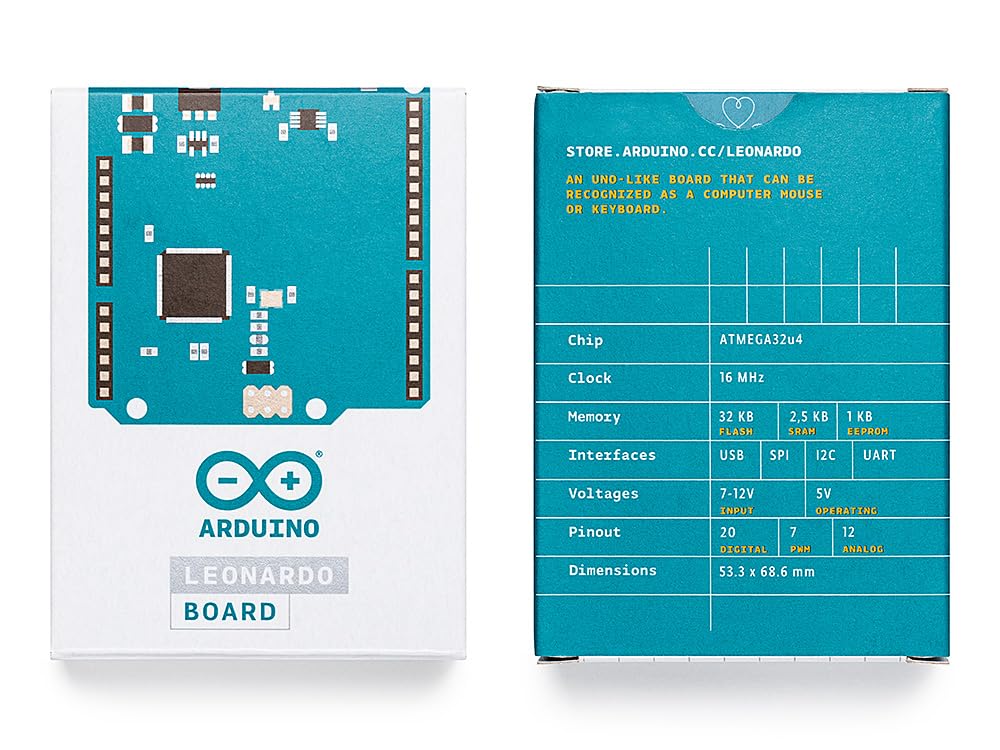
Figure 4: Front and back views of the Arduino Leonardo product packaging, displaying key specifications and branding.

Figure 5: The Arduino Leonardo board mounted on a clear protective base, showcasing its form factor and pin headers.
Specifications
| Attribute | Value |
|---|---|
| Microcontroller | ATmega32U4 |
| Operating Voltage | 5V |
| Input Voltage (recommended) | 7-12V |
| Digital I/O Pins | 20 |
| PWM Digital I/O Pins | 7 |
| Analog Input Pins | 12 |
| DC Current per I/O Pin | 40 mA |
| DC Current for 3.3V Pin | 50 mA |
| Flash Memory | 32 KB (4 KB used by bootloader) |
| SRAM | 2.5 KB |
| EEPROM | 1 KB |
| Clock Speed | 16 MHz |
| Dimensions | 3 x 1 x 2 inches (approx. 76.2 x 25.4 x 50.8 mm) |
| Item Weight | 0.882 ounces (approx. 25 grams) |
| Manufacturer | ARDUINO |
| Country of Origin | Italy |
| Model Number | A000057 |
Setup Guide
1. Software Installation (Arduino IDE)
- Download the Arduino IDE: Visit the official Arduino website (arduino.cc/en/software) and download the latest version of the Arduino IDE for your operating system (Windows, macOS, Linux).
- Install the IDE: Follow the installation instructions provided on the Arduino website or within the downloaded installer. For Windows, this typically involves running the executable. For macOS, drag the application to your Applications folder.
- Driver Installation: The Arduino IDE installer usually includes the necessary USB drivers. If you encounter issues, refer to the official Arduino troubleshooting guides for manual driver installation. The Leonardo's ATmega32U4 handles USB communication directly, often simplifying driver setup.
2. Connecting the Board
- Connect USB Cable: Use a micro-USB cable to connect the Arduino Leonardo board to your computer. The board will power on, and the "ON" LED should illuminate.
- Select Board in IDE: Open the Arduino IDE. Go to Tools > Board and select "Arduino Leonardo" from the list.
- Select Port in IDE: Go to Tools > Port. Select the serial port that corresponds to your Arduino Leonardo. On Windows, this will typically be a COM port (e.g., COM3, COM4). On macOS, it will be a `/dev/cu.usbmodemXXXX` or similar.
Operating Instructions
Uploading Your First Sketch (Blink Example)
- Open Example Sketch: In the Arduino IDE, go to File > Examples > 01.Basics > Blink. This will open a new window with the Blink sketch.
- Verify Sketch: Click the "Verify" button (checkmark icon) in the Arduino IDE toolbar. This compiles the code and checks for errors.
- Upload Sketch: Click the "Upload" button (right arrow icon) in the Arduino IDE toolbar. The IDE will compile the sketch and then upload it to your Arduino Leonardo board.
- Observe LED: Once uploaded, the built-in LED on your Leonardo board (usually labeled "L") should start blinking on and off at one-second intervals.
Using USB HID Capabilities
The Arduino Leonardo can emulate a USB keyboard or mouse. This allows you to create projects that interact directly with your computer's operating system, such as custom keypads, game controllers, or automated input devices.
- Keyboard Library: Use the built-in Keyboard library to send keystrokes to your computer.
- Mouse Library: Use the built-in Mouse library to control the mouse cursor.
- Refer to the Arduino IDE examples under File > Examples > 09.USB > Keyboard or Mouse for sample code.
Powering the Board
The Arduino Leonardo can be powered in several ways:
- USB Connection: The primary method is via the micro-USB connection to a computer or a USB power adapter. This provides 5V.
- Power Jack: An external power supply (AC-to-DC adapter or battery) can be connected to the power jack. The recommended input voltage is 7V to 12V.
- Vin Pin: Power can also be supplied to the board via the Vin pin (7-12V).
- 5V Pin: A regulated 5V supply can be provided to the 5V pin. This bypasses the on-board voltage regulator and should only be used with a stable 5V source.
Maintenance
- Handle with Care: The Arduino Leonardo is an electronic circuit board. Avoid bending or dropping it.
- Static Electricity: Discharge any static electricity from your body before handling the board, as static can damage electronic components.
- Keep Dry: Protect the board from moisture and extreme temperatures.
- Cleanliness: Keep the board free from dust and debris. Use compressed air or a soft brush if necessary.
- Power Supply: Always ensure your power supply voltage is within the recommended range (7-12V for power jack/Vin, 5V for 5V pin) to prevent damage.
Troubleshooting
Board Not Recognized / Driver Issues
- Check USB Cable: Ensure the USB cable is fully inserted and not faulty. Try a different USB port or cable.
- Reinstall Drivers: If the board is not appearing in the Tools > Port menu, try reinstalling the Arduino IDE, which includes the necessary drivers. For manual installation, refer to Arduino's official documentation.
- Restart Computer: Sometimes a simple restart can resolve driver recognition issues.
"Error Compiling / Uploading"
- Correct Board Selected: Verify that "Arduino Leonardo" is selected under Tools > Board.
- Correct Port Selected: Ensure the correct serial port is selected under Tools > Port.
- Syntax Errors: Check your code for any syntax errors. The Arduino IDE will highlight lines with errors in the console.
- Bootloader: If the board was previously programmed with a custom bootloader or if the bootloader is corrupted, you might need to re-burn the bootloader using an ISP programmer.
Sketch Uploads, But Nothing Happens
- Check Wiring: Double-check all connections to external components.
- Code Logic: Review your sketch's logic to ensure it performs the intended actions. Use `Serial.print()` statements for debugging.
- Power Supply: Ensure adequate power is supplied to the board and any connected components.
Warranty Information
Arduino products are manufactured with high-quality standards. For specific warranty terms and conditions, please refer to the official Arduino website or contact Arduino customer support. Typically, products are covered against manufacturing defects for a limited period from the date of purchase.
Support
For further assistance, technical documentation, community forums, and additional resources, please visit the official Arduino website:
- Official Website: www.arduino.cc
- Documentation: docs.arduino.cc
- Community Forum: forum.arduino.cc


