Introduction
This manual provides comprehensive instructions for the installation, operation, and maintenance of your Braeburn 5310 Touchscreen Hybrid Thermostat. The Braeburn 5310 is a versatile thermostat designed for universal auto changeover, compatible with low voltage single stage gas, oil, or electric heating/cooling systems, and single stage heat pump systems. It also supports 250Mv – 750Mv millivolt heating-only systems.
Key features include a bright blue backlight display, a responsive touchscreen with a Speedbar for quick adjustments, and a separate sub-base for easy installation. The thermostat offers multi-level keypad lockout for security and retains all user, installer, and program settings even during power failures due to its permanent non-volatile memory.
Product Highlights:
- Large 6.5 sq. in. easy-read touchscreen display.
- Flexible programming: 7-day, 5-2 day, or non-programmable options.
- Automatic or manual changeover between heating and cooling.
- Speedbar multi-function button for intuitive control.
- Adjustable temperature limits for energy management.
- Indoor or outdoor remote sensing capability.
- Speed Set programming mode for quick setup.
- Meets Energy Aware guidelines.
- Separate user and installer reset buttons.
- Power options: Hardwire (24V AC) or battery (2 AA alkaline batteries).
- Multi-level keypad lockout for enhanced security.
- Circulating Fan mode and programmable Fan mode.
- Suitable for residential or commercial applications.

Figure 1: Front view of the Braeburn 5310 Thermostat, showcasing its touchscreen and control interface.
Setup and Installation
Proper installation is crucial for the optimal performance of your Braeburn 5310 thermostat. It is recommended that installation be performed by a qualified technician. Ensure all power to the HVAC system is turned off at the circuit breaker before beginning installation.
Power Requirements:
- The thermostat can be powered by 24 Volt AC (common wire required) or by two "AA" alkaline batteries (3.0 Volt DC).
- For continuous backlight and optimal performance, 24V AC power is recommended.
Mounting and Wiring:
- Turn Off Power: Before any wiring, ensure the power to your heating and cooling system is completely off at the main circuit breaker.
- Remove Old Thermostat: Carefully remove your old thermostat from the wall. Note the wiring connections. It is advisable to take a picture of the existing wiring for reference.
- Install Sub-Base: The Braeburn 5310 features a separate sub-base. Mount this sub-base securely to the wall using the provided screws. Ensure it is level for aesthetic purposes.
- Wire Connections: Connect the wires from your HVAC system to the corresponding terminals on the sub-base. Refer to the wiring diagram provided with your thermostat for specific connections. For systems requiring a common wire (C-wire), ensure it is connected for 24V AC power. If using battery power only, the C-wire may not be necessary, but connecting it is recommended for enhanced functionality.
- Attach Thermostat: Once wiring is complete and secure, carefully snap the main thermostat unit onto the sub-base.
- Insert Batteries: If using battery power, insert two fresh "AA" alkaline batteries into the battery compartment.
- Restore Power: Turn the power back on at the circuit breaker.

Figure 2: Rear view of the Braeburn 5310 Thermostat, illustrating the wiring terminal block and sub-base design.
Initial Configuration:
After installation, the thermostat will guide you through initial setup. It features separate installer and user setup modes. To access installer options, you may need to press specific buttons simultaneously (e.g., "System" and "Config" as mentioned in user reviews) and then release. This allows configuration of system type, programming mode (7-day, 5-2 day), temperature differential, and other advanced settings.
A front reset button is available to return user settings to default values if needed.
Operating Your Thermostat
The Braeburn 5310 thermostat is designed for user-friendly operation with its intuitive touchscreen and Speedbar.
Basic Operation:
- Temperature Adjustment: Touch the desired temperature on the screen or use the up/down arrows (if present) to adjust the setpoint. The temperature control range is between 45°F and 90°F (7°C and 32°C), with an accuracy of +/- 1°F (+/- 0.5°C).
- System Mode: Select your desired system mode (Heat, Cool, Auto, Off) using the touchscreen options. "Auto" mode allows the thermostat to automatically switch between heating and cooling as needed.
- Fan Mode: Choose between Fan ON (continuous operation), Fan AUTO (fan runs only when heating or cooling is active), or Circulating Fan mode (fan cycles on and off periodically to keep air moving).
- Backlight: The bright blue backlight display illuminates when the screen is touched and turns off shortly after to conserve energy.
Programming Modes:
The Braeburn 5310 offers flexible programming options to suit your lifestyle:
- 7-Day Programming: Allows for different temperature settings for each day of the week.
- 5-2 Day Programming: Provides one set of programs for weekdays (Monday-Friday) and another for weekends (Saturday-Sunday).
- Non-Programmable: Operates as a manual thermostat, maintaining a constant temperature until adjusted.
Refer to the detailed programming instructions in the full manual for setting up your desired schedule using the Speed Set programming mode.
Advanced Features:
- Adaptive Recovery Mode (ARM): This feature learns how long it takes your system to reach programmed temperatures, activating heating or cooling early to ensure comfort at the scheduled time.
- Hold Function: Temporarily overrides the programmed schedule to maintain a specific temperature. The duration of the "Hold" can often be adjusted.
- Keypad Lockout: Prevents unauthorized changes to settings. Multiple levels of lockout are available.
- Residual Cooling Fan Delay: Allows the fan to continue running for a short period after the cooling cycle ends to maximize efficiency.
Maintenance
Regular maintenance ensures the longevity and accurate operation of your Braeburn 5310 thermostat.
Battery Replacement:
If your thermostat is battery-powered or uses batteries as a backup, replace the two "AA" alkaline batteries annually or when the low battery indicator appears on the display. To replace, gently pull the thermostat off its sub-base, remove the old batteries, insert new ones, and reattach the thermostat to the sub-base.
Cleaning:
Clean the thermostat's touchscreen and casing periodically with a soft, damp cloth. Avoid using abrasive cleaners or solvents, as these can damage the display or finish.
Filter, UV, and Humidifier Pad Check Monitor:
The thermostat includes a monitor for air filter, UV lamp, and humidifier pad checks. The display will indicate when it's time to inspect or replace these components based on programmed intervals. Follow your HVAC system's recommendations for these maintenance tasks.
Troubleshooting
If you encounter issues with your Braeburn 5310 thermostat, try the following troubleshooting steps:
| Problem | Possible Cause | Solution |
|---|---|---|
| Thermostat display is blank or dim. | No power (24V AC) or dead batteries. | Check circuit breaker for HVAC system. Replace "AA" batteries with fresh ones. Ensure C-wire is properly connected if using 24V AC. |
| System (heating/cooling) is not responding. | Incorrect system mode selected, wiring issue, or system lockout. | Verify the thermostat is set to the correct mode (Heat, Cool, Auto). Check wiring connections at the sub-base and HVAC unit. Ensure keypad lockout is not active. If the thermostat calls for heat/cool but no signal is sent to the equipment, consult a qualified technician. |
| Temperature readings seem inaccurate. | Thermostat location, sensor obstruction, or calibration needed. | Ensure the thermostat is not exposed to direct sunlight, drafts, or heat sources. Clean any dust from the thermostat vents. If issues persist, a professional may need to check calibration. |
| Screen is hard to read. | Lighting conditions, display settings. | The blue backlight activates upon touch. Ensure adequate ambient lighting in the area where the thermostat is mounted. |
| Thermostat not holding program. | "Hold" function active, or programming error. | Deactivate the "Hold" function. Re-enter your program schedule carefully, ensuring all steps are followed. |
If these steps do not resolve the issue, please contact a qualified HVAC technician or Braeburn customer support for further assistance.
Specifications
| Feature | Detail |
|---|---|
| Model Number | 5310 |
| Dimensions (H x W x D) | 3.94" x 5.56" x 1.19" (approx. 10cm x 14.1cm x 3cm) |
| Weight | 14.4 ounces (approx. 408 grams) |
| Power Source | 24 Volt AC or 2 "AA" Alkaline Batteries (3.0 Volt DC) |
| Temperature Control Range | 45°F to 90°F (7°C to 32°C) |
| Temperature Accuracy | +/- 1°F (+/- 0.5°C) |
| Operating Humidity Range | 5% to 95% Relative Humidity (non-condensing) |
| Compatibility | Low voltage single stage gas, oil, or electric heating/cooling systems; single stage heat pump systems; 250Mv – 750Mv millivolt heating-only systems. |
| Display Type | Touchscreen with bright blue backlight |
| Special Features | Permanent non-volatile memory, filter/UV/humidifier pad check monitor, Adaptive Recovery Mode (ARM), programmable independent Fan control, residual cooling Fan delay, indoor/outdoor remote sensor capability, multi-level keypad lockout. |
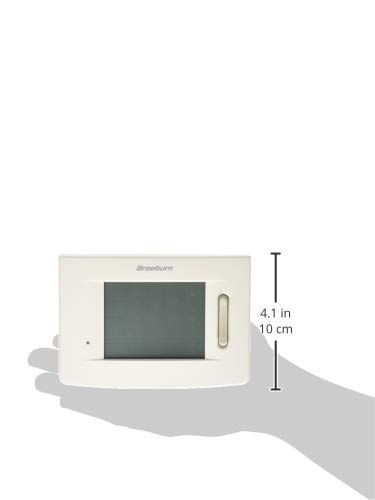
Figure 3: Size reference of the Braeburn 5310 Thermostat.
Warranty and Support
For specific warranty information regarding your Braeburn 5310 Thermostat, please refer to the warranty card included with your product packaging or visit the official Braeburn website. Warranty terms typically cover defects in materials and workmanship for a specified period from the date of purchase.
For technical support, troubleshooting assistance beyond this manual, or to inquire about replacement parts, please contact Braeburn customer service. Contact details can usually be found on the manufacturer's website or on the product packaging. Braeburn also provides English/Spanish packaging and instruction cards.


