
1. Introduction
This manual provides essential instructions for the safe and efficient operation, maintenance, and care of your Sunmile SM-G33 Electric Meat Grinder. Please read all instructions carefully before first use and retain this manual for future reference.
The Sunmile SM-G33 is designed for grinding various types of meat, offering convenience and versatility for home use. It features a powerful motor, durable stainless steel components, and multiple grinding plates for different textures, along with a sausage stuffing attachment.
2. Important Safety Instructions
WARNING: To reduce the risk of fire, electric shock, or injury, always follow basic safety precautions when using electrical appliances.
- Read all instructions before operating the appliance.
- Do not immerse the motor unit in water or other liquids.
- Always unplug the appliance from the power outlet before assembling, disassembling, or cleaning.
- Close supervision is necessary when any appliance is used by or near children.
- Avoid contact with moving parts.
- Do not process bones, nuts, hard vegetables, or fibrous materials like tendons or pigskin, as this can damage the motor or grinding mechanism. This appliance is designed for meat only.
- Do not operate any appliance with a damaged cord or plug, or after the appliance malfunctions or has been damaged in any manner.
- The use of attachments not recommended or sold by the manufacturer may cause fire, electric shock, or injury.
- Do not use outdoors.
- Do not let the cord hang over the edge of a table or counter, or touch hot surfaces.
- Ensure the appliance is placed on a stable, flat surface during operation.
- Never feed food by hand. Always use the food pusher provided.
- Do not attempt to repair the appliance yourself. Contact qualified service personnel.
- Ensure proper ventilation during operation.
3. Package Contents
Verify that all items are present in the package:
- Main Motor Unit
- Grinder Head (Polished Cast Aluminum)
- Stainless Steel Feeding Tray
- Auger (Feeding Screw)
- Cutting Blade (Stainless Steel)
- 3 Stainless Steel Cutting Plates (Coarse, Medium, Fine)
- Food Pusher (Plastic)
- Sausage Attachment (Plastic)
4. Product Overview
Familiarize yourself with the components of your Sunmile SM-G33 Electric Meat Grinder.

Figure 4.1: Fully assembled Sunmile SM-G33 Electric Meat Grinder with included accessories (grinding plates and sausage stuffer).
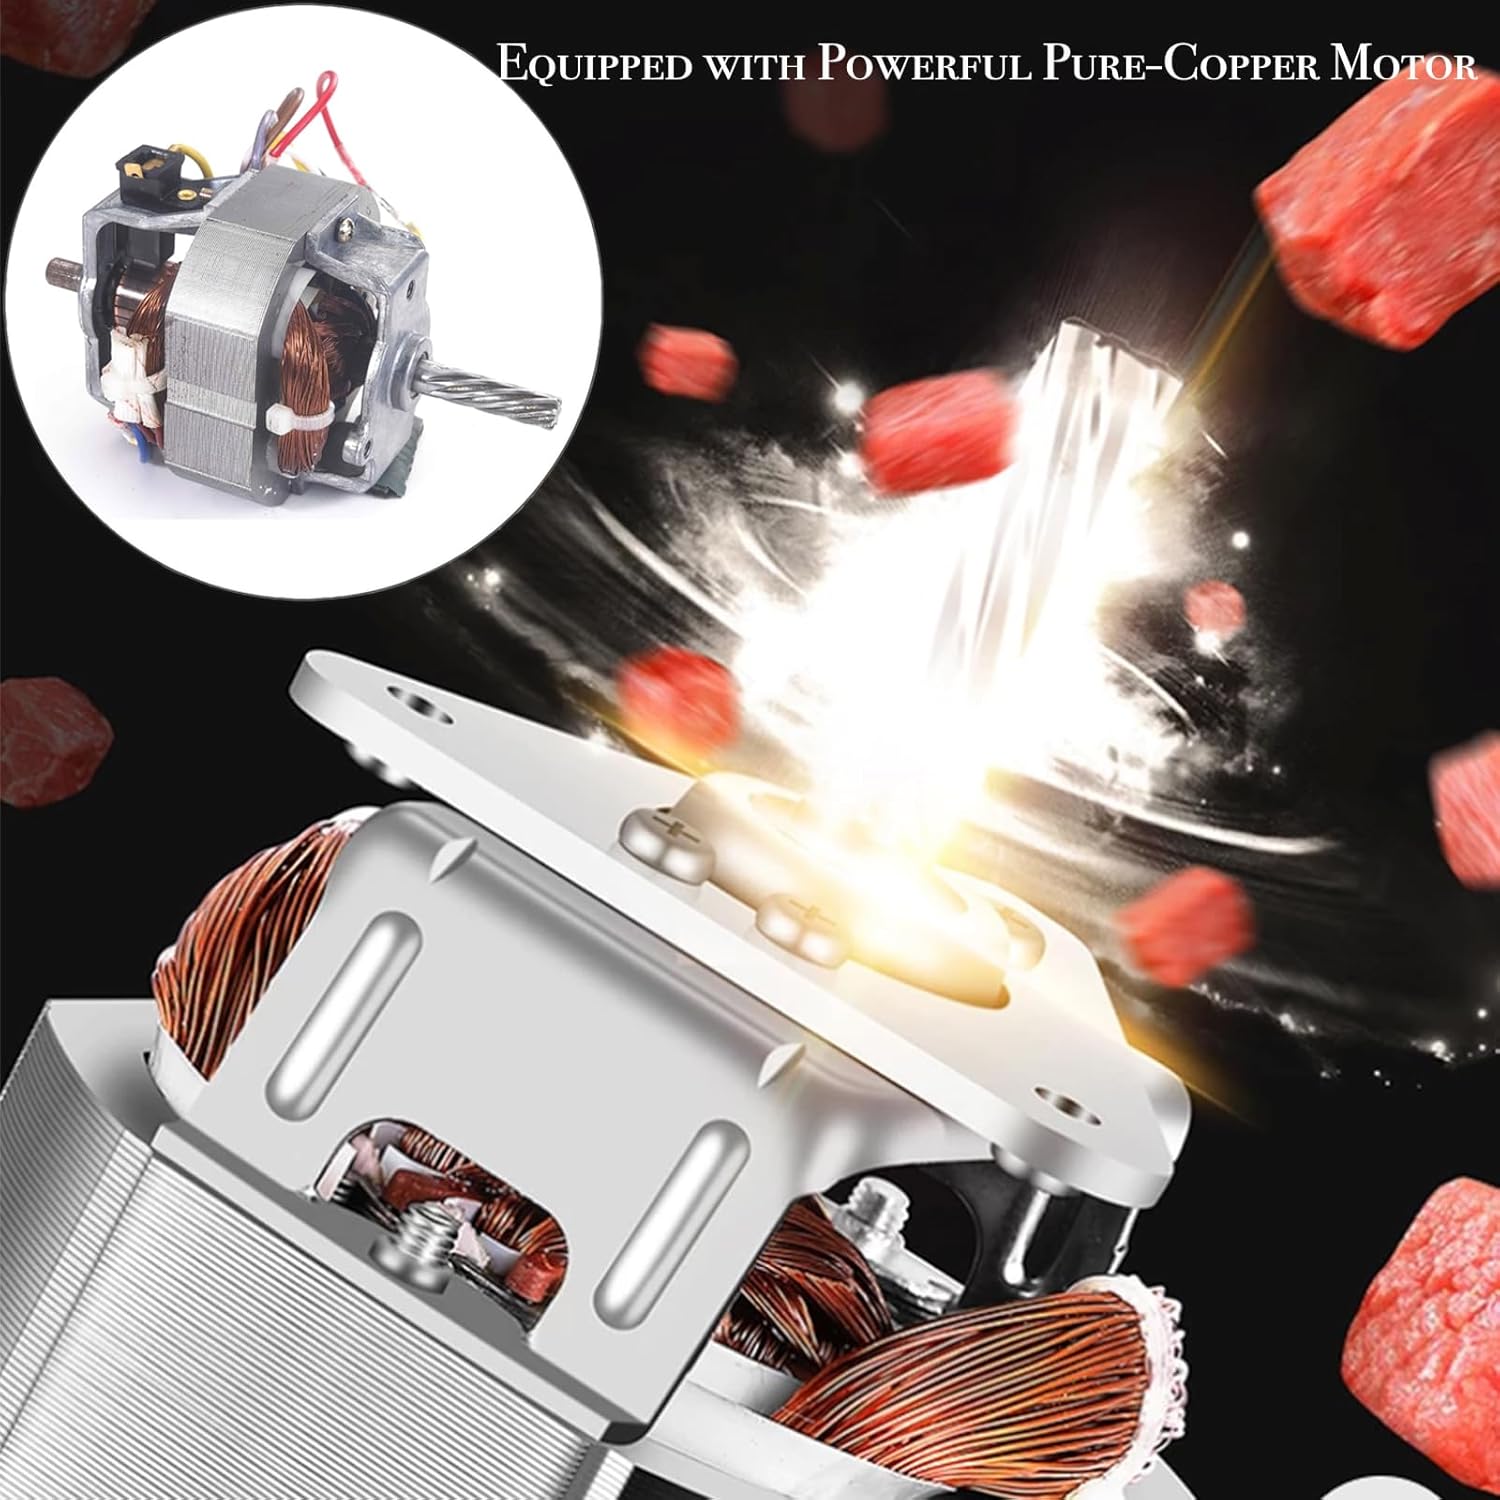
Figure 4.2: Illustration of the powerful pure-copper motor, highlighting its internal components.

Figure 4.3: Close-up view of the sharp stainless steel cutting blade, designed for efficient meat processing.
5. Setup and Assembly
Before first use, wash all parts that will come into contact with food in warm soapy water, rinse thoroughly, and dry completely. Ensure the motor unit is unplugged from the power outlet.
- Attach Grinder Head: Insert the grinder head into the motor unit's front opening. Rotate it counter-clockwise until it locks securely into place.
- Insert Auger: Place the auger (feeding screw) into the grinder head, ensuring the shaft aligns with the motor drive.
- Position Cutting Blade: Place the cutting blade onto the auger shaft with the sharp edges facing outwards, towards the cutting plate. Important: The blade side (flat surface) must face outward. Incorrect placement can cause clogging.
- Select and Attach Cutting Plate: Choose your desired cutting plate (coarse, medium, or fine) and place it over the cutting blade and auger shaft.
- Secure Fixing Ring: Screw the fixing ring onto the grinder head clockwise until it is hand-tight. Do not overtighten.
- Place Feeding Tray: Position the stainless steel feeding tray on top of the grinder head.

Figure 5.1: Visual guide for assembling the grinder head components in the correct order.

Figure 5.2: Illustration showing the correct orientation of the cutting blade (flat side facing outward) to prevent clogging.
6. Operating Instructions
6.1 Meat Grinding
- Prepare Meat: Cut meat into small pieces (approximately 1-inch cubes) that will easily fit into the feeding tube. Remove any bones, large tendons, or excessive fat. For best results, chill the meat and grinder components (auger, blade, plates) in the freezer for about 30 minutes before grinding.
- Select Grinding Plate: Choose the desired stainless steel cutting plate:
- Coarse: For chili, relish, or coarse ground meat.
- Medium: For general purpose grinding, sausages, and burgers.
- Fine: For pâtés, spreads, or very fine ground meat.
- Assemble Grinder: Follow the assembly steps in Section 5, ensuring the chosen cutting plate is installed.
- Connect Power: Plug the appliance into a suitable electrical outlet.
- Start Grinding: Turn the ON/OFF/Reverse switch to the "ON" position. Begin feeding the prepared meat into the feeding tube using the food pusher. Never use your fingers or other utensils to push meat.
- Reverse Function: If the grinder becomes clogged, switch the unit to "REV" (Reverse) for a few seconds to clear the blockage. Then switch back to "ON" to continue grinding. If the blockage persists, turn off the unit, unplug it, and disassemble to clear.
- Finish Grinding: Once all meat is processed, turn the switch to "OFF" and unplug the appliance.

Figure 6.1: The grinder in operation, emphasizing that it is designed for meat only and should not be used for bones, tendons, or other hard materials.
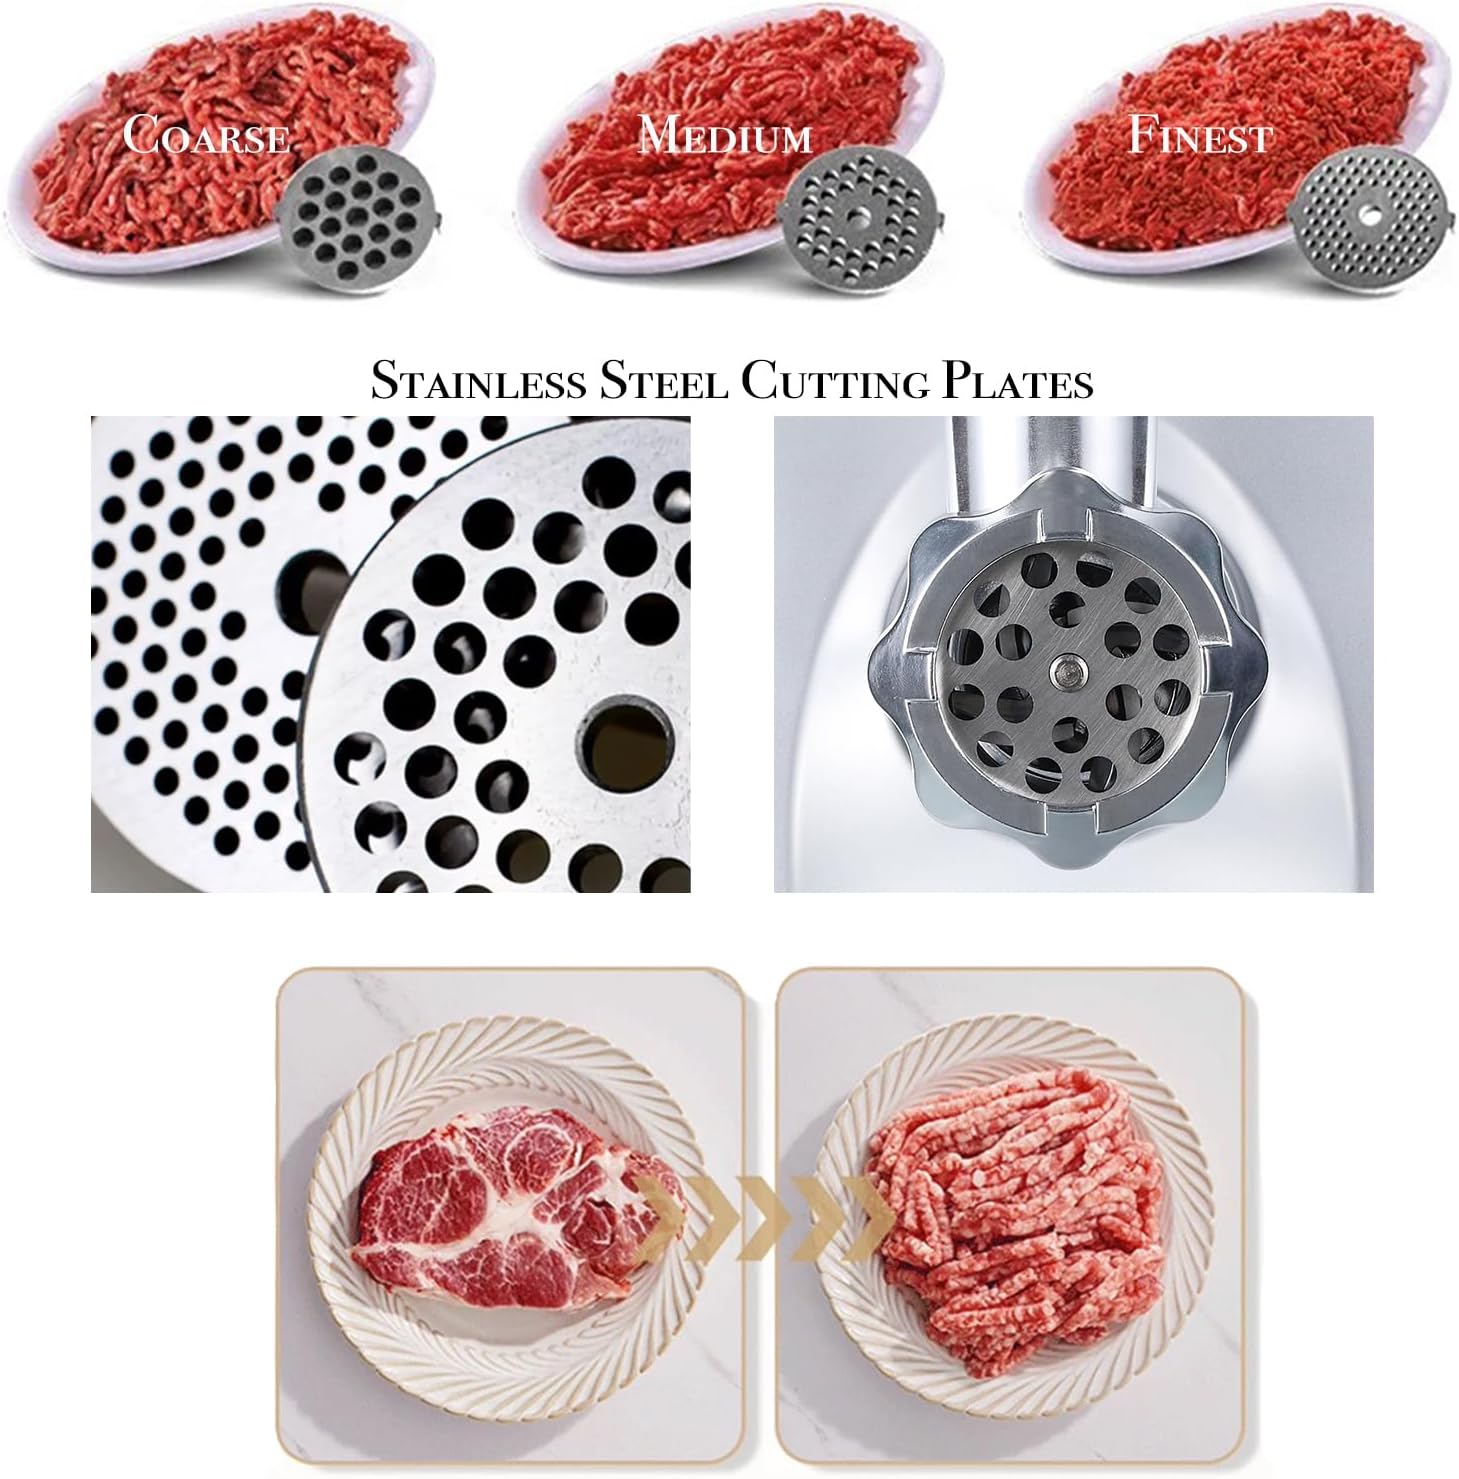
Figure 6.2: Visual representation of the three stainless steel cutting plates (coarse, medium, fine) and the resulting ground meat textures.

Figure 6.3: The process of meat being fed into the grinder and emerging as ground meat.
6.2 Sausage Stuffing
To make sausages, you will need to grind your meat first (usually with a medium or fine plate) and then reassemble the grinder for stuffing.
- Prepare Ground Meat: Ensure your meat is already ground and seasoned as desired.
- Assemble for Stuffing:
- Insert the auger into the grinder head.
- Place the cutting blade onto the auger shaft (flat side out).
- Instead of a cutting plate, attach the sausage attachment directly onto the auger shaft, over the blade.
- Screw the fixing ring onto the grinder head to secure the sausage attachment.
- Place the feeding tray.
- Prepare Casings: Soak natural casings in warm water for at least 30 minutes to make them pliable. If using collagen casings, follow manufacturer instructions.
- Load Casing: Carefully slide one end of the casing onto the sausage attachment, gathering the rest of the casing onto the tube. Leave a small tail of casing hanging off the end.
- Start Stuffing: Turn the grinder to "ON". Feed the ground meat into the feeding tube using the food pusher. The meat will be pushed through the sausage attachment into the casing.
- Form Sausages: As the casing fills, gently guide it off the attachment. Do not overfill. Twist the casing at desired intervals to form individual sausages.
- Finish: When done, turn the switch to "OFF" and unplug the appliance.

Figure 6.4: The sausage stuffer attachment being used to fill casings with ground meat.
7. Cleaning and Maintenance
WARNING: Always unplug the appliance before cleaning.
- Disassemble: Turn the fixing ring counter-clockwise to remove it. Carefully remove the cutting plate, cutting blade, auger, and grinder head. Remove the feeding tray.
- Clean Parts:
- Stainless Steel Cutting Blade and Plates: These parts are made of stainless steel and are dishwasher safe. Alternatively, wash by hand with warm soapy water.
- Grinder Head, Auger, Feeding Tray, and Sausage Attachment: These parts are made of polished cast aluminum or plastic. DO NOT wash these parts in a dishwasher. Dishwashing can cause discoloration due to aluminum oxidation. Wash these parts by hand with warm soapy water and a soft brush or sponge.
- Motor Unit: Wipe the exterior of the motor unit with a damp cloth. Never immerse the motor unit in water or any other liquid.
- Rinse and Dry: Rinse all cleaned parts thoroughly with running water to remove any soap residue and remaining meat particles. Dry all parts immediately and completely to prevent rust (especially for stainless steel parts) and water spots.
- Reassemble for Storage: Once all parts are dry, reassemble the grinder for convenient storage. This also helps prevent loss of small parts.

Figure 7.1: Illustration of cleaning the grinder head and components under running water, highlighting which parts are food-grade aluminum alloy and which are food-grade stainless steel.

Figure 7.2: Detailed cleaning instructions, specifying that only the cutting blade and plates are dishwasher safe, while other head parts made of aluminum should be hand-washed to prevent discoloration.
8. Troubleshooting
| Problem | Possible Cause | Solution |
|---|---|---|
| Motor does not start. | Appliance not plugged in; power outage; switch in "OFF" position. | Check power connection; check circuit breaker; turn switch to "ON". |
| Grinder stops during operation or meat is not grinding. | Clogged with meat or hard material; motor overheating. | Switch to "REV" to clear blockage. If persistent, unplug and disassemble to clean. If motor is hot, turn off and let cool for 30 minutes. Ensure only meat is fed into the grinder. |
| Loud noise or unusual vibration. | Improper assembly; foreign object inside; worn parts. | Unplug and check assembly (Section 5). Disassemble and inspect for foreign objects. If problem persists, contact customer support. |
| Meat comes out mushy or smeared. | Meat is too warm; cutting blade installed incorrectly. | Chill meat and grinder components before use. Ensure cutting blade is installed with the flat side facing outwards. |
9. Specifications
- Model: SM-G33
- Rated Power: 400W
- Max Locked Power: 800W
- Grinding Capacity: Up to 170 lbs per hour
- Material: Stainless steel body, polished cast aluminum grinder head and tray, stainless steel blade and plates.
- Dimensions (L x W x H): Approximately 13.58" x 6.18" x 13.58" (35 cm x 15.5 cm x 33 cm)
- Item Weight: 8.82 pounds
- Certifications: ETL

Figure 9.1: Diagram illustrating the approximate dimensions of the Sunmile SM-G33 Electric Meat Grinder.
10. Warranty and Support
Your Sunmile SM-G33 Electric Meat Grinder comes with a 1-year manufacturer warranty from the date of purchase.
This warranty covers defects in materials and workmanship under normal household use. It does not cover damage resulting from misuse, abuse, accident, alteration, lack of proper care, or normal wear and tear.
In case you require assistance, need to replace parts or accessories, or have any questions regarding your product, please contact Sunmile customer support. We aim to respond within 24 hours to provide the best possible solution.
For support, please refer to the contact information provided with your purchase or visit the official Sunmile website.