
Introduction
Welcome to your Lomanco C416 16x4 Mill Cornice Vent instruction manual. This guide provides essential information for the proper installation, function, and maintenance of your new cornice vent. Please read this manual thoroughly before installation and retain it for future reference.
Product Overview
The Lomanco C416 is a 16" x 4" mill-finished under-eave cornice vent designed to provide essential attic ventilation. It features eyebrow-designed louvers and heavy-duty aluminum construction with an attached screen for insect protection. This vent serves as a companion product for various exhaust ventilators, ensuring proper airflow in your attic space.
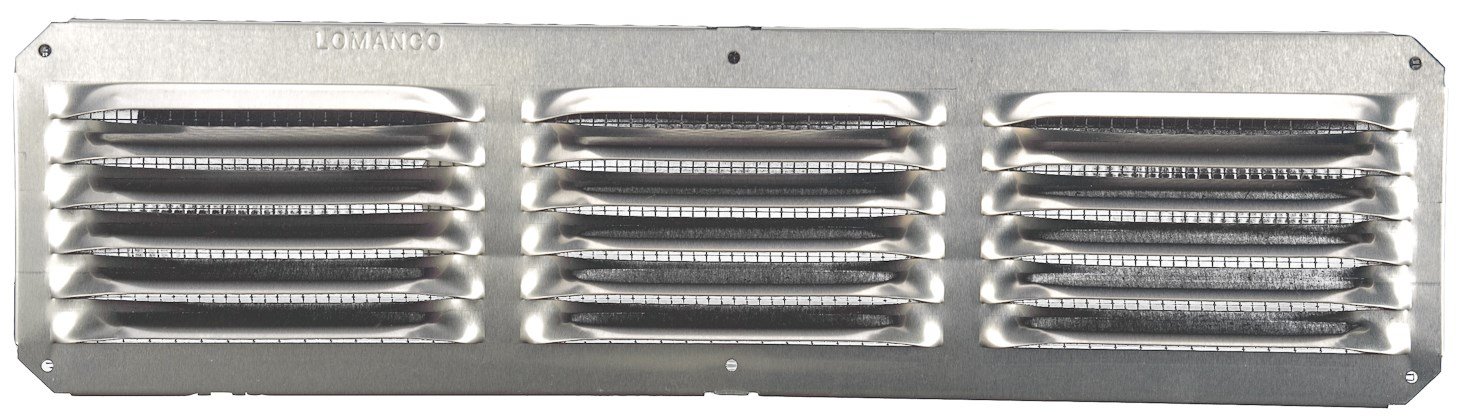
Image: A close-up view of the Lomanco C416 16x4 Mill Cornice Vent, showcasing its mill finish, eyebrow louvers, and integrated insect screen.
Important Safety Information
- Always wear appropriate personal protective equipment (PPE) such as gloves and eye protection during installation.
- Exercise caution when working at heights. Use stable ladders or scaffolding and ensure they are properly secured.
- Ensure proper tools are used for installation to prevent injury or damage to the product or surrounding structures.
- Keep out of reach of children and pets.
Package Contents
Verify that all components are present before beginning installation:
- Lomanco C416 16x4 Mill Cornice Vent (Quantity as purchased, e.g., 12-pack)
- Note: Fasteners are typically not included with vents and should be purchased separately based on your specific eave material and installation requirements.
Installation Guide
Follow these steps for proper installation of your Lomanco C416 Cornice Vent:
- Preparation: Identify the desired location for the cornice vent under the eave or soffit. Ensure the area is clear of any obstructions, wiring, or structural elements.
- Cutting the Opening: Carefully measure and mark a 16" x 4" opening in the soffit or eave material. Use appropriate cutting tools (e.g., utility knife, jigsaw, or hole saw) to create a clean and precise opening.
- Placement: Insert the Lomanco C416 vent into the prepared opening. Ensure the louvers are facing downwards to prevent water entry while allowing optimal airflow. The vent should fit snugly within the opening.
- Securing the Vent: Secure the vent in place using appropriate fasteners (e.g., screws, nails) suitable for your eave material. Fasten through the pre-drilled holes or flanges of the vent. Ensure the vent is firmly attached and flush with the surface.
- Sealing (Optional): For enhanced weather protection, apply a bead of exterior-grade sealant around the perimeter of the vent where it meets the eave material.
- Verification: After installation, visually inspect the vent to confirm it is securely installed, properly aligned, and provides unobstructed airflow into the attic space.
Functionality and Benefits
The Lomanco C416 cornice vent is designed to work in conjunction with exhaust ventilators (such as ridge vents or roof vents) to create a continuous airflow system in your attic. Cool, fresh air enters through the cornice vents, rises as it heats up, and exits through the exhaust vents. This natural convection process helps to:
- Reduce attic temperature, which can lower cooling costs during warmer months.
- Prevent moisture buildup, protecting against mold, mildew, and wood rot.
- Extend the life of your roof by preventing heat and moisture damage to shingles and structural components.
- Maintain consistent attic temperatures, which can help prevent ice dams in colder climates.
Maintenance
Proper maintenance ensures the longevity and optimal performance of your cornice vent:
- Regular Inspection: Periodically inspect the vent, especially after severe weather, for any obstructions such as leaves, debris, insect nests, or damage.
- Cleaning: Gently clean the vent exterior with a soft brush or cloth to remove dirt and dust. Avoid using harsh chemicals or abrasive cleaners that may damage the mill finish or aluminum.
- Screen Check: Ensure the integrated insect screen remains intact and free of damage to maintain effective protection against pests. Repair or replace if damaged.
Troubleshooting
Refer to the table below for common issues and their potential solutions:
| Problem | Possible Cause | Solution |
|---|---|---|
| Reduced Airflow | Vent obstructed by debris (leaves, dust, insect nests) | Clear any leaves, dust, or insect nests from the vent opening and screen. Ensure the attic space above the vent is also clear. |
| Vent is Loose | Insufficient or loose fasteners | Re-secure the vent with appropriate fasteners, ensuring they are tight and properly seated. Add more fasteners if necessary. |
| Water Entry | Improper installation or damaged louvers | Ensure louvers face downwards. Check for damage to the vent itself. Apply exterior-grade sealant around the perimeter if water is entering through gaps. |
If issues persist or you are unsure about a solution, it is recommended to consult a qualified roofing or ventilation professional.
Product Specifications
- Model: C416
- Dimensions: 16 inches (length) x 4 inches (width) x 1 inch (depth)
- Material: Heavy-Duty Aluminum
- Finish: Mill
- Features: Eyebrow Designed Louvers, Attached Insect Screen
- Item Weight: Approximately 1.8 pounds (per unit)
- Manufacturer: Lomanco
Warranty and Support
For specific warranty details, terms, and conditions, please refer to the official Lomanco website or contact their customer service directly. This manual does not contain comprehensive warranty information.
For further assistance, product inquiries, or to locate a distributor, please visit the Lomanco official website or contact their customer support team.