
Epson POWERLITE 93 PLUS
Epson POWERLITE 93 Plus LCD Projector User Manual
Model: POWERLITE 93 PLUS
1. Introduction
This manual provides detailed instructions for the safe and efficient operation of your Epson POWERLITE 93 Plus LCD Projector. Please read this manual thoroughly before using the projector and keep it for future reference.
Key Features:
- Brilliant, sharp and engaging multimedia projected with 2600 lumens color, 2600 lumens white light output and native XGA resolution.
- Amazing audio that's sure to fill any classroom with the built-in 16W speaker.
- Great positioning flexibility with 1.2x zoom ratio.
- RJ-45 port connectivity for network monitoring and control.
- Convenient lamp and air filter access for easy maintenance.
2. Safety Information
Always observe the following safety precautions to prevent fire, electric shock, or injury.
Important Warnings:
- WARNING: Turn off and wait until the lamp has cooled down before replacing the lamp. High-pressure lamp may explode if improperly handled. Refer to lamp replacement instructions. Replace with the same EPSON lamp unit.
- WARNING: There is a possibility that the lamp may be cracked. Be very careful not to allow such pieces of glass when opening the lamp cover.
- CAUTION: Hot surface. Do not touch.
- WARNING: Never look into the lens while the lamp is on. This can cause severe eye damage.
- The lamp in this product contains mercury. Dispose according to local, state or federal laws.

Image: Side view of the projector displaying important warning labels regarding lamp handling and hot surfaces.
3. Product Components and Controls
Front View:
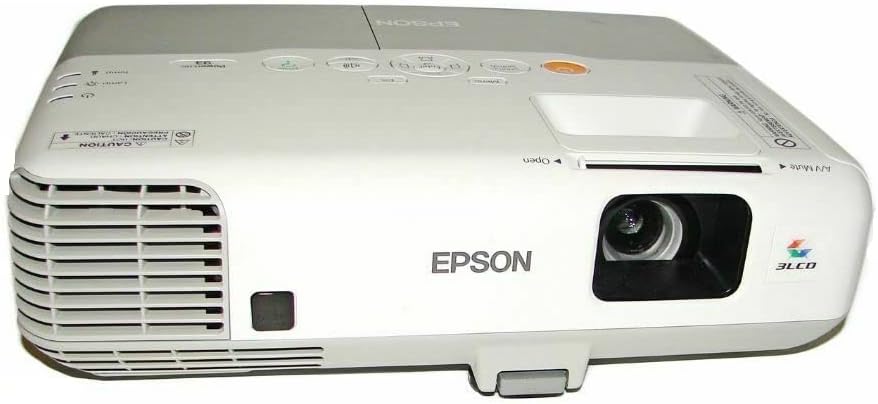
Image: Front view of the Epson PowerLite 93 Plus projector, showing the lens, ventilation grilles, and front adjustable foot.
Top Control Panel:
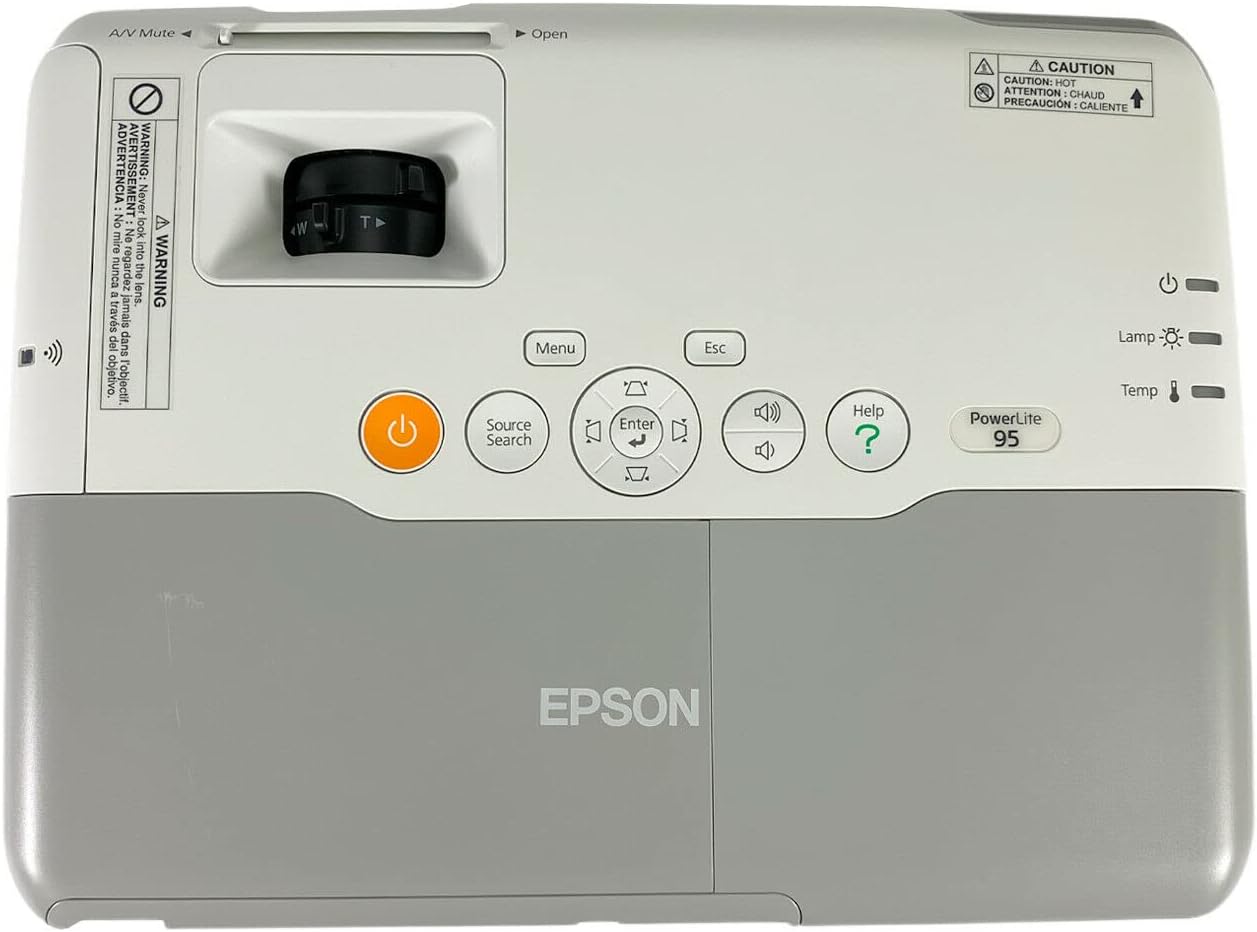
Image: Close-up of the top control panel, featuring power button, menu navigation, source search, volume controls, and indicator lights for lamp and temperature.
Rear Connection Panel:

Image: Rear view of the projector displaying various input and output ports, including HDMI, VGA (Computer1, Computer2, Monitor Out), S-Video, Composite Video, Audio In/Out, USB (Type A, Type B), LAN (RJ-45), and RS-232C.
Bottom View:
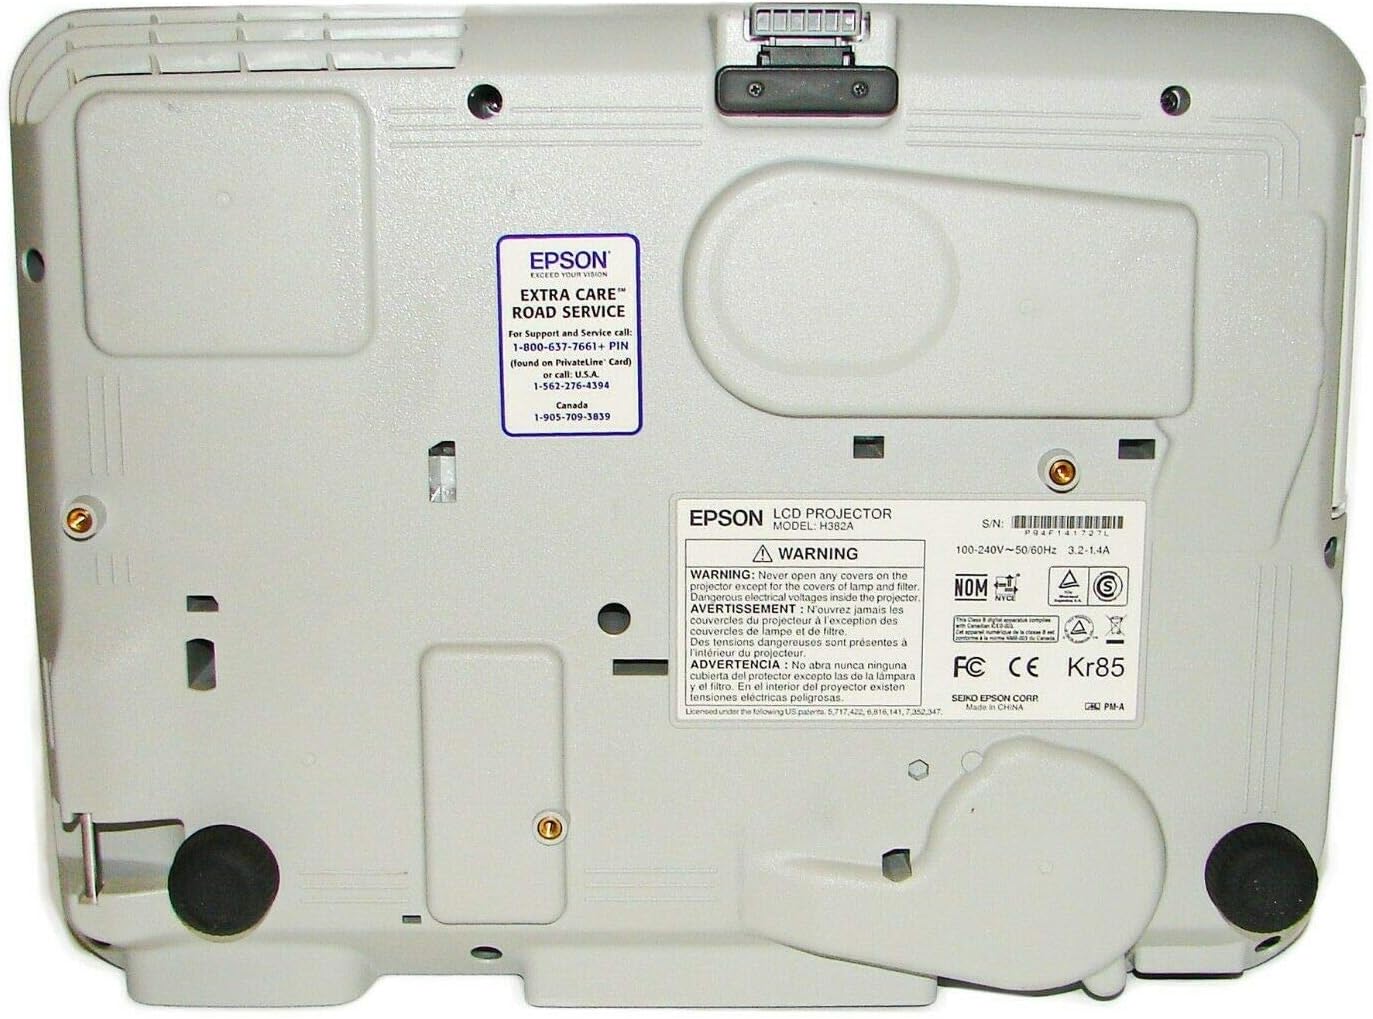
Image: Bottom view of the projector, showing mounting points, adjustable feet, and product information labels including serial number and electrical ratings.
4. Setup
4.1 Unpacking and Placement
Carefully remove the projector from its packaging. Place the projector on a stable, flat surface. Ensure adequate ventilation around the unit.
4.2 Connecting to a Power Source
- Connect the supplied power cord to the projector's AC inlet.
- Plug the other end of the power cord into a grounded electrical outlet.
4.3 Connecting Input Devices
The projector supports various input sources. Refer to the rear connection panel image in Section 3.
- HDMI: For high-definition digital video and audio.
- Computer (VGA): Connect your computer using a VGA cable to either Computer1 or Computer2 ports.
- Video (Composite/S-Video): For standard definition video sources.
- USB: For displaying content from USB devices or for USB display functionality.
- LAN (RJ-45): For network control and monitoring.
4.4 Adjusting the Image
- Focus Ring: Rotate the focus ring around the lens to sharpen the image.
- Zoom Lever: Adjust the zoom lever to change the image size.
- Adjustable Feet: Use the adjustable feet on the bottom of the projector to tilt the image vertically and correct keystone distortion.
5. Operating the Projector
5.1 Powering On/Off
- To power on, press the Power button on the control panel or remote control.
- To power off, press the Power button again. A confirmation message may appear; press Power again to confirm shutdown.
5.2 Selecting an Input Source
Press the Source Search button on the control panel or remote control to cycle through available input sources (HDMI, Computer1, Computer2, Video, S-Video, USB).
5.3 Adjusting Volume
Use the Volume Up and Volume Down buttons on the control panel or remote control to adjust the audio output.
5.4 Using the Menu System
Press the Menu button to access the projector's on-screen display (OSD) menu. Use the arrow buttons to navigate and the Enter button to select options. Press Esc to exit a menu or return to the previous screen.
6. Maintenance
6.1 Cleaning the Air Filter
Regularly clean the air filter to ensure proper ventilation and prevent overheating.
- Turn off the projector and unplug the power cord.
- Locate the air filter cover (typically on the side or bottom).
- Remove the cover and carefully pull out the air filter.
- Use a small vacuum cleaner or soft brush to remove dust from the filter. Do not wash the filter with water.
- Reinsert the clean filter and replace the cover.
6.2 Replacing the Lamp
The lamp has a limited lifespan. When the lamp indicator light turns orange or the image becomes dim, it's time to replace the lamp. Always use a genuine Epson replacement lamp (ELPLP60).
- Turn off the projector and unplug the power cord. Allow the projector to cool down for at least an hour.
- Locate the lamp cover (refer to the warning label image in Section 2 for typical location).
- Unscrew the lamp cover and carefully remove it.
- Loosen the screws holding the lamp module in place.
- Carefully pull out the old lamp module. WARNING: The lamp may be hot and can shatter if mishandled.
- Insert the new lamp module, ensuring it is seated correctly.
- Tighten the lamp module screws and replace the lamp cover.
- Plug in the power cord and turn on the projector. Reset the lamp timer through the projector's menu system.

Image: Side view of the projector, indicating the location of the lamp access panel for maintenance.
7. Troubleshooting
| Problem | Possible Cause | Solution |
|---|---|---|
| No image projected | Power cord disconnected; Incorrect input source selected; Lens cap on. | Check power connection; Press Source Search button; Remove lens cap. |
| Image is blurry | Lens out of focus; Projector too close/far from screen. | Adjust focus ring; Adjust projector distance or zoom. |
| Image has a yellow tint | Lamp nearing end of life or faulty. | Consider replacing the lamp. |
| No audio | Volume too low; Audio cable not connected; Muted. | Increase volume; Ensure audio cable is connected (if not using HDMI); Check mute setting. |
| Projector overheats and shuts down | Blocked air vents; Dirty air filter. | Ensure clear airflow around projector; Clean or replace air filter. |
8. Specifications
- Model: POWERLITE 93 PLUS
- Display Technology: 3LCD
- Brightness: 2600 Lumens (Color and White Light Output)
- Native Resolution: XGA (1024x768)
- Connectivity: DisplayPort, HDMI, USB video, VGA (D-sub 15-pin x 2), S-Video, Composite Video, Audio In (RCA x 2, Stereo Mini x 2), Audio Out (Stereo Mini), LAN (RJ-45), RS-232C
- Built-in Speaker: 16W
- Lamp Type: ELPLP60
- Product Dimensions: 19 x 7 x 14 inches
- Item Weight: 7 pounds
- Manufacturer: Epson
- Date First Available: April 2, 2012
9. Warranty and Support
Customer Support:
For technical assistance, troubleshooting, or service inquiries, please contact Epson Customer Support.
- Epson Extra Care Road Service: For Support and Service call 1-800-637-7661.
- Website: Visit the official Epson website for drivers, FAQs, and additional support resources.
Warranty Information:
This product is covered by Epson's standard limited warranty. Please refer to the warranty card included with your product or visit the Epson website for full terms and conditions. Optional protection plans may be available for extended coverage.
- 2-Year Protection Plan (Optional)
- 3-Year Protection Plan (Optional)
Related documentsPOWERLITE 93 PLUS


Ask a question about this manual
Ask about setup, troubleshooting, compatibility, parts, safety, or missing instructions. Manuals+ will review the question and use this page’s manual context to help answer it.