
Chef's Choice 4643009
Chef'sChoice Manual Knife Sharpener Model 4643 Instruction Manual
Comprehensive guide for sharpening 15-degree and 20-degree straight-edge and serrated knives with diamond abrasives for precise angle control and a sharp edge.
Introduction
The Chef's Choice ProntoPro Diamond Hone Knife Sharpener #4643 is designed for quickly and easily applying a superior, shaving-sharp edge to both Asian (15-degree) and European/American (20-degree) style knives. This manual sharpener utilizes precise angle guides, 100% diamond abrasive wheels, and CrissCross sharpening technology to deliver a super sharp, durable, arch-shaped edge. It is suitable for all quality knives, including straight-edge household and kitchen knives, Santoku, sports and pocket knives, and serrated knives.
Safety Information
- Always exercise extreme caution when handling knives and operating the sharpener.
- Keep fingers clear of the sharpening slots during operation.
- Ensure the sharpener is placed on a stable, flat surface before use.
- Keep out of reach of children.
- Do not attempt to sharpen scissors or other tools not specified for this device.
- Clean knives carefully after sharpening to remove any metal particles.
Product Overview

Figure 1: Chef'sChoice Manual Knife Sharpener Model 4643. This image shows the overall design of the sharpener with its ergonomic handle and three sharpening slots.
The Chef'sChoice Model 4643 features three distinct sharpening stages, each designed for a specific purpose:
- Stage 1 (Asian Knives - 15°): Designed for sharpening Asian-style knives to a 15-degree angle.
- Stage 2 (Euro/Amer - 20°): Designed for sharpening European/American-style knives to a 20-degree angle.
- Stage 3 (Polishing & Serrated): Used for honing and polishing the edge of both 15-degree and 20-degree knives, and for sharpening serrated knives.

Figure 2: Diagram illustrating the three sharpening stages and their respective angles.
Setup
Place the Chef'sChoice Manual Knife Sharpener Model 4643 on a sturdy, flat surface. Ensure the non-slip feet are securely gripping the countertop to prevent movement during sharpening. The ergonomic handle provides a comfortable and secure grip for stability.
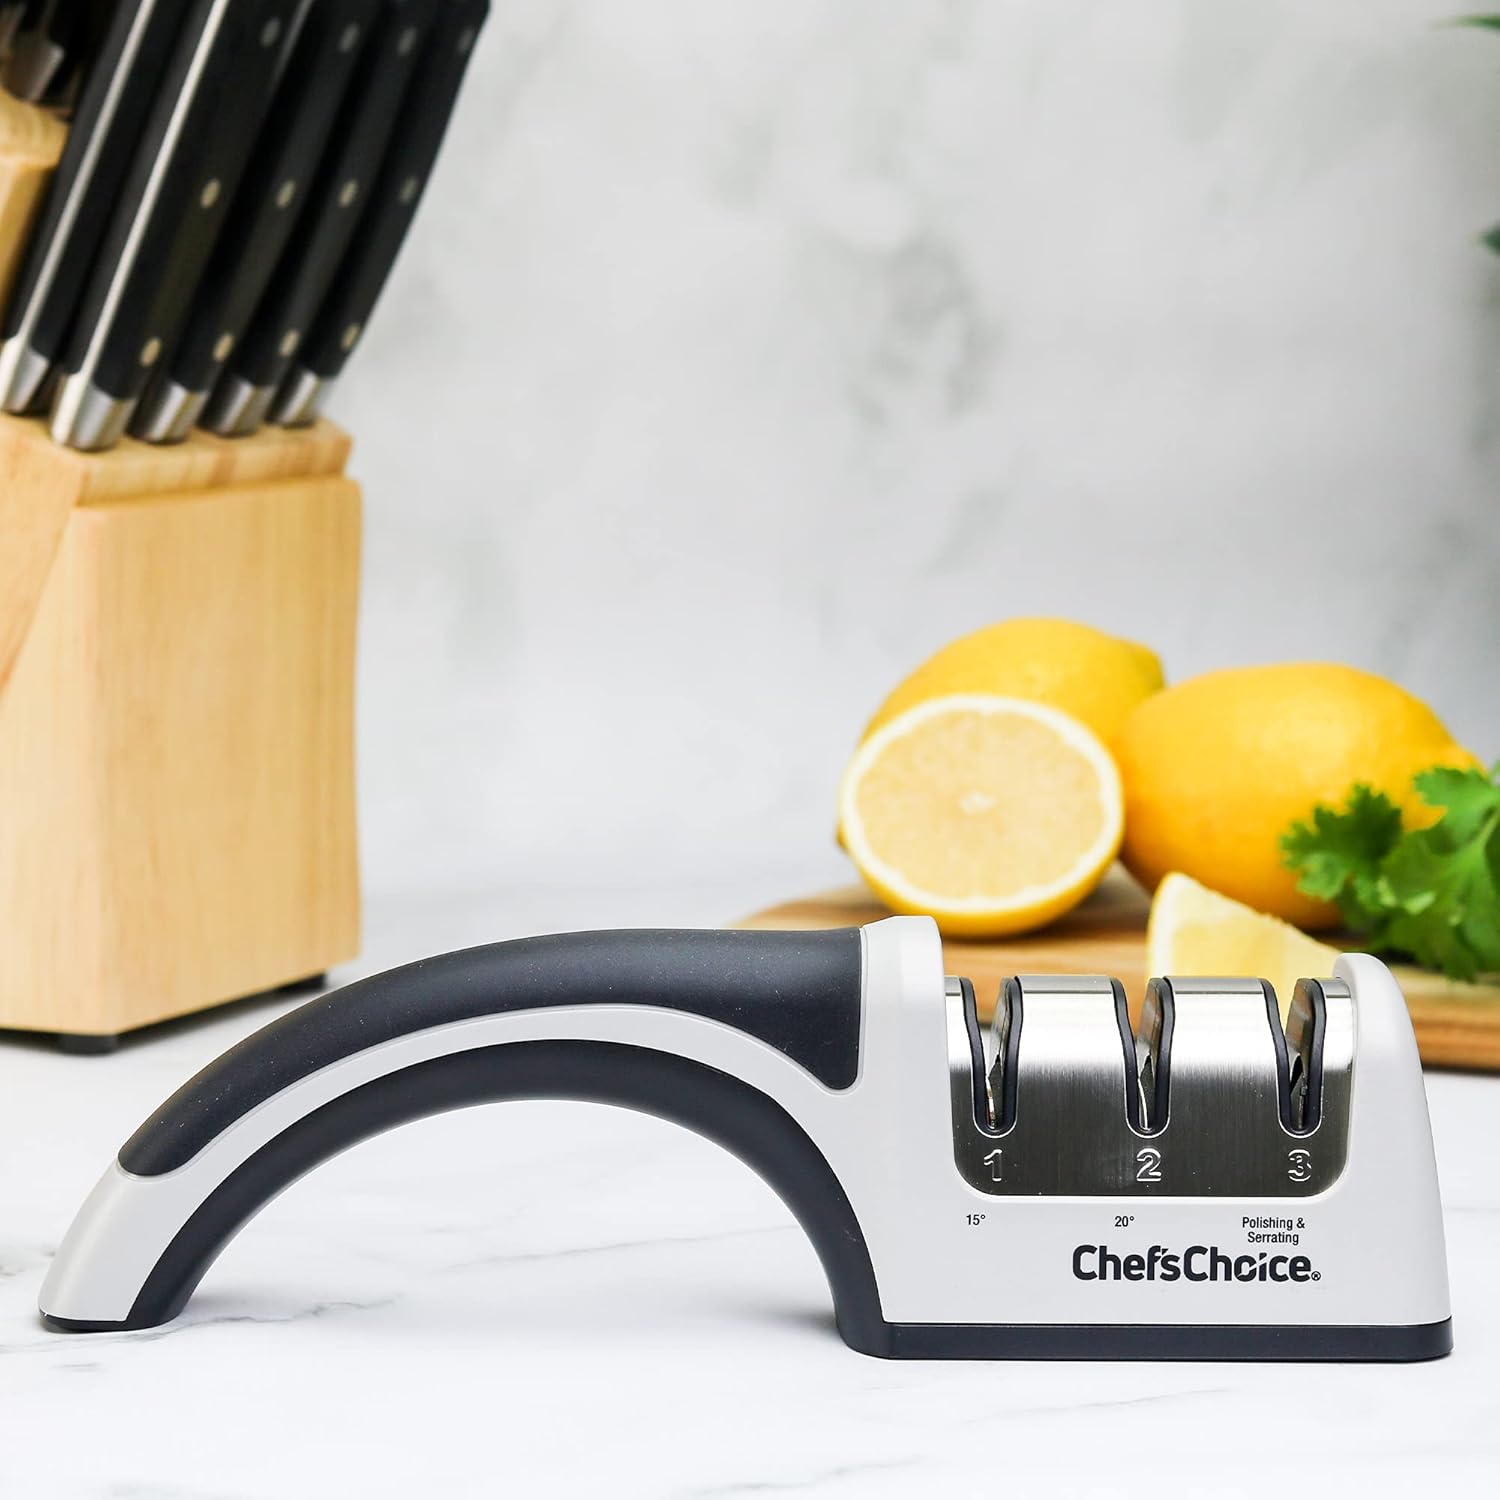
Figure 3: The sharpener positioned on a kitchen counter, ready for use.
Operating Instructions
General Sharpening Guidelines:
- Always pull the knife blade through the slots, never push.
- Apply moderate downward pressure (approximately 3-5 lbs) during sharpening.
- Maintain a consistent speed and angle.
- Alternate between the left and right sides of the slot to ensure even sharpening.
Sharpening 15-Degree Asian Knives (Stage 1):
- Insert the knife blade into Stage 1 (labeled "Asian").
- Pull the blade through the slot, alternating between the left and right sides of the slot. Perform approximately 3-4 alternating pulls per side.
- After sharpening in Stage 1, proceed to Stage 3 for honing and polishing.
Video 1: Demonstration of sharpening a knife using the Chef'sChoice 4643 Manual Knife Sharpener. This video illustrates the proper technique for pulling the knife through the sharpening slots.
Sharpening 20-Degree European/American Knives (Stage 2):
- Insert the knife blade into Stage 2 (labeled "Euro/Amer").
- Pull the blade through the slot, alternating between the left and right sides of the slot. Perform approximately 3-4 alternating pulls per side.
- After sharpening in Stage 2, proceed to Stage 3 for honing and polishing.
Honing and Polishing (Stage 3):
- Insert the knife blade into Stage 3 (labeled "Polishing & Serrated").
- Pull the blade through the slot, alternating between the left and right sides of the slot. Perform 2-5 alternating pulls per side. This stage refines the edge and removes any burrs.
Sharpening Serrated Knives (Stage 3):
- For serrated knives, use only Stage 3.
- Gently pull the serrated blade through the slot, ensuring each serration makes contact with the abrasive. Perform 5-10 pulls.
Burr Detection: After sharpening in Stage 1 or 2, carefully feel the edge of the blade for a burr. A burr is a slight curl of metal that forms on the opposite side of the sharpened edge. If a burr is present, it indicates that the sharpening process is complete for that stage. Proceed to Stage 3 to remove the burr and polish the edge.
Maintenance
- Clean the sharpener regularly with a damp cloth to remove any metal dust or debris. Do not immerse in water.
- After each use, wipe the sharpened knife blade with a clean cloth to remove any fine metal particles before using it on food.
- Store the sharpener in a dry place.
Troubleshooting
Knife not getting sharp:
- Ensure you are using the correct sharpening stage for your knife's bevel angle (15° for Asian, 20° for European/American).
- Apply sufficient but not excessive downward pressure.
- Perform enough passes through each stage. Very dull knives may require more passes.
- Check for a burr to confirm the primary sharpening is complete before moving to the polishing stage.
Sharpener sliding during use:
- Ensure the sharpener is placed on a clean, dry, and stable surface.
- Verify that the non-slip feet are intact and free of debris.
Specifications
| Brand | Chef's Choice |
| Model Number | 4643009 |
| Material | Plastic |
| Color | Gray |
| Product Dimensions | 9.25"L x 2"W x 2"H |
| Item Weight | 0.5 Pounds (8 ounces) |
| Grit Type | Extra Fine (for polishing stage) |
| Number of Items | 1 |
| Care Instructions | Hand Wash |
| Assembly Required | No |
| Made In | USA |

Figure 4: Product dimensions for the Chef'sChoice Manual Knife Sharpener.
Warranty
This Chef'sChoice product comes with a 10-year warranty. For detailed information regarding warranty coverage and claims, please refer to the official product documentation included with your purchase or contact customer support.
Support
For further assistance, product inquiries, or technical support, please visit the official Chef'sChoice website or contact their customer service department. Contact information can typically be found on the product packaging or the manufacturer's website.
Related documents4643009


Ask a question about this manual
Ask about setup, troubleshooting, compatibility, parts, safety, or missing instructions. Manuals+ will review the question and use this page’s manual context to help answer it.