1. Introduction
This manual provides essential instructions for the safe installation, operation, and maintenance of the Schneider Electric 9013GHG2J30 Pressure Switch. This device is designed for automatic control of electrical circuits in response to changes in fluid pressure. It features a Double Pole Single Throw Normally Closed (DPST-NC) contact configuration and is suitable for various industrial and scientific applications.
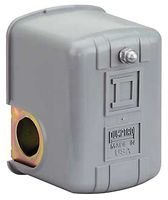
Figure 1: Schneider Electric 9013GHG2J30 Pressure Switch. This image shows the compact gray housing of the pressure switch with its electrical conduit connection point and the pressure sensing port at the bottom.
2. Safety Information
WARNING: Read and understand all instructions before installing, operating, or servicing this device. Failure to follow these instructions may result in death, serious injury, or equipment damage.
- Disconnect all power before working on the switch or connected equipment.
- Installation and maintenance should only be performed by qualified personnel.
- Ensure the pressure system is depressurized before connecting or disconnecting the pressure switch.
- Verify that the operating pressure range of the system does not exceed the switch's specified limits (40 psi to 170 psi).
- Protect the switch from environmental conditions beyond its IP54 rating.
3. Setup and Installation
3.1 Mounting
Mount the pressure switch in a location free from excessive vibration, moisture, and extreme temperatures. Ensure adequate space for wiring and pressure line connections. The switch is designed for flange mounting.
3.2 Pressure Connection
- Ensure the pressure system is completely depressurized.
- Connect the pressure line to the 1/4" NPSF flange port on the switch.
- Use appropriate thread sealant to ensure a leak-free connection. Do not overtighten.
3.3 Electrical Wiring
The 9013GHG2J30 is a Double Pole Single Throw Normally Closed (DPST-NC) switch. This means that under normal (low pressure) conditions, the contacts are closed, and they open when the pressure rises above the set point.
- Disconnect all power to the circuit before wiring.
- Open the switch enclosure.
- Connect the electrical wires to the screw terminals as per your system's wiring diagram. Refer to local electrical codes.
- Ensure all connections are secure and properly insulated.
- Close the switch enclosure securely to maintain its IP54 rating.
3.4 Pressure Adjustment
The switch has an adjustable operating range between 40 psi and 170 psi. The exact adjustment mechanism (e.g., screw, knob) is typically located inside the enclosure. Consult the specific product diagram for precise adjustment instructions.
- Depressurize the system and disconnect power.
- Open the switch enclosure.
- Locate the adjustment screw/mechanism.
- Turn the adjustment mechanism to set the desired pressure actuation point within the 40-170 psi range. Turning clockwise typically increases the set point.
- Close the enclosure, repressurize the system, and restore power to test the setting. Repeat adjustment if necessary.
4. Operating Instructions
Once properly installed and adjusted, the Schneider Electric 9013GHG2J30 Pressure Switch operates automatically. When the system pressure falls below the set point, the DPST-NC contacts will close, completing the circuit. When the system pressure rises above the set point, the contacts will open, interrupting the circuit.
- Ensure the system pressure remains within the operational limits of the switch.
- Regularly monitor the system to confirm the switch is actuating at the desired pressure points.
5. Maintenance
The 9013GHG2J30 Pressure Switch is designed for reliable operation with minimal maintenance. However, periodic inspection is recommended to ensure optimal performance and longevity.
- Visual Inspection: Periodically check the switch for any signs of physical damage, corrosion, or loose connections.
- Leak Check: Inspect the pressure connection for any signs of leaks. Tighten if necessary, ensuring not to overtighten.
- Functionality Test: If possible and safe, periodically test the switch's actuation point to ensure it is operating within the desired pressure range.
- Cleaning: Keep the exterior of the switch clean and free from dust and debris. Use a soft, dry cloth. Do not use harsh chemicals or abrasive cleaners.
NOTE: Always disconnect power and depressurize the system before performing any maintenance.
6. Troubleshooting
This section provides guidance for common issues. For problems not listed here, contact Schneider Electric technical support.
| Problem | Possible Cause | Solution |
|---|---|---|
| Switch does not actuate at set pressure. | Incorrect pressure setting. Blocked pressure port. Faulty wiring. Internal switch failure. | Verify and adjust the pressure setting. Check for obstructions in the pressure line/port. Inspect wiring for loose connections or damage. If all else fails, the switch may need replacement. |
| Pressure leaks at connection. | Improperly sealed connection. Damaged threads. | Depressurize, disconnect, reapply thread sealant, and reconnect. Inspect threads for damage; replace components if necessary. |
| Electrical circuit remains open/closed unexpectedly. | Incorrect wiring. Internal contact welding/failure. Pressure outside operating range. | Review wiring diagram and correct connections. Test switch continuity; replace if contacts are faulty. Ensure system pressure is within 40-170 psi. |
7. Specifications
| Feature | Detail |
|---|---|
| Model | 9013GHG2J30 |
| Brand | Schneider Electric |
| Operation Mode | Automatic |
| Contact Type | Double Pole Single Throw Normally Closed (DPST-NC) |
| Pressure Range | Adjustable 40 psi to 170 psi |
| Connector Type | Flange |
| Pressure Connection | 1/4" NPSF |
| Terminal Type | Screw (DPST) |
| Circuit Type | 1-way |
| Contact Material | Copper |
| International Protection Rating | IP54 |
| Number of Positions | 1 |
8. Support and Warranty
For technical assistance, product support, or warranty information, please contact Schneider Electric customer service or visit their official website. Keep your purchase receipt for warranty claims.
Note: Specific warranty terms and conditions may vary by region and product.


