
1. Introduction
Thank you for choosing the Haverland XTAL6N Electric Towel Radiator. This manual provides essential information for the safe installation, operation, and maintenance of your new appliance. Please read these instructions carefully before use and retain them for future reference.
The Haverland XTAL6N is a 600W electric towel radiator designed with an ultrafine, curved glass finish. It features a radiofrequency (RF) chrono-thermostat for precise temperature control and programming, along with advanced anti-fog technology.
2. Safety Information
- Read all instructions before installing or using this appliance.
- This appliance is intended for domestic use only as a towel radiator and bathroom heater.
- Do not cover the radiator or obstruct its air vents, as this can cause overheating.
- Ensure the power supply voltage matches the rating label on the appliance (230V).
- Installation must be carried out by a qualified electrician and in accordance with local wiring regulations.
- Do not install the appliance directly below a fixed socket outlet.
- Keep the appliance away from water sources and do not immerse it in water.
- Do not touch the appliance with wet hands.
- Unplug the appliance from the power outlet before cleaning or performing any maintenance.
- This appliance is not intended for use by persons (including children) with reduced physical, sensory or mental capabilities, or lack of experience and knowledge, unless they have been given supervision or instruction concerning use of the appliance by a person responsible for their safety.
- Children should be supervised to ensure that they do not play with the appliance.
3. Package Contents
Please check the box for the following items:
- Haverland XTAL6N Electric Towel Radiator (600W, Black)
- RF Chrono-Thermostat (Remote Control Unit)
- Mounting Brackets and Screws
- Installation Template
- User Manual (this document)
4. Installation and Setup
4.1 Mounting the Radiator
The XTAL6N radiator must be securely mounted to a wall. Use the provided mounting brackets and screws. Ensure the wall material is suitable to support the weight of the radiator (approximately 13 kg).

Image 1: Front view of the Haverland XTAL6N Electric Towel Radiator. This image shows the sleek black glass panel with two horizontal towel bars, highlighting its modern design.
1. Choose Location: Select a suitable wall in your bathroom, ensuring it is away from direct water spray and has adequate clearance around the unit for air circulation.

Image 2: The Haverland XTAL6N radiator installed in a modern bathroom setting. The black glass panel and silver towel bars complement the light green and white tiled walls, demonstrating its aesthetic integration.
2. Mark Drill Holes: Use the provided template to mark the positions for the mounting bracket holes on the wall.
3. Drill Holes: Drill holes at the marked positions and insert wall plugs suitable for your wall type.
4. Attach Brackets: Secure the mounting brackets to the wall using the screws.
5. Mount Radiator: Carefully lift the radiator and attach it to the wall brackets. Ensure it is level and securely fastened.
4.2 Electrical Connection
The XTAL6N requires a permanent electrical connection. This must be performed by a qualified electrician. The appliance is designed for 230V power supply.
- Connect the radiator's electrical cable to a suitable fused spur or junction box in accordance with local electrical regulations.
- Ensure proper earthing.
- Do not use extension cords or adapters.
4.3 Thermostat Setup
The RF chrono-thermostat controls the radiator wirelessly. Ensure the thermostat is placed within range of the radiator and in a location where it can accurately measure room temperature, away from drafts or direct heat sources.

Image 3: The Haverland RF Chrono-Thermostat remote control unit. This digital display unit allows for wireless control and programming of the towel radiator, showing time and temperature settings.
1. Insert Batteries: Open the battery compartment of the thermostat and insert the required batteries (usually AA or AAA, check the thermostat's specific instructions).
2. Pairing: Follow the thermostat's instructions to pair it with the XTAL6N radiator. This typically involves a sequence of button presses on both the radiator and the thermostat.
3. Initial Settings: Set the current time and day on the thermostat.
5. Operating Instructions
5.1 Basic Operation
Once installed and paired, the radiator is controlled via the RF chrono-thermostat.
- Power On/Off: Use the designated button on the thermostat to turn the radiator on or off.
- Temperature Adjustment: Use the '+' and '-' buttons on the thermostat to set your desired room temperature. The radiator will heat until the room reaches this set temperature.
- Mode Selection: The thermostat typically offers different operating modes such as Comfort, Economy, and Anti-freeze. Refer to the thermostat's specific manual for detailed mode descriptions and selection.
5.2 Anti-Fog Technology
The XTAL6N features anti-fog technology, which helps to prevent condensation on the glass surface during operation, enhancing visibility and aesthetics.
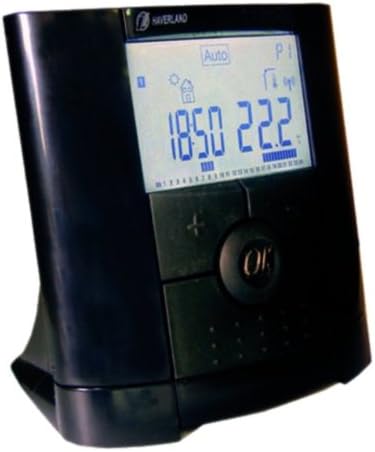
Image 4: A diagram illustrating the heat distribution pattern of the radiator, indicating how heat is spread across the surface to activate the anti-fog technology and ensure even heating.
6. Programming
The RF chrono-thermostat allows for advanced programming to optimize energy consumption and comfort.
- Preset Programs: The thermostat comes with 9 factory-predetermined programs. These are designed for common daily routines. Consult your thermostat manual to select and activate these programs.
- User-Configurable Programs: You can create up to 4 custom programs to suit your specific needs. This allows you to set different temperatures for various times of the day and days of the week.
- Programming Steps:
- Access the programming menu on the thermostat.
- Select a program slot (for user-configurable programs) or choose a preset program.
- For custom programs, define the desired temperature for each hour segment of the day.
- Repeat for each day of the week as needed.
- Save and activate the program.
Detailed programming instructions are provided in the separate RF chrono-thermostat manual. It is recommended to familiarize yourself with that document for full functionality.
7. Maintenance
7.1 Cleaning
- Always disconnect the radiator from the power supply before cleaning.
- Allow the radiator to cool down completely.
- Wipe the glass surface with a soft, damp cloth. For stubborn marks, a mild glass cleaner can be used.
- Do not use abrasive cleaners, solvents, or harsh chemicals, as these can damage the finish.
- Clean the towel bars with a soft cloth.
- Ensure the radiator is completely dry before reconnecting to power.
7.2 General Care
- Regularly check the power cord for any signs of damage.
- Ensure the mounting brackets remain secure.
8. Troubleshooting
If you encounter issues with your Haverland XTAL6N, please refer to the following common problems and solutions:
| Problem | Possible Cause | Solution |
|---|---|---|
| Radiator not heating | No power supply Thermostat not paired Thermostat set to low temperature or off mode | Check power connection and circuit breaker Re-pair thermostat with radiator (refer to thermostat manual) Increase set temperature or change operating mode |
| Thermostat display is blank | Dead batteries | Replace batteries in the RF chrono-thermostat |
| Radiator heats intermittently | Programmed schedule active Room temperature reached set point | Check active program on thermostat This is normal operation; the radiator will cycle on/off to maintain temperature |
| Anti-fog feature not working effectively | Excessive humidity Radiator not fully warmed up | Ensure adequate bathroom ventilation Allow sufficient time for the radiator to reach operating temperature |
If the problem persists after trying these solutions, please contact Haverland customer support.
9. Specifications
- Brand: HAVERLAND
- Model Number: XTAL6N
- Power: 600 Watts
- Voltage: 230V
- Material: Glass
- Color: Black
- Dimensions (H x W x D): Approximately 108.99 cm x 57.99 cm x 14.5 cm
- Product Weight: 13 kg
- Control: RF Chrono-Thermostat
- Features: Ultrafine design, curved finish, 9 preset programs, 4 user-configurable programs, anti-fog technology.
10. Warranty and Support
Your Haverland XTAL6N Electric Towel Radiator is covered by a manufacturer's warranty. Please refer to the warranty card included with your purchase for specific terms and conditions, including the warranty period and coverage details.
For technical assistance, spare parts, or warranty claims, please contact Haverland customer support through their official website or the contact information provided in your product documentation. When contacting support, please have your model number (XTAL6N) and proof of purchase readily available.