
1. Introduction
The Brightsign HD810 is a solid-state digital sign controller designed for reliable and high-quality playback of digital signage content. This device is engineered for continuous operation in various commercial environments, providing a robust solution for displaying dynamic media. This manual provides essential information for the proper installation, operation, and maintenance of your Brightsign HD810 unit.
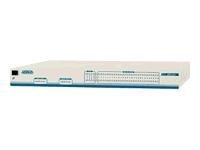
Figure 1: Front view of the Brightsign HD810 Digital Sign Controller. The image shows the compact, black enclosure of the device, highlighting its professional design suitable for digital signage applications.
2. Safety Information
Please read all safety instructions carefully before operating the device. Failure to follow these instructions may result in electric shock, fire, or damage to the unit.
- Power Source: Use only the power adapter supplied with the unit. Ensure the power outlet meets the specified voltage requirements.
- Ventilation: Do not block any ventilation openings. Ensure adequate airflow around the device to prevent overheating.
- Moisture: Do not expose the device to rain, moisture, or excessive humidity. Keep it away from liquids.
- Placement: Place the device on a stable, flat surface. Avoid placing it near heat sources or in direct sunlight.
- Servicing: Do not attempt to service this product yourself. Refer all servicing to qualified service personnel.
- Cleaning: Disconnect power before cleaning. Use a soft, dry cloth. Do not use liquid or aerosol cleaners.
3. Package Contents
Verify that all items are present in the package. If any items are missing or damaged, contact your vendor immediately.
- Brightsign HD810 Digital Sign Controller
- Power Adapter
- Quick Start Guide (if applicable)
4. Device Overview
The Brightsign HD810 features a robust design with essential ports for connectivity and content delivery.
4.1 Front Panel
- Status LED: Indicates the operational status of the device (e.g., power on, content playback, error).
- SD Card Slot: For inserting an SD card containing digital signage content and firmware.
4.2 Rear Panel
- HDMI Output: Connects to a display device (monitor, TV, projector) for video and audio output.
- Ethernet Port (LAN): Connects to a network for content updates, remote management, and network features.
- USB Port: For connecting USB peripherals such as keyboards, mice, or external storage devices.
- Power Input: Connects the supplied power adapter to the device.
- Reset Button: Used for factory reset or rebooting the device (typically recessed).
5. Setup
Follow these steps to set up your Brightsign HD810 Digital Sign Controller.
- Prepare Content: Ensure your digital signage content is properly formatted and loaded onto a compatible SD card. Refer to Brightsign documentation for content preparation guidelines.
- Insert SD Card: With the device powered off, carefully insert the prepared SD card into the SD card slot on the front panel until it clicks into place.
- Connect to Display: Connect one end of an HDMI cable to the HDMI Output port on the rear of the HD810 and the other end to an HDMI input on your display device.
- Connect to Network (Optional): If network connectivity is required for content updates or remote management, connect an Ethernet cable from your network router or switch to the Ethernet Port on the rear of the HD810.
- Connect Power: Connect the supplied power adapter to the Power Input port on the rear of the HD810, then plug the adapter into a suitable power outlet. The device will power on automatically.
- Power On Display: Turn on your display device and select the correct HDMI input source.
6. Operating Instructions
Once powered on and configured, the Brightsign HD810 operates largely autonomously.
6.1 Initial Playback
Upon successful boot-up, the HD810 will automatically detect and begin playing the content from the inserted SD card, provided the content is correctly configured. The Status LED will indicate active playback.
6.2 Content Updates
Content updates can be performed via the network (if configured) using Brightsign's content management software, or by physically replacing the SD card with a new one containing updated content.
6.3 Power Cycling
To power cycle the device, disconnect the power adapter from the unit, wait for 10 seconds, and then reconnect it. This will initiate a reboot.
7. Maintenance
Regular maintenance ensures optimal performance and longevity of your Brightsign HD810.
- Cleaning: Periodically clean the exterior of the device with a soft, dry, lint-free cloth. Do not use harsh chemicals or abrasive materials. Ensure ventilation openings are free from dust.
- Firmware Updates: Check the Brightsign website regularly for firmware updates. Keeping the firmware up-to-date can improve performance, add features, and resolve issues. Follow the instructions provided by Brightsign for firmware update procedures.
- Content Management: Regularly review and update your digital signage content to keep it fresh and relevant. Ensure SD cards are in good condition and free from corruption.
8. Troubleshooting
This section addresses common issues you might encounter with your Brightsign HD810.
| Problem | Possible Cause | Solution |
|---|---|---|
| No display output |
|
|
| Content not playing |
|
|
| No network connectivity |
|
|
9. Specifications
Key technical specifications for the Brightsign HD810 Digital Sign Controller.
- Model: HD810
- Manufacturer: BRIGHTSIGN
- Item Weight: 2.45 pounds
- ASIN: B0068MVAYO
- Date First Available: October 11, 2010
- Connectivity: HDMI, Ethernet, USB
- Storage: SD Card Slot
- Power: External Power Adapter (specifics depend on region)
10. Warranty and Support
The Brightsign HD810 is sold with a warranty. For specific details regarding the warranty period and coverage, please refer to the warranty card included with your product or visit the official Brightsign website.
For technical support, product documentation, or to download the latest firmware and software, please visit the official Brightsign support portal:
Brightsign Official Website: www.brightsign.biz
When contacting support, please have your product model (HD810) and serial number ready.


