
1. Introduction
The Dayton Audio SUB-1200 is a 12-inch powered subwoofer designed to enhance the low-frequency effects in home theater and audio systems. This unit features a bottom-firing, flared port, bass-reflex design for optimized bass response and reduced port noise. It incorporates a long-throw woofer and an integrated amplifier with various controls for seamless integration into your audio setup.
2. Safety Information
Please read and follow all safety instructions before operating this product. Retain this manual for future reference.
- Electrical Safety: Do not expose this unit to rain or moisture. Do not open the enclosure; there are no user-serviceable parts inside. Refer all servicing to qualified personnel. Ensure the power cord is not pinched or walked on.
- Placement: Place the subwoofer on a stable, level surface. Avoid placing it near heat sources, direct sunlight, or in areas with excessive vibration. Maintain adequate ventilation around the unit.
- Cleaning: Disconnect the power before cleaning. Use a soft, dry cloth. Do not use liquid cleaners or aerosol cleaners.
- Ventilation: Do not block any ventilation openings. Install in accordance with the manufacturer's instructions.
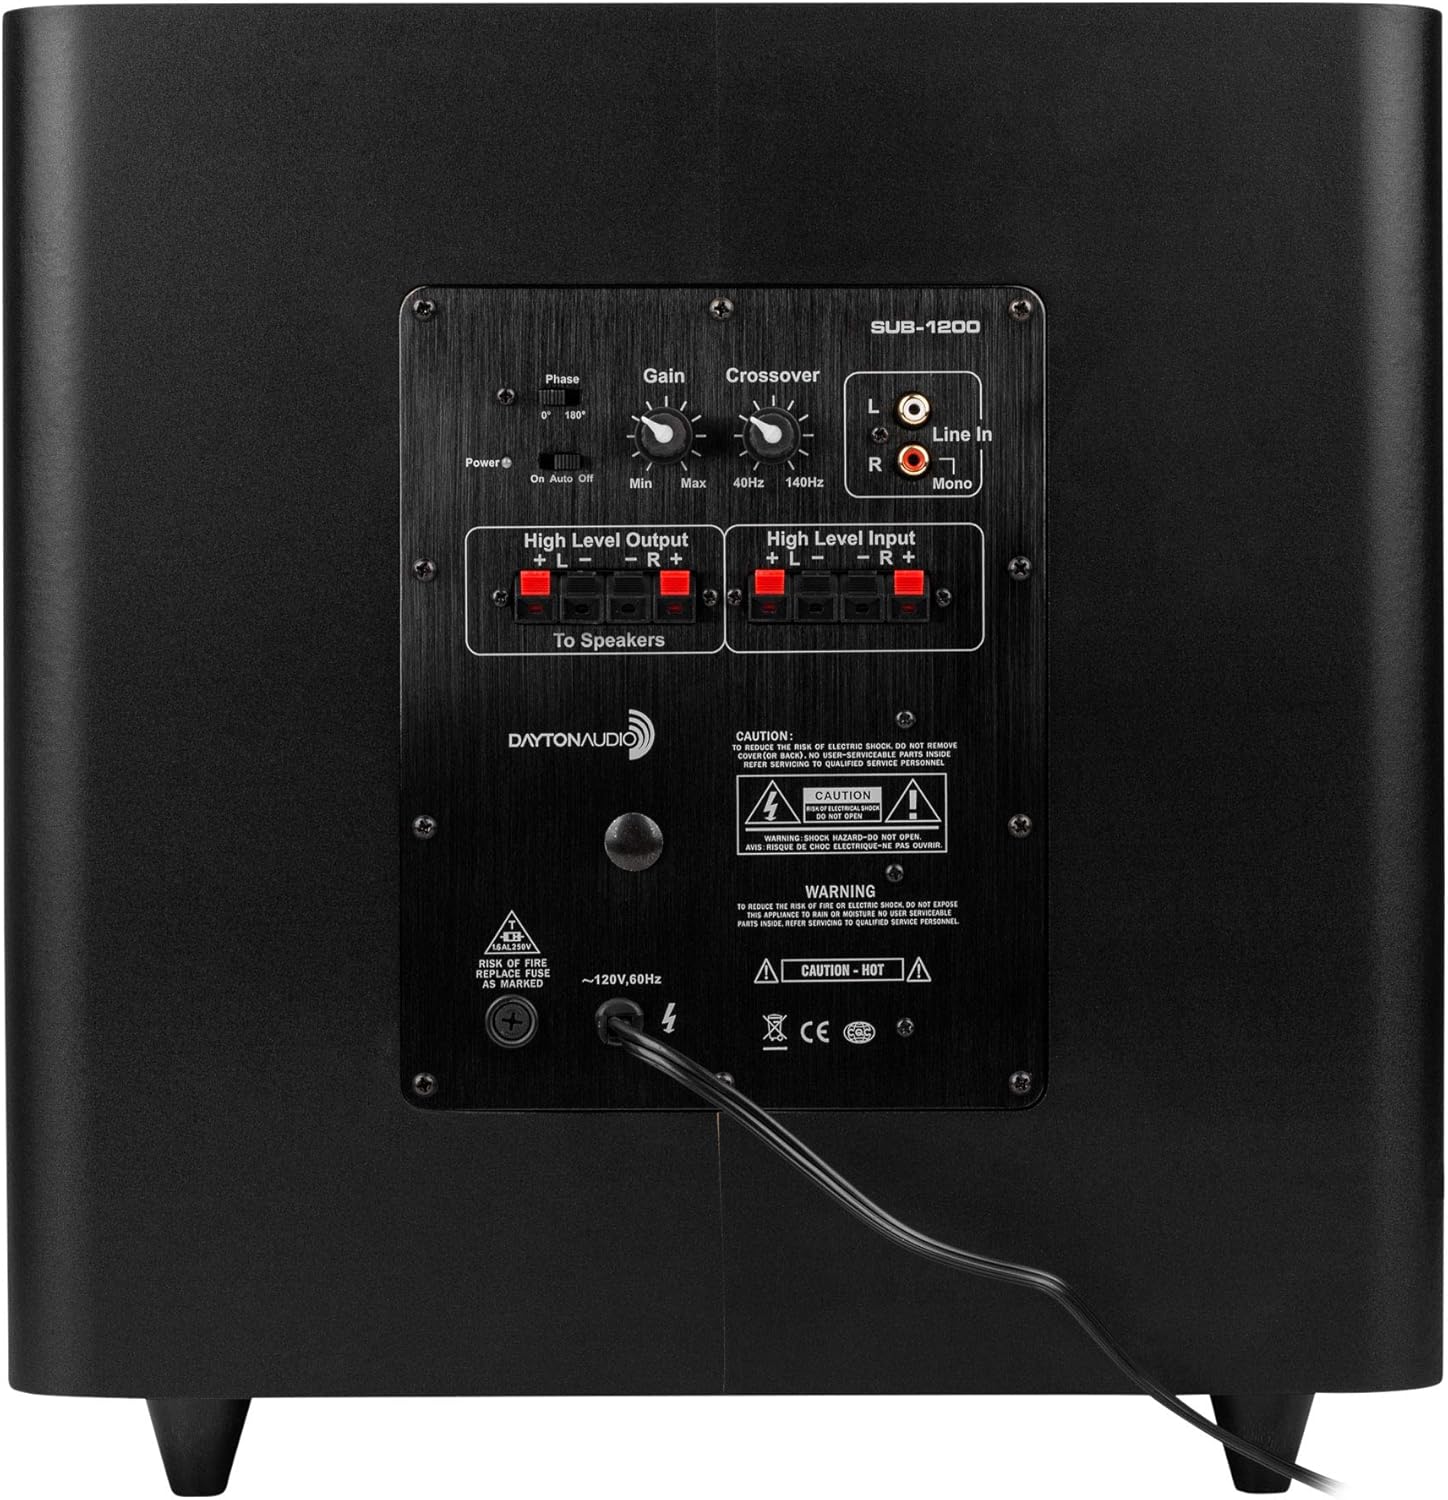
Image: Rear panel of the Dayton Audio SUB-1200 subwoofer, displaying electrical caution and warning labels.
3. Package Contents
Verify that all items are present in the package:
- Dayton Audio SUB-1200 Subwoofer Unit
- Power Cable
- Instruction Manual (this document)
4. Features
The Dayton Audio SUB-1200 offers the following key features:
- Downward-firing flared port design for clean, powerful bass.
- Heavy-duty long-throw 12-inch woofer for deep low-frequency reproduction.
- Integrated amplifier with high and low-level inputs and high-level outputs.
- Adjustable phase switch (0°/180°) for optimal acoustic integration.
- Independent volume (gain) control.
- Variable 12 dB electronic low-pass filter (40 Hz - 140 Hz).
- Selectable auto on/off switch, activated by input signal.
- Unobtrusive, textured black vinyl finish.

Image: Front view of the Dayton Audio SUB-1200 subwoofer with its protective grille in place.

Image: Front view of the Dayton Audio SUB-1200 subwoofer with the grille removed, revealing the 12-inch woofer cone.
5. Setup and Connections
Proper setup and connection are essential for optimal performance. Refer to the diagram below for control and input/output locations.

Image: Diagram illustrating the numbered controls and connection points on the rear panel of the SUB-1200.
5.1. Connection Options
- Line Level Inputs (1): These RCA inputs are used to connect pre-out or preamplifier outputs directly to the subwoofer amplifier's internal crossover. These inputs are summed to mono. This is the preferred connection method. If you have a mono line level signal from a "Pro-Logic" or "Dolby Digital" receiver, use the right (red) input. If an LFE (Low-Frequency Effects) mono output is connected, set the crossover point to maximum.
- High Level Inputs (2): If preamplifier outputs are not available, use these high-level (speaker) inputs. Connect these directly to your main amplifier's speaker outputs by inserting the speaker wire.
- High Level Outputs (3): These outputs can be used to connect to main speakers or to another powered subwoofer with high-level inputs. Note that high-level outputs are paralleled to the high-level inputs with no high-pass filter applied.
5.2. Control Settings
- Crossover Frequency Control (4): This control is continuously variable from 40 Hz to 140 Hz at 12 dB/octave. Adjust this frequency to blend the subwoofer's output seamlessly with your main speakers. A common starting point is between 60-80 Hz. If using an LFE mono output, set this control to maximum.
- Gain Control (5): Adjusts the output level of the subwoofer. Set the level so that the bass frequencies blend naturally with your other speakers, avoiding an overly dominant or


