
1. Introduction
This manual provides comprehensive instructions for the Nikon COOLPIX P7100 digital camera. Designed for photographers seeking advanced control and portability, the P7100 delivers high-quality images and HD video. Familiarize yourself with the camera's features and functions to maximize your photographic experience.

Figure 1.1: Front view of the Nikon COOLPIX P7100 Digital Camera.
2. Setup
2.1 Included Accessories
Verify that the following items are included with your Nikon COOLPIX P7100:
- AN-CP21 Strap
- UC-E6 USB Cable
- EG-CP16 Audio/Video Cable
- EN-EL14 Rechargeable Li-ion Battery
- MH-24 Battery Charger
- NikonView NX 2 CD-ROM
- Reference Manual CD
2.2 Charging the Battery
Before initial use, fully charge the EN-EL14 Li-ion Battery using the MH-24 Battery Charger. Connect the charger to a power outlet and insert the battery. The charging indicator will blink during charging and glow steadily when complete.
2.3 Inserting Battery and Memory Card
Open the battery/memory card compartment cover. Insert the charged EN-EL14 battery as shown, ensuring correct orientation. Insert an SD/SDHC/SDXC memory card into the designated slot until it clicks into place. Close the compartment cover securely.

Figure 2.1: Rear view of the camera, showing the battery and memory card compartment area.
3. Operation
3.1 Power On/Off
Press the ON/OFF button located on the top panel to power the camera on or off. The camera features a fast startup time for quick readiness.

Figure 3.1: Top view of the camera, highlighting the ON/OFF button and mode dial.
3.2 Shooting Modes and Controls
The mode dial on the top of the camera allows selection of various shooting modes, including Programmed auto (P), Shutter-priority auto (S), Aperture-priority auto (A), and Manual (M) modes for full creative control. Dedicated dials and buttons provide quick access to settings like ISO, white balance, and exposure compensation.
- PSAM Modes: Offer advanced control over exposure settings.
- Scene Modes: Pre-set modes for specific shooting conditions (e.g., Portrait, Landscape, Night Landscape, Food, Sunset).
- Effects Modes: Apply in-camera special effects like Cross Process or HDR.
3.3 Image Quality and Lens Features
The P7100 is equipped with a large 10.1 MP, 1/1.7-inch CCD sensor for detailed images with reduced noise and a wide tonal range. The 7.1x optical Zoom-NIKKOR ED glass lens (28-200mm equivalent) provides versatile focal lengths, complemented by VR (Vibration Reduction) image stabilization to minimize blur.
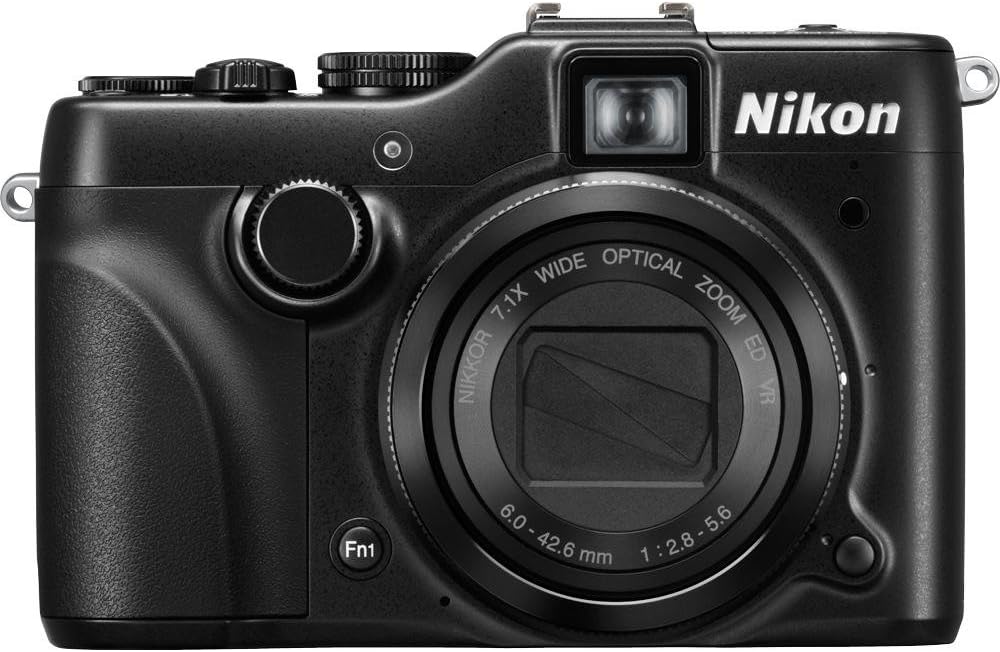
Figure 3.2: Front view of the camera, highlighting the NIKKOR lens.
The camera supports shooting in NRW (RAW) file format, preserving original image data for extensive post-processing flexibility.
3.4 Vari-Angle LCD Monitor and Viewfinder
The 3-inch Vari-Angle LCD monitor (921,000-dot) can be tilted up and down, offering flexibility for shooting from various angles. Its Clear Color Display and anti-reflection coating ensure clear viewing even in bright conditions. An optical viewfinder is also provided for traditional framing.
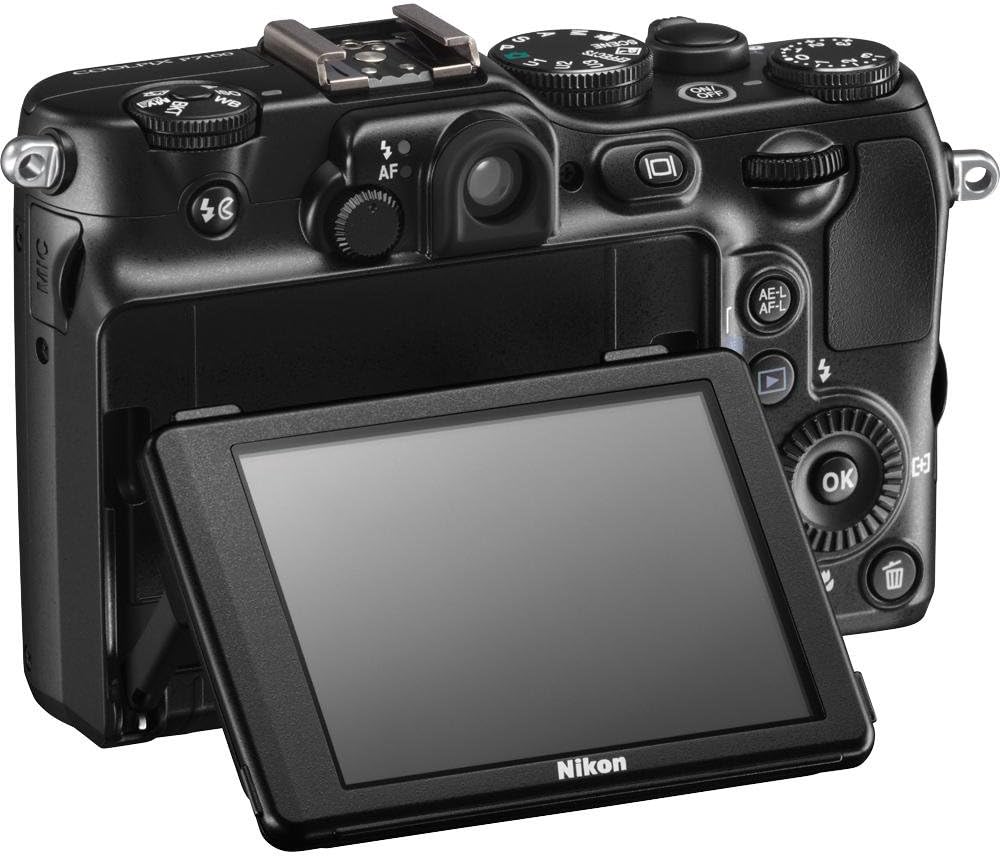
Figure 3.3: Rear view of the camera with the Vari-Angle LCD monitor tilted for flexible viewing.
3.5 HD Video Recording
Record HD (720p) movies with stereo sound. The optical zoom function is available during video recording, allowing for dynamic framing. Connect the camera to an HDTV via the built-in HDMI port to view your videos.
Video 3.1: An official product video demonstrating features of the Nikon COOLPIX P7100, including its HD movie mode and vari-angle display.
4. Maintenance
4.1 Cleaning the Camera
Use a soft, lint-free cloth to clean the camera body. For the lens and LCD screen, use a specialized lens cleaning cloth and solution. Avoid harsh chemicals or abrasive materials.
4.2 Battery Care
Store the battery in a cool, dry place when not in use. Avoid fully discharging the battery for extended periods. If the camera will not be used for a long time, remove the battery.
5. Troubleshooting
If you encounter issues with your Nikon COOLPIX P7100, refer to the following common solutions:
- Camera does not power on: Ensure the battery is fully charged and correctly inserted.
- Images are blurry: Check if VR (Vibration Reduction) is enabled. Ensure proper focus and sufficient lighting.
- Memory card error: Reinsert the memory card. If the error persists, try a different compatible SD/SDHC/SDXC card.
- LCD screen not displaying: Check if the Vari-Angle monitor is properly extended and rotated. Ensure the camera is powered on.
- Flash not firing: Verify flash mode settings. Ensure the flash is not obstructed.
For more detailed troubleshooting, consult the Reference Manual CD included with your camera.
6. Specifications
| Feature | Detail |
|---|---|
| Model Name | Nikon COOLPIX P7100 |
| Effective Still Resolution | 10.1 MP |
| Photo Sensor Size | 1/1.7-inch |
| Photo Sensor Technology | CCD |
| Optical Zoom | 7.1x |
| Lens Type | Zoom-NIKKOR ED Glass Lens |
| Focal Length (35mm equiv.) | 28-200mm |
| Image Stabilization | Optical (VR) |
| Display Type | 3-inch Vari-Angle LCD |
| Display Resolution | 921,000 dots |
| Video Resolution | HD 720p |
| Supported File Format | RAW (NRW), JPEG |
| Flash Memory Type | SD/SDHC/SDXC |
| Connectivity Technology | HDMI, USB |
| Item Weight | 14 Ounces |
| Color | Black |
7. Warranty and Support
7.1 Warranty Information
This product comes with a 90-day parts and labor warranty. Please retain your proof of purchase for warranty claims.
7.2 Customer Support
For technical assistance, service, or additional information, please refer to the official Nikon support channels or the detailed Reference Manual CD provided with your camera.