
Lewmar 68000967
Lewmar 3-Button Windlass Wireless Remote Kit User Manual
Model: 68000967
Introduction
This manual provides comprehensive instructions for the installation, operation, and maintenance of your Lewmar 3-Button Windlass Wireless Remote Kit. This kit enables wireless remote control of your Lewmar windlass, enhancing convenience and safety during anchoring operations. Please read this manual thoroughly before installation and use to ensure proper function and longevity of the product.

Figure 1: Lewmar 3-Button Windlass Wireless Remote Kit components, including the remote fob and the receiver unit.
Safety Information
Always observe basic safety precautions when installing and operating marine electrical equipment. Failure to do so may result in injury or damage to the product or vessel.
- Ensure power is disconnected before performing any installation or maintenance.
- The remote fob is waterproof to IP67 and floats, but avoid prolonged submersion.
- Keep the remote fob away from strong magnetic fields.
- Only use the remote for its intended purpose: controlling a Lewmar windlass.
Kit Components
The Lewmar 3-Button Windlass Wireless Remote Kit includes the following items:
- One (1) Wireless Remote Fob (3-button)
- One (1) Receiver Unit
- Batteries for the remote fob

Figure 2: The wireless remote fob, featuring three control buttons and an ON indicator light.
Setup and Installation
This section details the steps required to install the receiver unit and pair the remote fob.
Receiver Unit Installation
- Choose a Location: Select a dry, protected location for the receiver unit, ideally close to the windlass contactor. Ensure it is accessible for wiring and programming.
- Mount the Receiver: Secure the receiver unit using appropriate fasteners.
- Wiring:
- Disconnect all power to the windlass system before wiring.
- Connect the receiver's power input to a fused 12V or 24V DC supply (matching your windlass system voltage).
- Connect the receiver's output wires to the corresponding control inputs on your windlass contactor (typically 'Up', 'Down', and 'Common' or 'Ground'). Refer to your windlass contactor's manual for specific wiring diagrams.
- Verify Connections: Double-check all wiring connections for security and correct polarity.
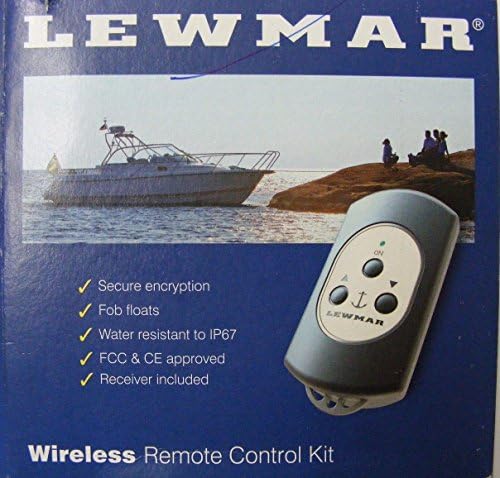
Figure 3: The receiver unit, showing connection points for power and windlass control outputs.
Pairing the Remote Fob
The receiver unit can support up to eight remote key fobs. Follow these steps to pair a new fob:
- Ensure the receiver unit is powered on.
- Locate the "PROG" button on the receiver unit.
- Press and hold the "PROG" button for approximately 3 seconds until the indicator light on the receiver begins to flash. This indicates it is in pairing mode.
- Within 10 seconds, press any button on the remote fob you wish to pair.
- The indicator light on the receiver will stop flashing and remain solid for a few seconds, confirming successful pairing.
- Test the remote fob by operating the windlass (ensure the area is clear).
- Repeat for any additional fobs you wish to pair.
Operating Instructions
The Lewmar 3-Button Wireless Remote provides intuitive control of your windlass.
Remote Fob Functions
- "UP" Button: Activates the windlass to retrieve the anchor chain/rode.
- "DOWN" Button: Activates the windlass to deploy the anchor chain/rode.
- "ON" Button: (If present and configured) May activate or enable the remote. On some models, simply pressing UP/DOWN activates the remote.
- Indicator Light: Illuminates when a button is pressed, indicating signal transmission.
General Operation Tips
- Always maintain a clear line of sight to the anchor and windlass during operation.
- Ensure no one is in the path of the anchor or chain.
- The wireless range is up to 20 meters without obstruction. Performance may vary with vessel construction and environmental factors.
- Do not operate the windlass continuously for extended periods to prevent overheating. Refer to your windlass manual for duty cycle information.
Maintenance
Regular maintenance ensures the longevity and reliable operation of your wireless remote kit.
Remote Fob Battery Replacement
When the indicator light on the remote fob becomes dim or fails to illuminate, it's time to replace the batteries.
- Carefully open the remote fob casing. Refer to the fob's specific design for access to the battery compartment (often involves small screws).
- Note the type and orientation of the existing batteries.
- Remove the old batteries and dispose of them responsibly.
- Insert new batteries of the same type, ensuring correct polarity.
- Securely close the remote fob casing, ensuring any seals are properly seated to maintain water resistance.
General Care
- Clean the remote fob and receiver unit periodically with a damp cloth. Avoid harsh chemicals.
- Inspect wiring connections to the receiver unit annually for corrosion or damage.
- Store the remote fob in a safe place when not in use, away from extreme temperatures or direct sunlight.
Troubleshooting
This section provides solutions to common issues you may encounter with your Lewmar Wireless Remote Kit.
| Problem | Possible Cause | Solution |
|---|---|---|
| Remote fob does not operate windlass. |
|
|
| Windlass operates intermittently. |
|
|
| Receiver indicator light not on. |
|
|
Specifications
Key technical specifications for the Lewmar 3-Button Windlass Wireless Remote Kit:
- Model Name: Remote Kit-Windlass, Wireless 3 Button
- Part Number: 68000967
- Wireless Range: Up to 20m (without obstruction)
- Fob Water Resistance: IP67 (floats)
- Supported Fobs: Up to eight (8) remote key fobs per receiver
- Power Input (Receiver): 12V / 24V DC (system dependent)
- Dimensions (Receiver): Approximately 6.22 x 6.1 x 2.68 inches (Item Package Dimensions)
- Weight (Package): Approximately 0.29 Kilograms
- Material: High-strength, glass-reinforced construction (fob), Other (receiver)
- Color: Black
Warranty Information
The Lewmar 3-Button Windlass Wireless Remote Kit is covered by a manufacturer's warranty.
- Warranty Period: 1 Year Manufacturer Warranty.
- For detailed warranty terms and conditions, please refer to the official Lewmar warranty documentation or contact Lewmar customer support.
Support and Contact
For technical assistance, spare parts, or further information, please contact Lewmar customer support.
- Manufacturer: Lewmar
- Website: www.lewmar.com
- Refer to the Lewmar website for contact details, FAQs, and additional product resources.
Related documents68000967


Ask a question about this manual
Ask about setup, troubleshooting, compatibility, parts, safety, or missing instructions. Manuals+ will review the question and use this page’s manual context to help answer it.