
1. Introduction
The Menabo Race 3 is a stable and easy-to-mount aluminum rear bicycle rack designed for installation on a vehicle's tow bar. It is capable of transporting up to three bicycles. This rack features a folding mechanism that allows for easy access to the vehicle's trunk even when the rack is loaded with bicycles. It is equipped with rear lights and a 13-pin electrical plug, including an adapter for vehicles with a 7-pin plug, ensuring compliance with road traffic regulations.
2. Safety Information
- Always ensure the rack is securely attached to the tow bar before loading bicycles or driving.
- Verify that all bicycles are properly secured to the rack using the provided frame supports and fastening straps.
- Check the electrical connection for proper functioning of all lights (brake, turn signals, tail lights) before each use.
- Adhere to the maximum load capacity of 45 kg for the rack. Do not exceed this weight.
- Be aware of the increased length and width of your vehicle when the rack is installed and loaded. Exercise caution when maneuvering, especially when reversing or parking.
- Regularly inspect the rack for any signs of wear, damage, or loose components.
3. Setup
3.1 Attaching the Rack to the Tow Bar
The Menabo Race 3 bicycle rack is designed for quick and easy attachment to most standard tow bars using its Power Click mounting system. Ensure the tow bar is clean and free of grease or dirt before installation.
- Position the rack's coupling mechanism over the tow ball.
- Engage the Power Click lever (refer to image below) to firmly secure the rack onto the tow ball. Ensure the mechanism clicks into place and is locked.
- Use the integrated lock with the provided keys to prevent unauthorized removal of the rack.
- Verify the rack is stable and does not wobble excessively. Adjust the tension if necessary according to the manufacturer's guidelines.

Image 3.1: Tow bar coupling mechanism with engagement handle.
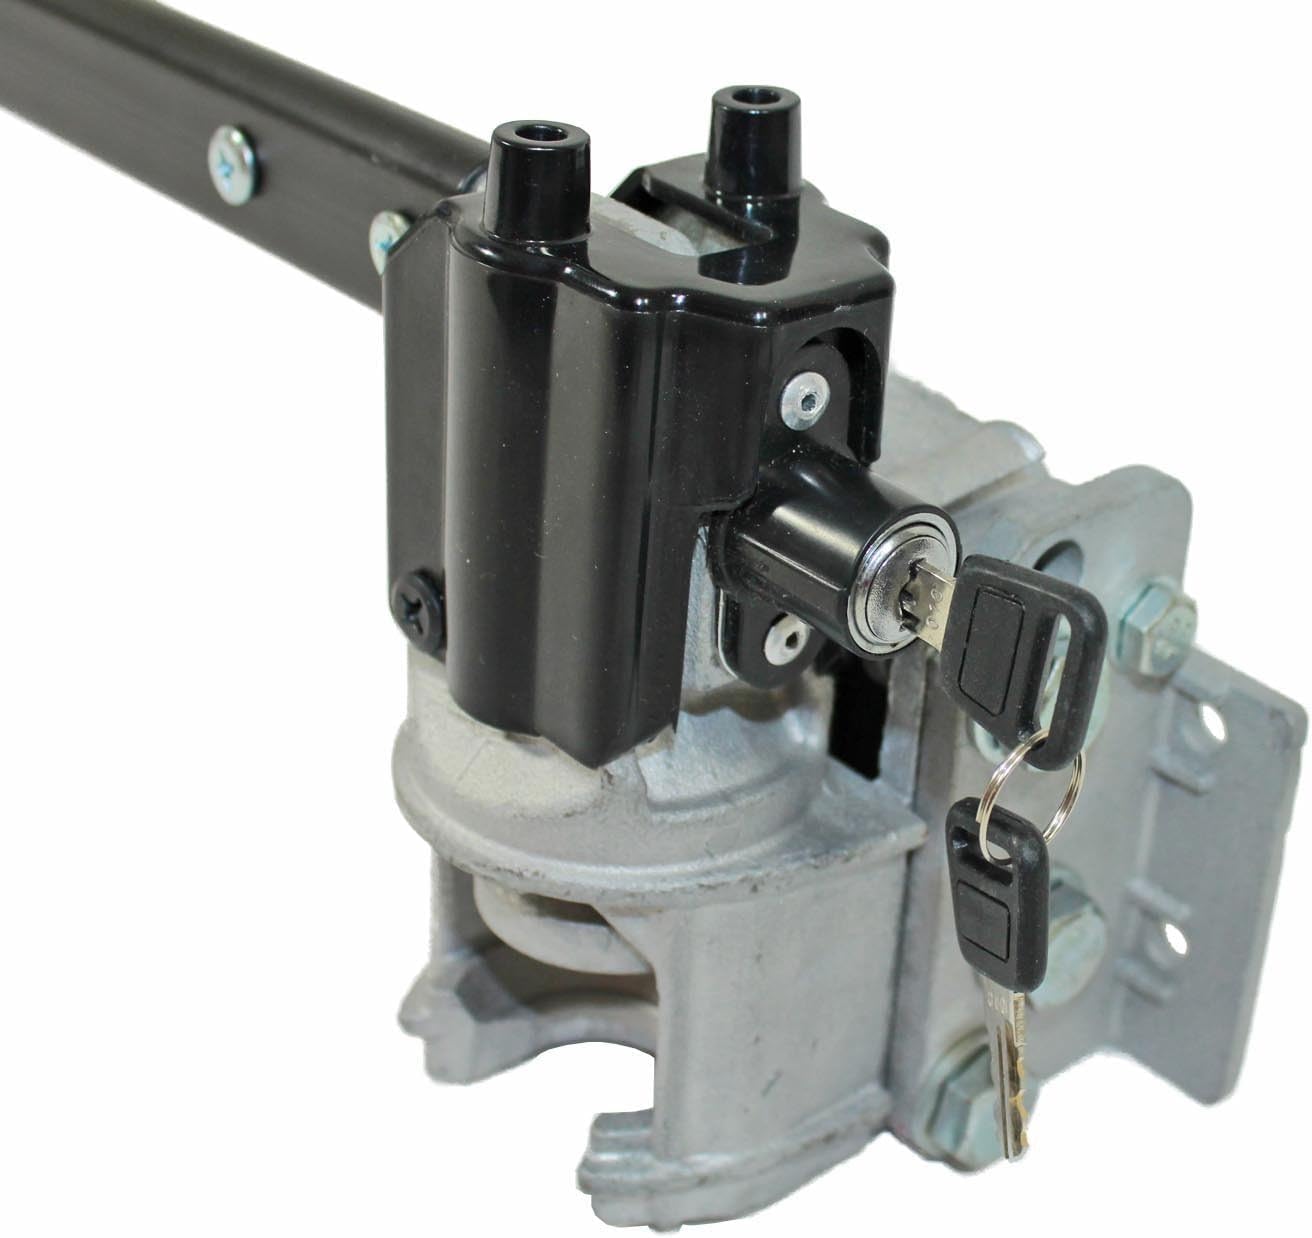
Image 3.2: Close-up of the tow bar coupling mechanism, showing the integrated lock.
3.2 Electrical Connection
Connect the rack's 13-pin electrical plug to your vehicle's tow bar socket. If your vehicle has a 7-pin socket, use the included adapter. Ensure a secure connection and test all lights before driving.
3.3 Unfolding the Rack
The rack is supplied with a folding mechanism. Follow the instructions provided in the packaging to unfold the main structure and position the bike rails. Ensure all components are securely locked in their operational positions.
4. Operating
4.1 Loading Bicycles
The Menabo Race 3 is designed to transport up to three bicycles. Place each bicycle onto the designated rails, ensuring the wheels sit properly in the wheel channels.

Image 4.1: View of the bicycle rails and integrated taillight on the Menabo Race 3 rack.
4.2 Securing Bicycles
Secure each bicycle using the provided frame supports and fastening straps. The frame supports attach to the bicycle frame, while the straps secure the wheels to the rails. Ensure all bikes are stable and do not move during transit.
4.3 Tilting Mechanism for Trunk Access
The rack features a tilting mechanism to allow access to your vehicle's trunk even when bicycles are loaded. Consult the specific instructions provided with your rack for the exact procedure to engage the tilting function. Always ensure the rack is securely returned to its upright, locked position before driving.
4.4 Vehicle Compatibility
The Menabo Race 3 offers universal fitment for vehicles with a tow bar. The design accommodates various vehicle rear types, including sedans, hatchbacks, station wagons, and convertibles.
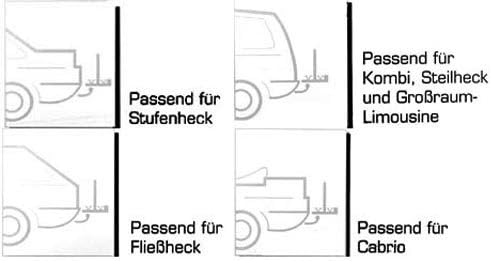
Image 4.2: Diagrams illustrating compatibility with various vehicle rear designs.
5. Maintenance
- Cleaning: Clean the rack regularly with mild soap and water, especially after exposure to road salt or dirt. Avoid abrasive cleaners.
- Fasteners: Periodically check all bolts, nuts, and straps for tightness. Re-tighten any loose fasteners.
- Lubrication: Apply a suitable lubricant to moving parts, such as the tilting mechanism and locking components, to ensure smooth operation and prevent corrosion.
- Storage: When not in use, store the rack in a dry, protected area to prolong its lifespan. The rack is designed to be easy to store.
6. Troubleshooting
- Rack Wobbles After Installation: Ensure the Power Click mechanism is fully engaged and locked. Check the tension adjustment of the coupling to the tow ball. Refer to the specific instructions for your model for proper tensioning.
- Lights Not Working: Verify the electrical plug is fully inserted into the vehicle's socket. Check the vehicle's fuses and the rack's wiring for any visible damage. Ensure the correct adapter (7-pin or 13-pin) is used.
- Bicycles Not Secure: Confirm that all frame supports are clamped tightly to the bicycle frames and that the wheel straps are securely fastened. Adjust the position of the bikes on the rails if necessary to achieve better balance and stability.
- Tilting Mechanism Stiff/Stuck: Apply a lubricant to the pivot points of the tilting mechanism. Ensure no debris is obstructing its movement. Do not force the mechanism if it is stuck.
- Corrosion on Bolts/Components: Regularly clean and lubricate metal components, especially after exposure to moisture or road salt. Consider applying a rust-inhibiting spray to exposed metal parts.
7. Specifications
| Feature | Specification |
|---|---|
| Brand | Menabo |
| Model Number | MEN197551_a |
| Material | Aluminum |
| Color | Black, Silver |
| Vehicle Service Type | Bicycle |
| Item Dimensions (L x W x H) | 47 x 120 x 14 cm |
| Item Weight | 15 Kilograms |
| Load Capacity | 45 kg |
| Mounting Type | Power Click |
| Car Fitment Type | Universal Fit |
| Number of Elements (Bikes) | 3 |
| Folding Feature | Tilting mechanism for trunk access included. (Note: The rack itself does not fold into a compact storage size.) |
| Electrical Connection | 13-pin plug, includes 7-pin adapter |
| Approval | EEC approved, E-marked rear lights |
| Origin | Made in Italy |
8. Warranty Information
This product is covered by a manufacturer's warranty against defects in materials and workmanship. Please retain your proof of purchase for any warranty claims. Specific warranty terms and duration may vary by region. For detailed warranty information, please refer to the documentation included with your purchase or contact Menabo customer support.
9. Support
For technical assistance, spare parts, or further inquiries, please contact Menabo customer support. Contact details can typically be found on the manufacturer's official website or on the product packaging.
- Website: www.menabo.it (Example, please verify official website)
- Email: Refer to manufacturer's website
- Phone: Refer to manufacturer's website


