
1. Introduction
This manual provides essential instructions for the safe and effective use of your Tecmate OptiMate 5 Start/Stop 12V 4A Automatic Battery Charger & Maintainer, model TM-221. This device is designed to charge and maintain 12V lead-acid batteries, including standard, flooded, EFB, and AGM types, commonly found in vehicles with Start/Stop and hybrid systems.
Please read this manual thoroughly before operating the charger to ensure proper function and to prevent damage to the unit or your battery.
2. Safety Information
WARNING: Risk of explosive gases. Batteries generate explosive gases during normal operation. Ensure adequate ventilation when charging. Avoid open flames or sparks near the battery.
- Always connect the charger to the battery terminals correctly: positive to positive, negative to negative.
- Disconnect the AC power before connecting or disconnecting the DC output connectors.
- Do not expose the charger to rain or excessive moisture.
- Do not operate the charger if it has received a sharp blow, been dropped, or otherwise damaged.
- Keep out of reach of children.
- This charger is for 12V lead-acid batteries only. Do not use for other battery types.
- Ensure the vehicle's ignition is off before connecting the charger.
3. Product Features
The OptiMate 5 Start/Stop (TM-221) offers advanced features for optimal battery care:
- Automatic Operation: Fully automatic 6-step program for charging and long-term maintenance.
- Battery Recovery: Capable of saving deeply discharged batteries from as low as 4 Volts.
- Battery Types: Compatible with all 12V engine start (SLI) batteries, including standard, flooded with filler caps, sealed EFB, and AGM types.
- Vehicle Compatibility: Ideal for cars, pick-up trucks, hybrid vehicles, and electric cars with Start/Stop control.
- Battery Health Test: Monitors battery state of health and warns of charge loss due to poor health or high vehicle drain.
- Safe Charging: No risk of overcharging. Safe for vehicle electronics. Spark suppressed. Automatic shut-down if short-circuited or battery disconnected.
- Long-Term Maintenance: Maintains the battery at its optimal level 24/7.

Image 3.1: The OptiMate 5 Start/Stop is designed for 12V lead-acid batteries (STD, EFB, AGM, GEL) and is suitable for various vehicles including those with Start/Stop and hybrid systems.
4. Setup
Before connecting the charger, ensure the area is well-ventilated and the vehicle's ignition is off.
4.1 Connecting to the Battery
The OptiMate 5 Start/Stop comes with two connection options: the O-11 fused battery harness and O-04 battery clips.

Image 4.1: The OptiMate 5 Start/Stop charger with its standard accessories, including battery clips and a fused harness.
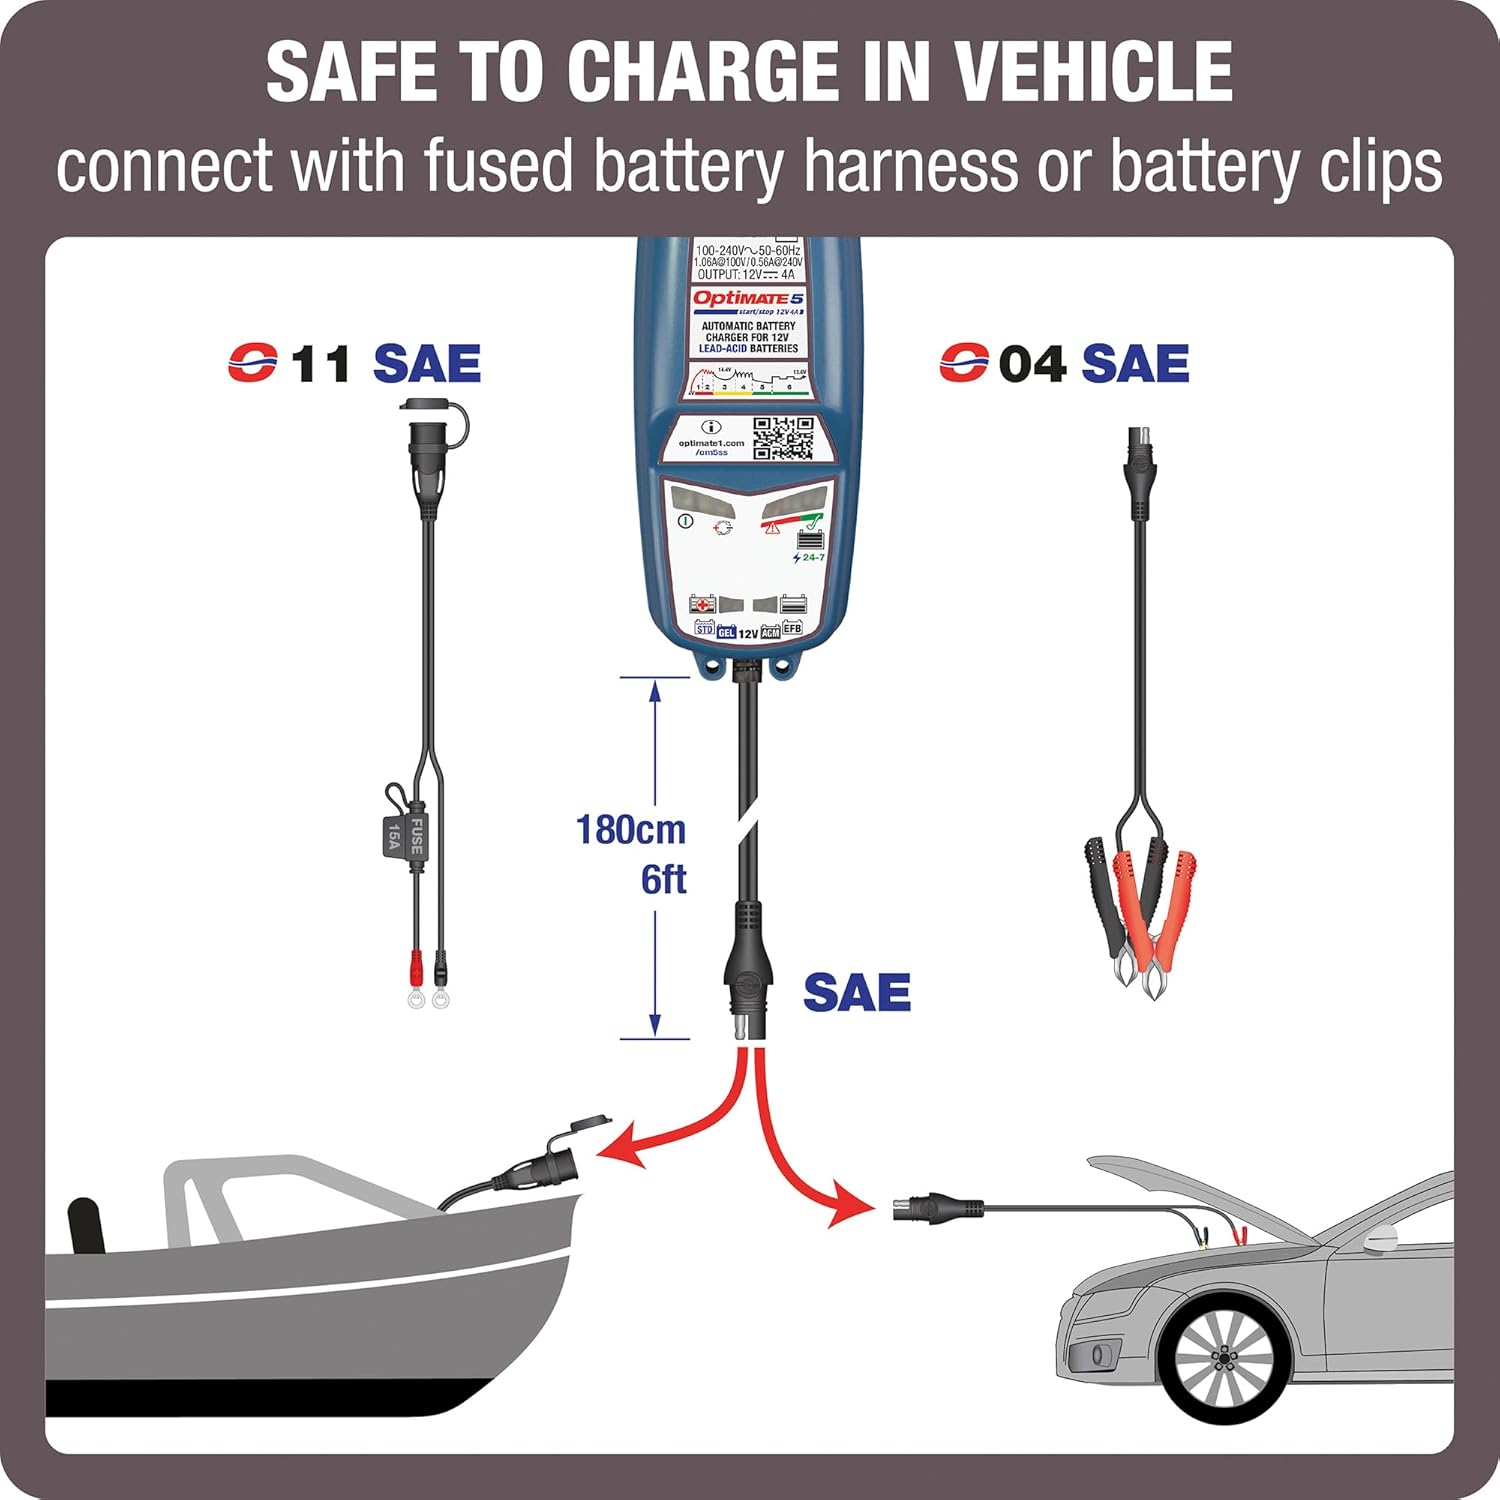
Image 4.2: Connection options for the OptiMate 5 Start/Stop, illustrating the use of the O-11 fused harness for permanent connection or O-04 clips for temporary connection.
- Using Battery Clips (O-04):
- Connect the red clip to the positive (+) battery terminal.
- Connect the black clip to the negative (-) battery terminal.
- Ensure clips are securely attached and do not touch each other or other metal parts.
- Using Fused Battery Harness (O-11):
- Permanently attach the ring terminals to the battery posts (red to positive, black to negative).
- The harness allows for quick and convenient connection of the charger when needed.
4.2 Connecting to AC Power
Once the charger is securely connected to the battery, plug the AC power cord into a standard wall outlet (100-240V, 50-60Hz).
5. Operating Instructions
The OptiMate 5 Start/Stop operates automatically once connected. The charging process follows a 6-step program.
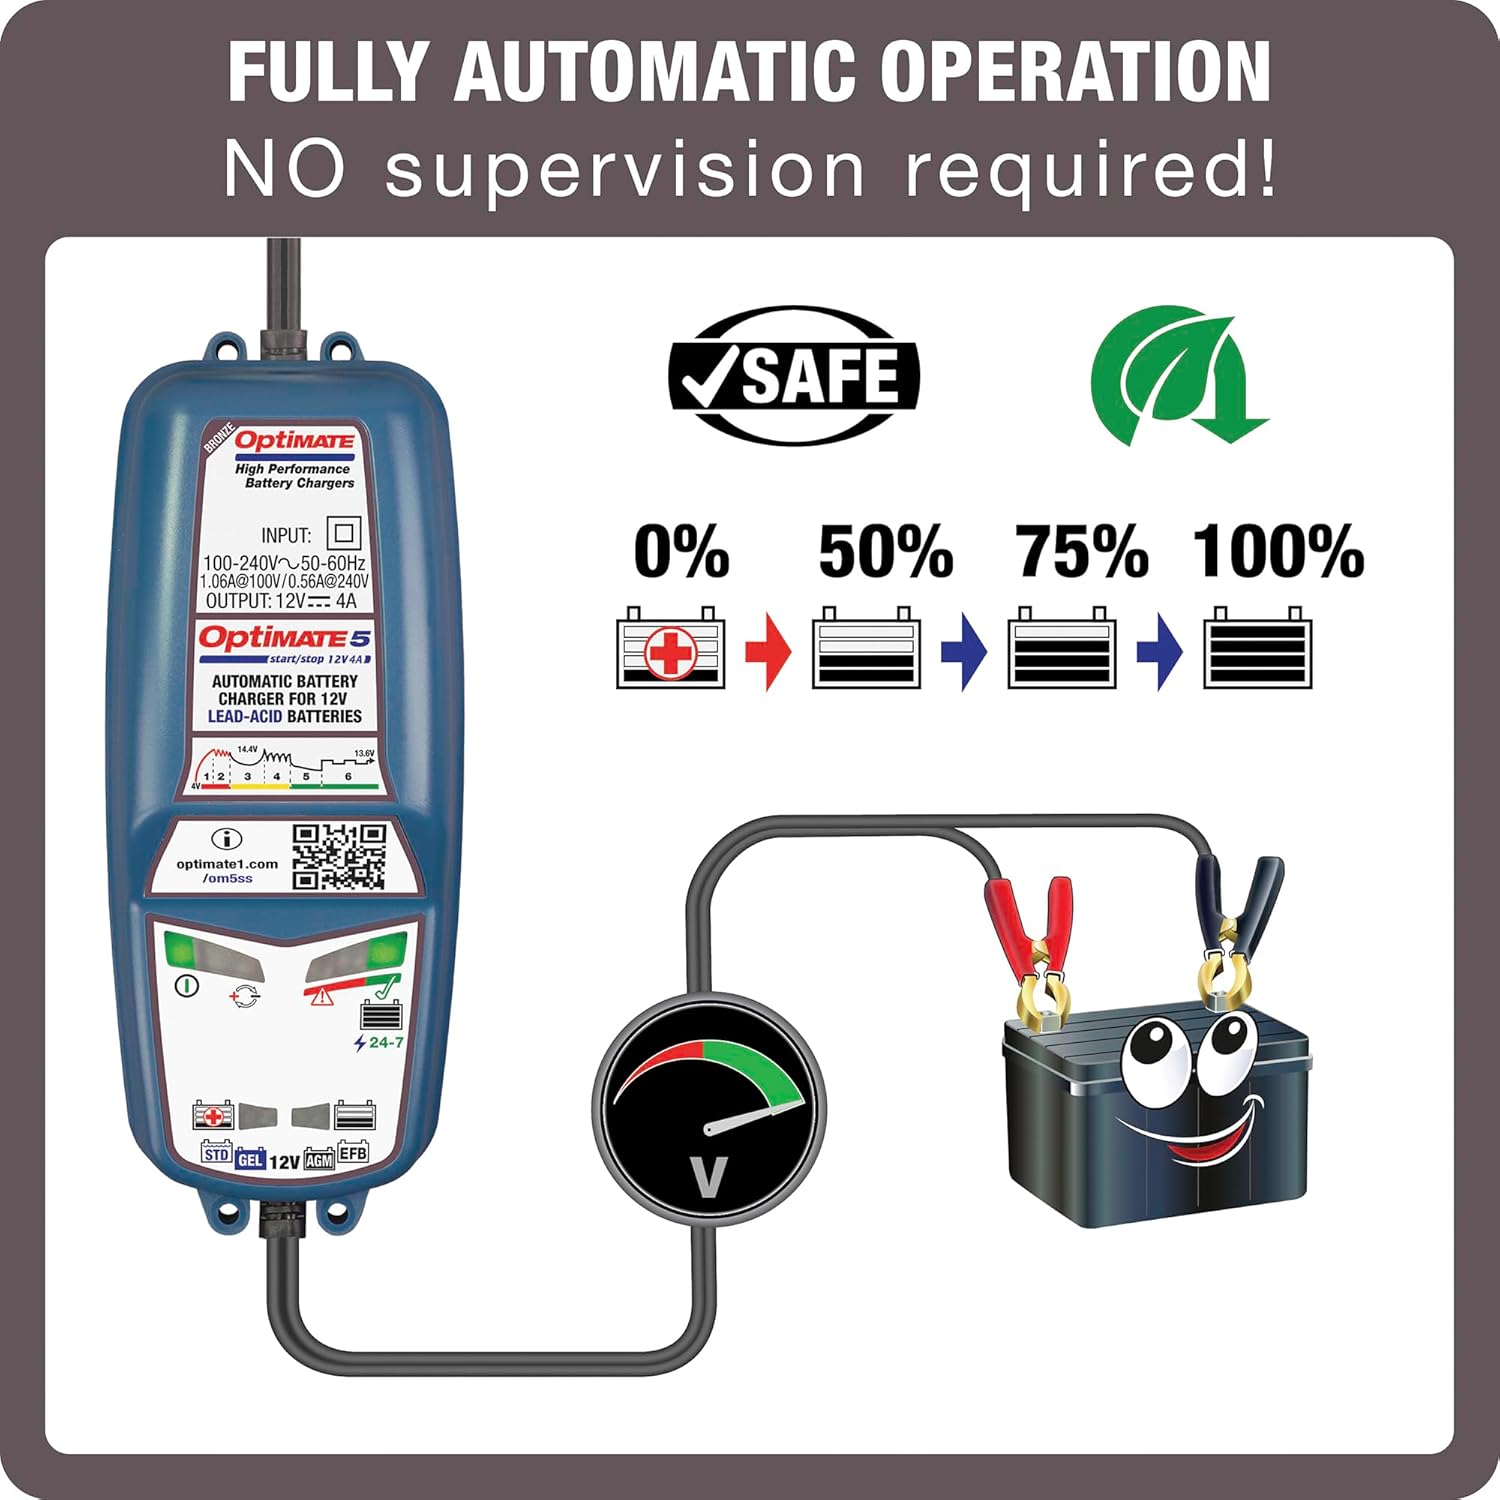
Image 5.1: The OptiMate 5 Start/Stop provides fully automatic charging, requiring no supervision.
5.1 Charging Process
- Initialization: The charger checks the battery's voltage and condition.
- Desulfation/Recovery: If the battery is deeply discharged (as low as 4V), the charger will attempt to recover it.
- Bulk Charge: Charges the battery at maximum current until it reaches approximately 75-80% capacity.
- Absorption Charge: Charges the battery to 100% at a decreasing current.
- Voltage Retention Test: The charger tests the battery's ability to retain charge.
- Maintenance Charge (Float/Pulse): Once fully charged, the charger switches to a long-term maintenance mode, delivering small pulses of current to keep the battery at optimal charge without overcharging. This is a 24/7 mode.
Indicator lights on the charger will show the current stage of the charging process. Refer to the charger's label for specific light indications.
For more detailed information on the charging stages, visit the official product page: http://www.optimate1.com/om5ss/
6. Maintenance
The OptiMate 5 Start/Stop is designed for long-term battery maintenance. Once the battery is fully charged, the charger automatically enters its 24/7 maintenance mode.

Image 6.1: The OptiMate 5 Start/Stop provides safe, interactive 24/7 maintenance, testing the battery hourly and applying float charge as needed.
- You can leave the charger connected to the battery indefinitely without risk of overcharging.
- The charger will periodically test the battery's voltage and deliver a pulse charge if necessary to keep it at optimum levels.
- Ensure the charger and its connections remain clean and free from debris.
7. Troubleshooting
The OptiMate 5 Start/Stop includes diagnostic features to help identify battery issues.

Image 7.1: The OptiMate 5 Start/Stop warns users if the battery loses charge, indicating potential issues like poor health or high vehicle drain.
- Charger Not Starting:
- Check AC power connection.
- Verify battery connections (positive to positive, negative to negative).
- Ensure battery voltage is above 4V for the charger to initiate recovery.
- Battery Not Charging / Losing Charge:
- The charger tests battery state of health and will indicate if the battery is losing charge. This could be due to:
- Poor battery health or age.
- A high electrical drain in the vehicle, indicating other vehicle issues.
- Consult a professional if the charger consistently indicates battery issues despite proper connection.
- The charger tests battery state of health and will indicate if the battery is losing charge. This could be due to:
- Error Indicators: Refer to the specific LED indicators on your charger for detailed error codes and their meanings.
8. Specifications
| Feature | Detail |
|---|---|
| Model | TM-221 |
| Brand | Tecmate |
| Input Voltage | 100-240V, 50-60Hz |
| Output Voltage | 12 Volts |
| Output Current | 4A |
| Battery Types | 12V Lead-Acid (STD, EFB, AGM, GEL) |
| Battery Capacity | 12Ah-160Ah (as per image) |
| Dimensions | 11 x 7 x 3 inches |
| Item Weight | 15 ounces (0.94 Pounds) |
| Safety Certifications | CEC, CSA, DOE, UL |
9. Warranty and Support
Tecmate products are manufactured to high standards and are backed by a manufacturer's warranty. For specific warranty details, including duration and coverage, please refer to the warranty card included with your product or visit the official Tecmate website.
For technical support, product inquiries, or warranty claims, please contact Tecmate customer service through their official website or the contact information provided in your product packaging.
Manufacturer: TecMate
Model: TM-221